This post may contain affiliate links, which means we'll receive a commission if you purchase through our links, at no extra cost to you. Read the full disclaimer here.
Transforming an unused space of your home into a dedicated active play zone is a game-changer for energetic kids, especially during rainy days. A custom-built indoor playground platform provides a sturdy, elevated base for slides, climbing walls and cozy reading nooks.
Build an indoor playground from our easy-to-follow steps and links below!
Our Indoor Playground Design
Here recently, we’ve been plugging all our spare time into building something amazing for our three (high energy) kids in our finished basement playroom. A fun indoor playground!
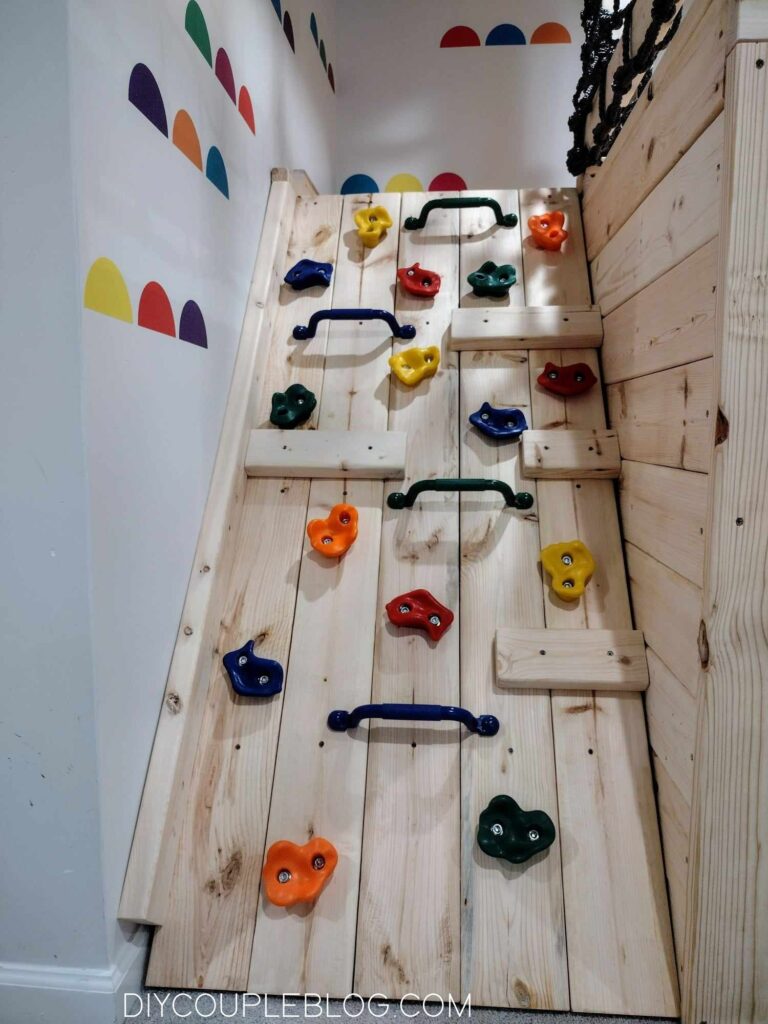
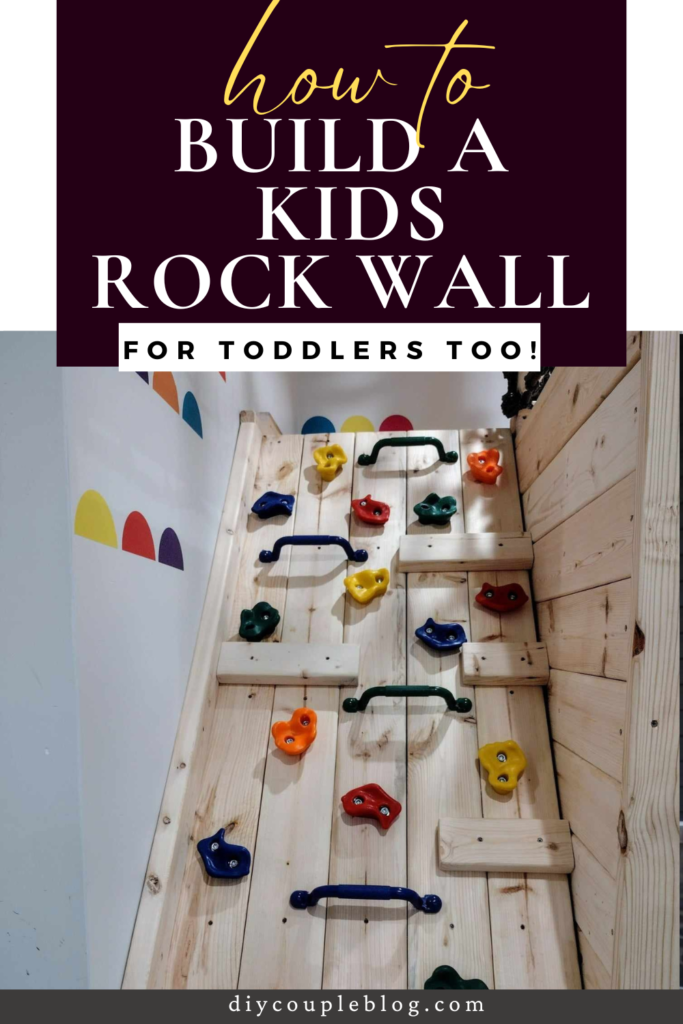
We needed a platform to include two levels with a slide coming down. Oh, and our boy wanted a rock wall for sure.
So, we immediately figured out our design, some small details and got to work on our DIY indoor playground.
If you’re anything like us, looking for some indoor playground ideas for your home too, we hope this inspires you to DIY a playground your kids will get a ton of use out of.
With our step-by-step pictures and instructions, we took the hard part away so you can start building a home playground right away!
We’ve also wrote up a supplies list and linked everything we could to help you along the way with your build. We knew we couldn’t fit it all into one post, so we broke it down into separate parts.
You can access the other ones at the bottom of this post to make it easier to find and I linked them where I could for reference.
PIN IT FOR LATER!
Indoor Play Area Setup
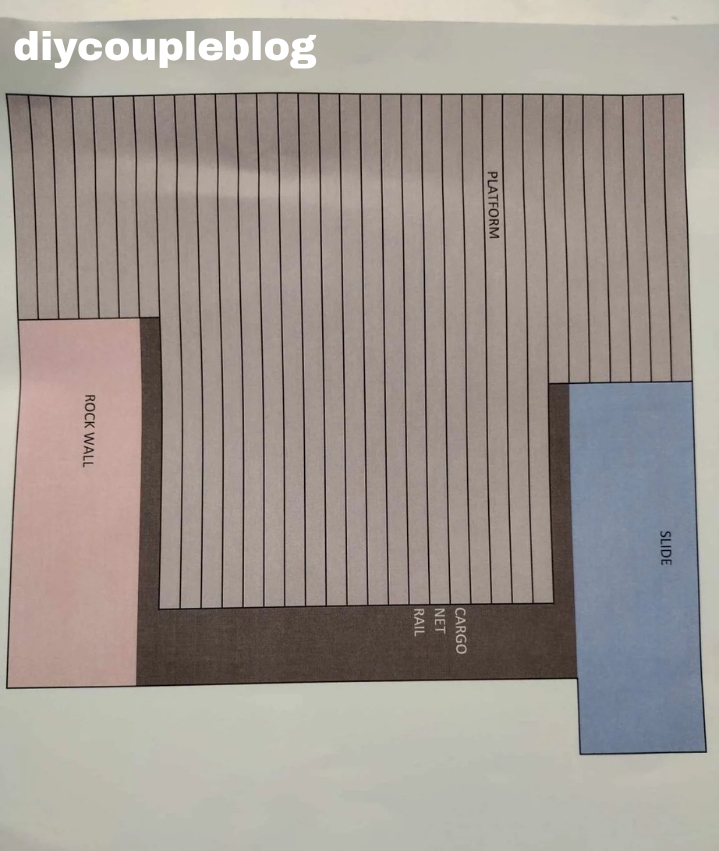
First, we did some decision making, which consisted of figuring out where the platform should go. We then made a simple mockup drawing on our computer, and this is a basic design of what we came up with.
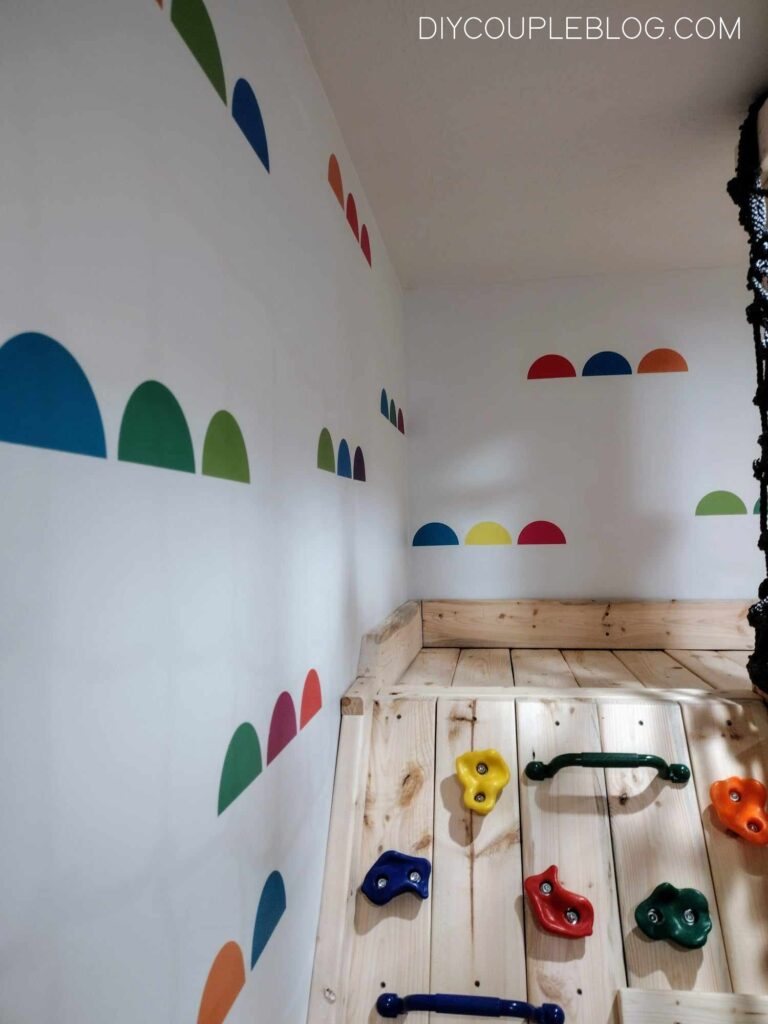
If you are planning on painting the room a different color, we recommend you do this before getting started building, we did not finish painting and wish we had.
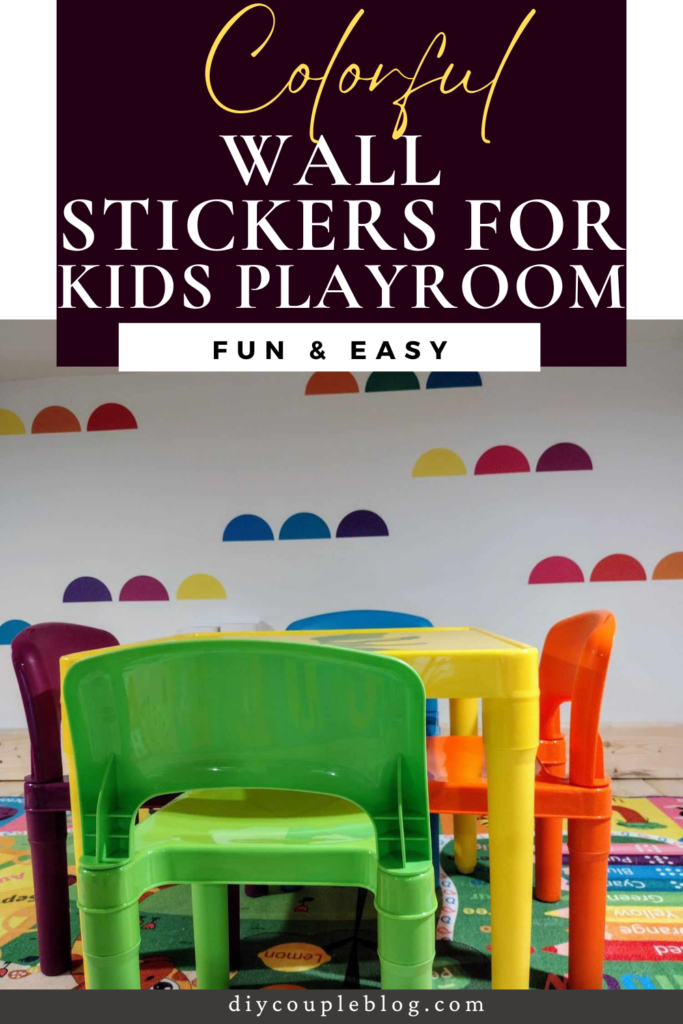
If you want to see what we did as far as painting and applying some wall stickers for kids (in order to add a pop of color) you can go check that out.
Supplies Needed for Indoor Playground:
3.5 inch screws (we used leftover exterior screws we already had on hand to save $)
Marker
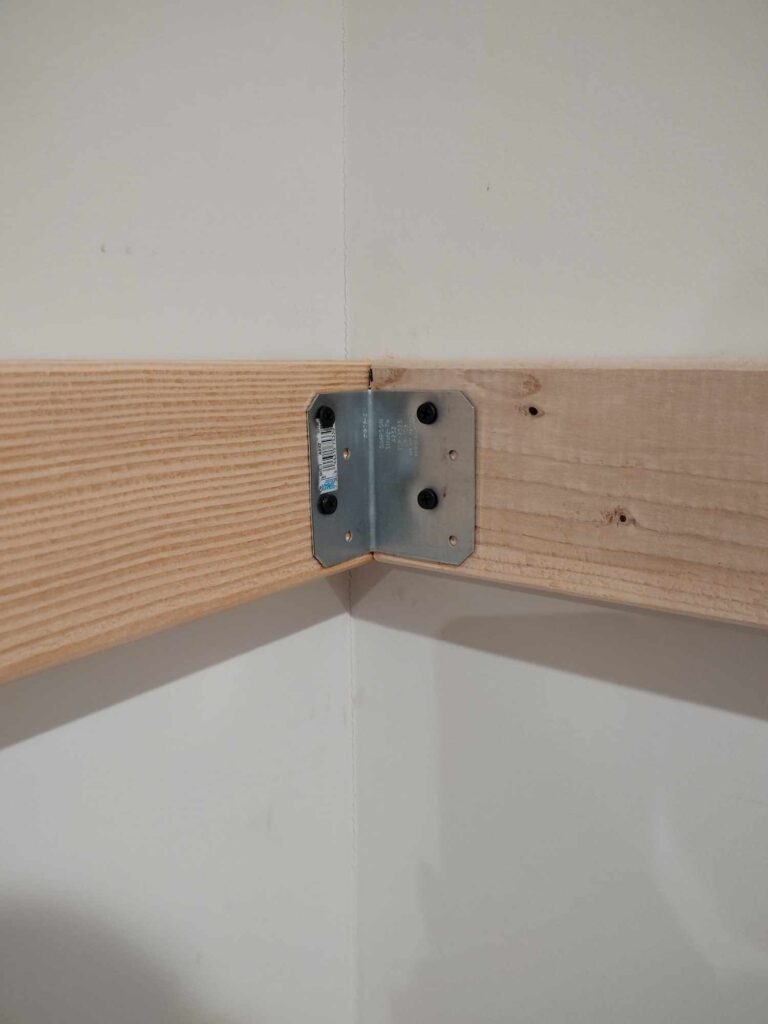
(1) Mending Plate
(12) Angle brackets
#9 by 2.5 inch connector screws
(16) 2×4 hangers
(20) 2x4x8 studs
(61) 2x6x8 studs
(1) 2x6x10 lumber
(2) 4x4x8 lumber
(1) 2x8x8 lumber
Tools Required For This Indoor Playground DIY:
Razor knife
3/8 inch drill bit
1/8 inch drill bit (this case has both drill bits needed^)
Sander & 320 very fine grit, 36 grit extra course sandpaper
Kreg Jig straight edge (optional)
Clamps (optional, if you use the Kreg Jig straight edge)
How To Build an Indoor Playground at Home
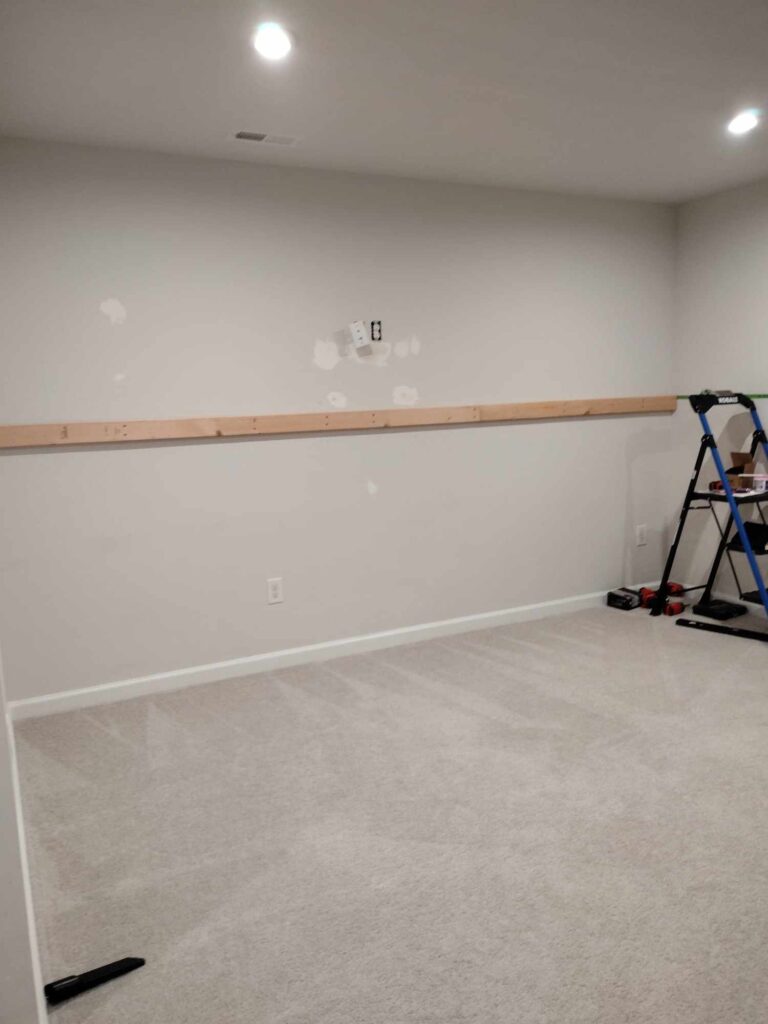
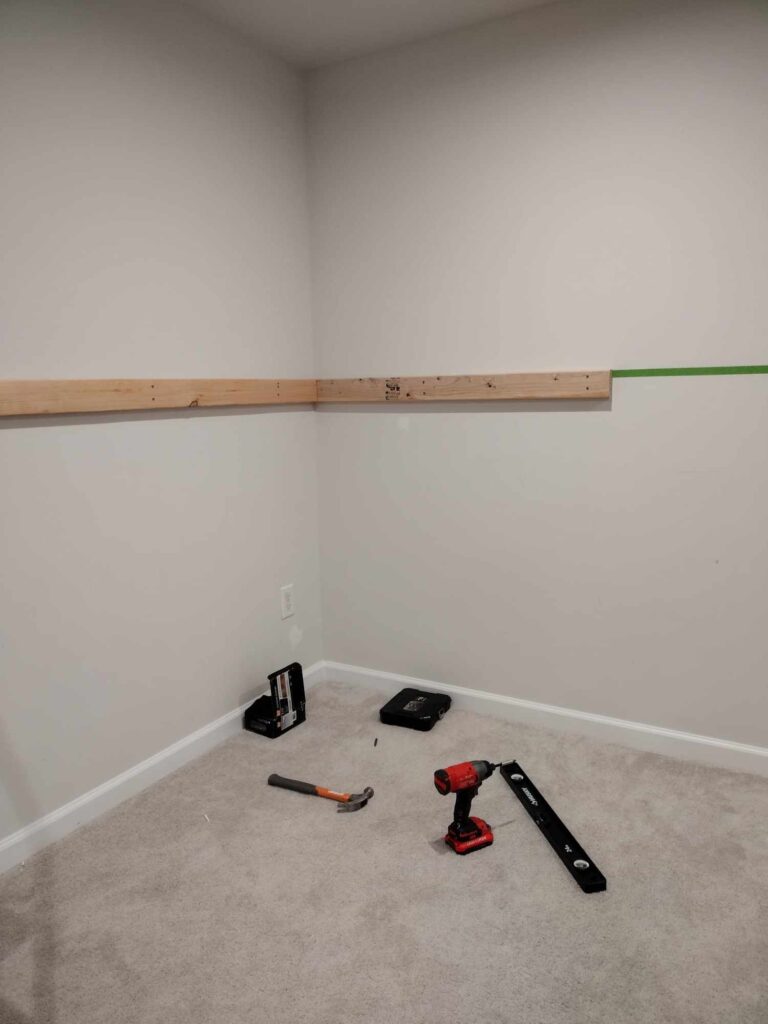
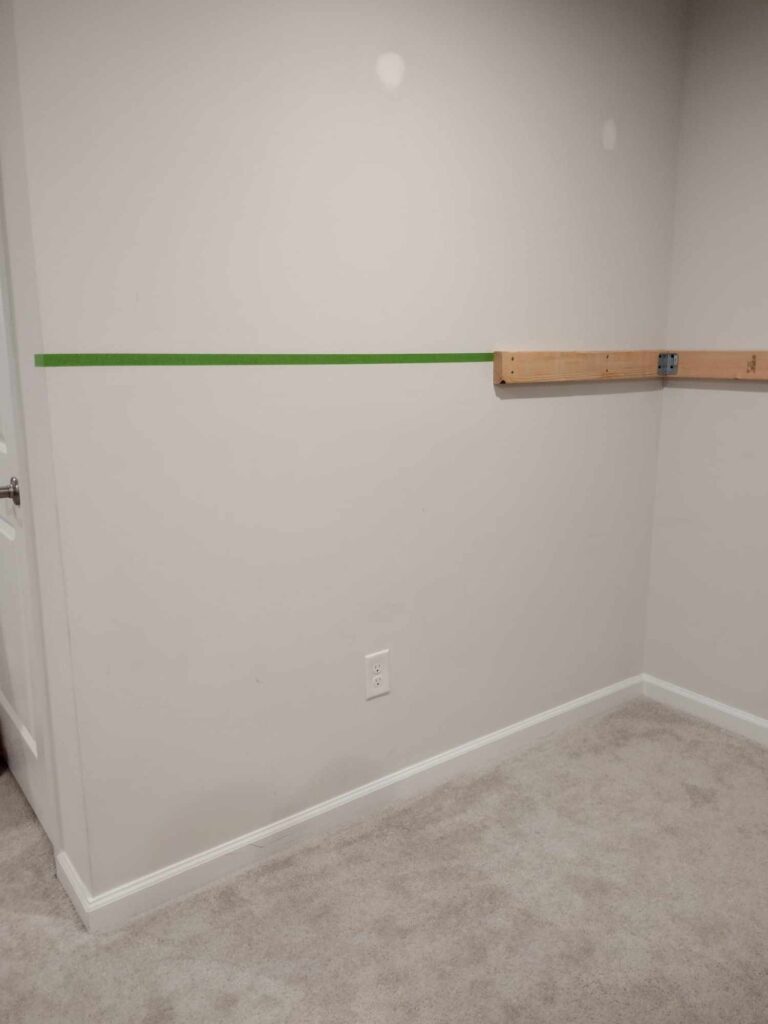
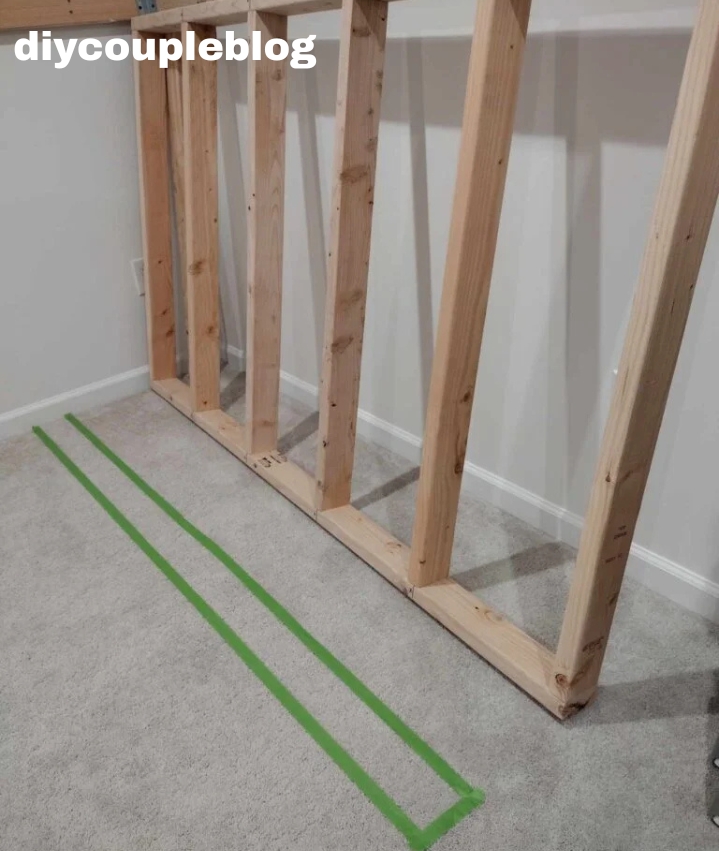
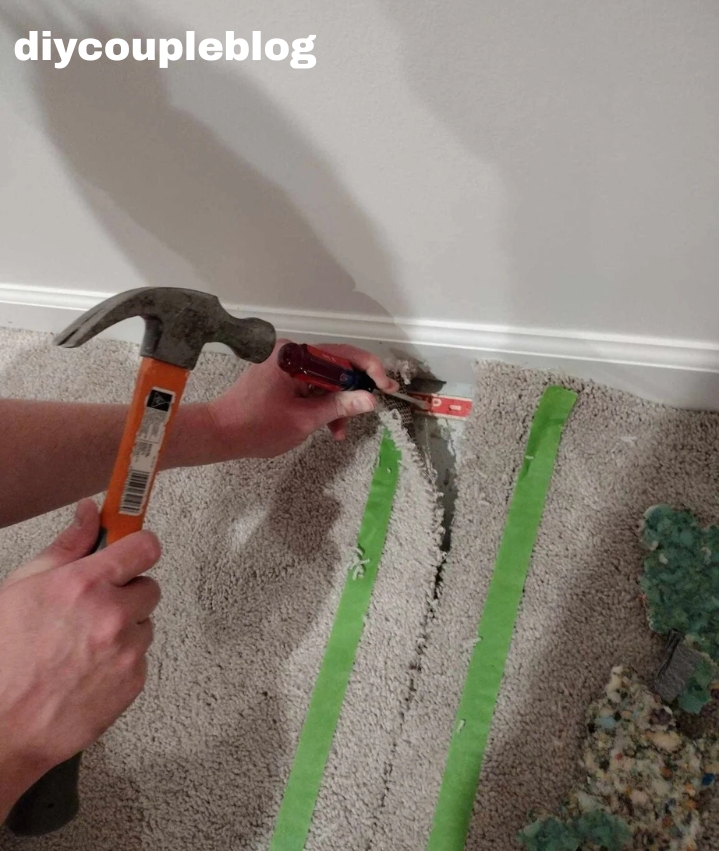
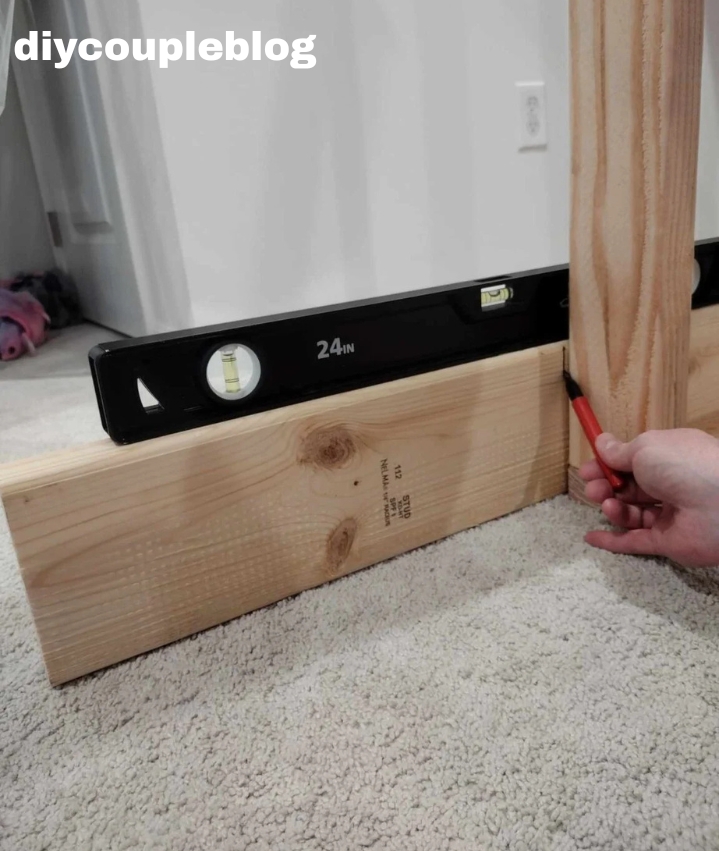
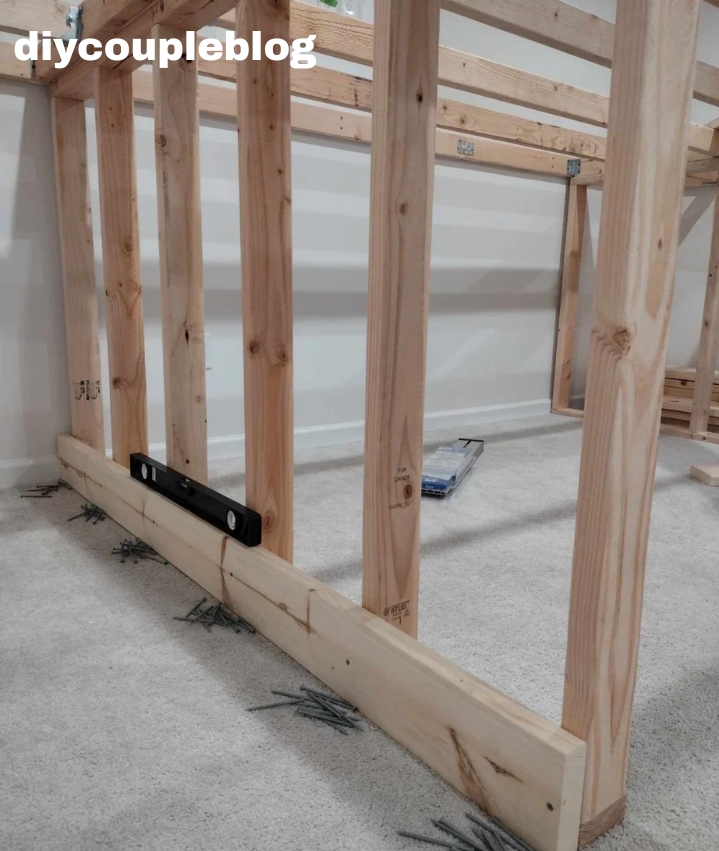
To begin with our indoor playground, we used our handy laser level, marked it, and added frog tape where our playground platform would be installed. We marked the wall at 49.5 inch from the floor.
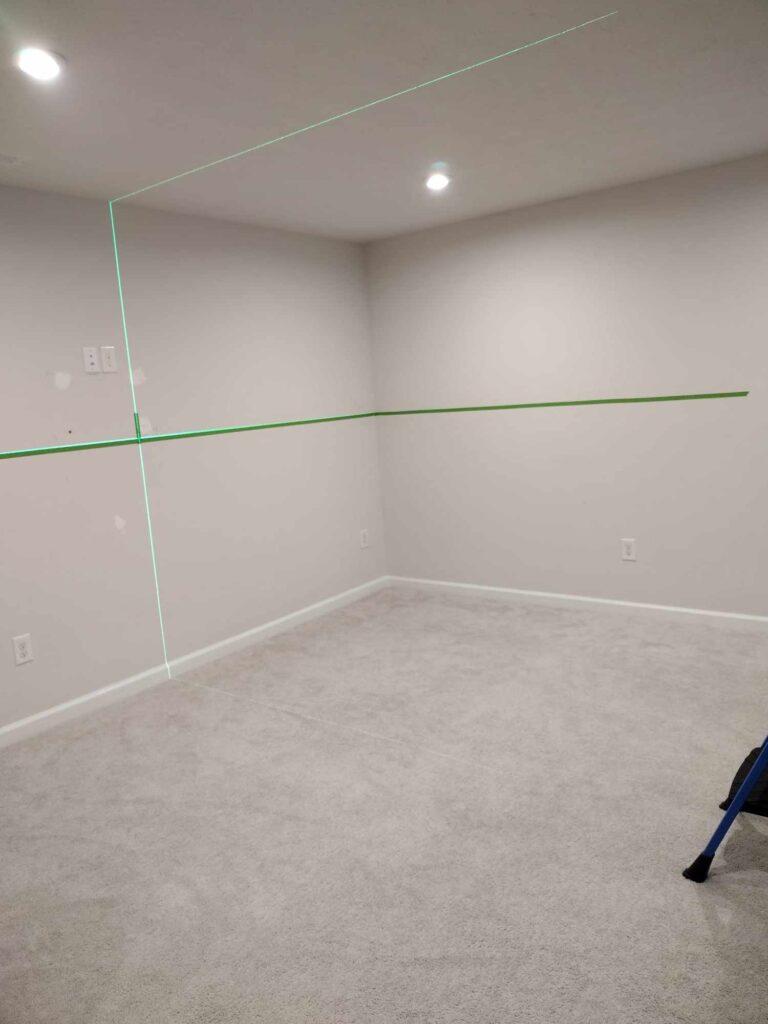

Find the studs in the wall and then mark them on the tape.
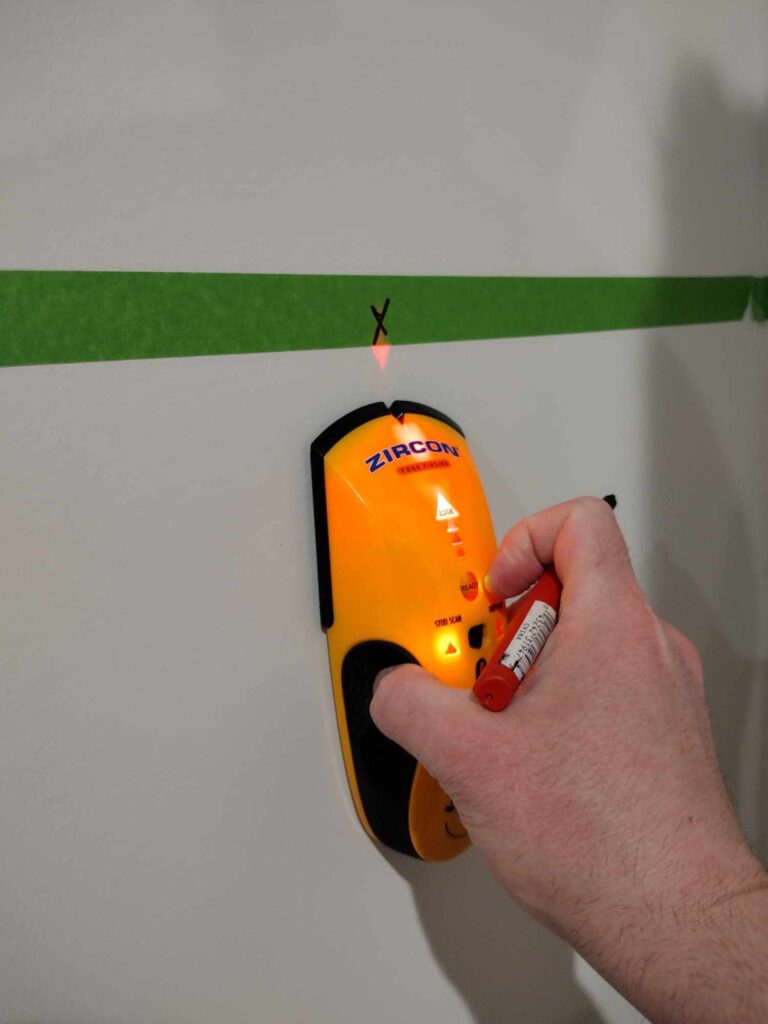
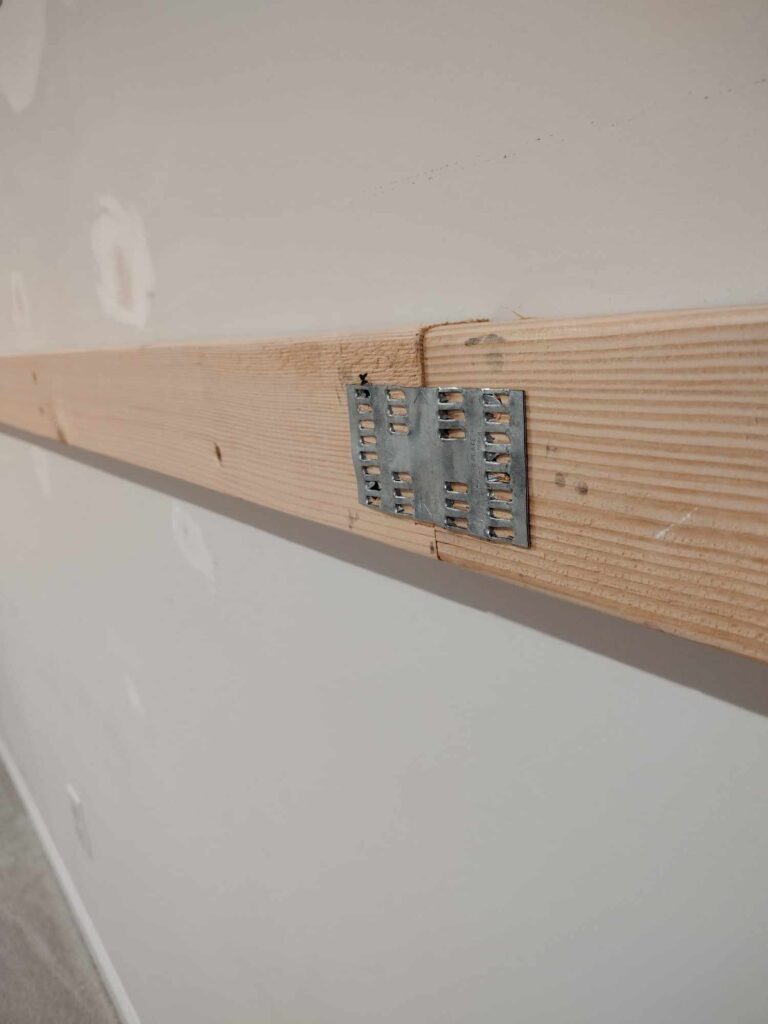
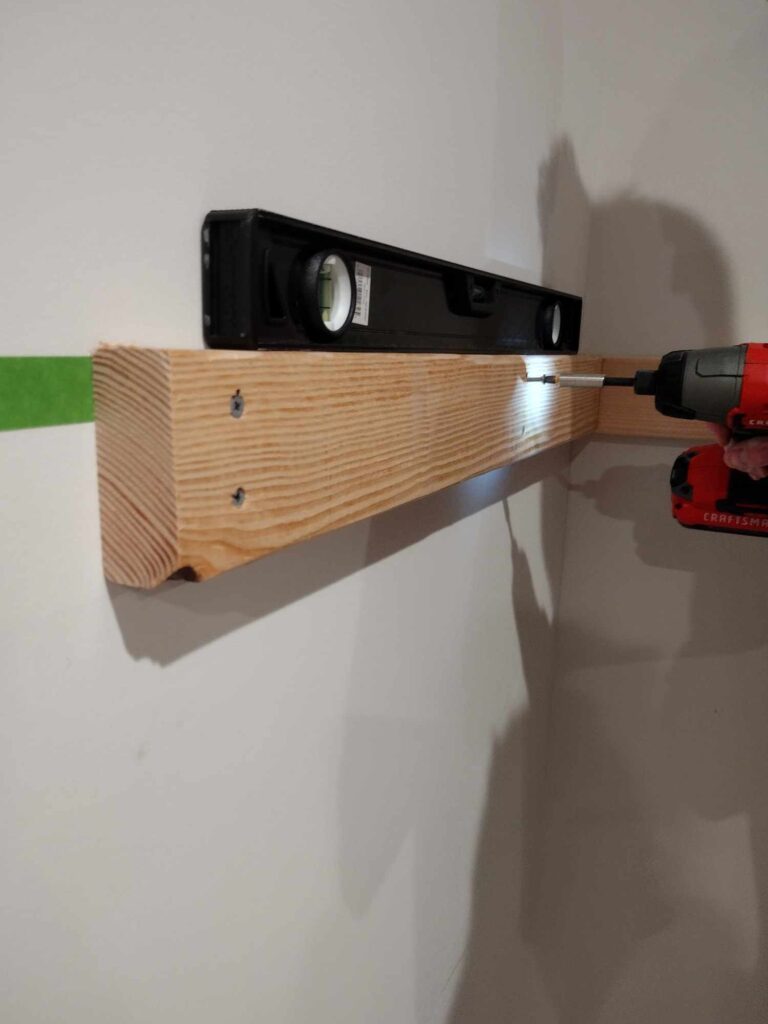
To continue, measure and cut the appropriate size 2×4’s to span from each edge of the wall. Measure and mark on the 2×4 where your studs are on your wall. A helpful tip is to pre-drill pilot holes prior to installing, using 1/8 inch drill bit to make for an easy installation.
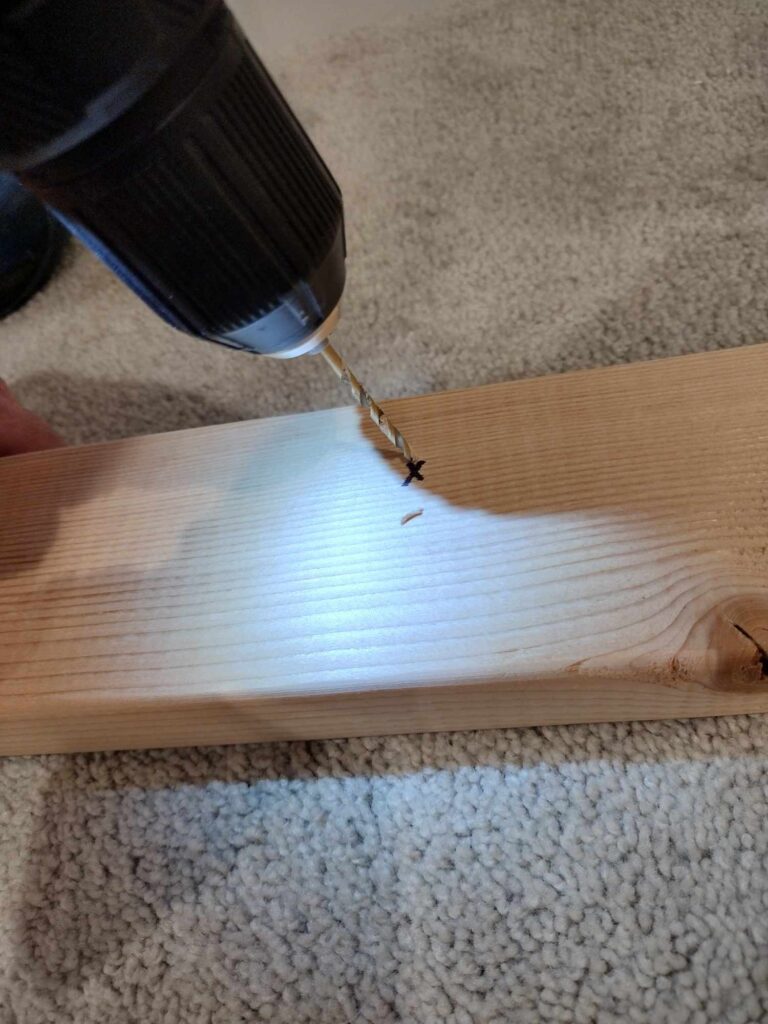
Mount the boards to the wall on the taped line using 3.5 inch screws.
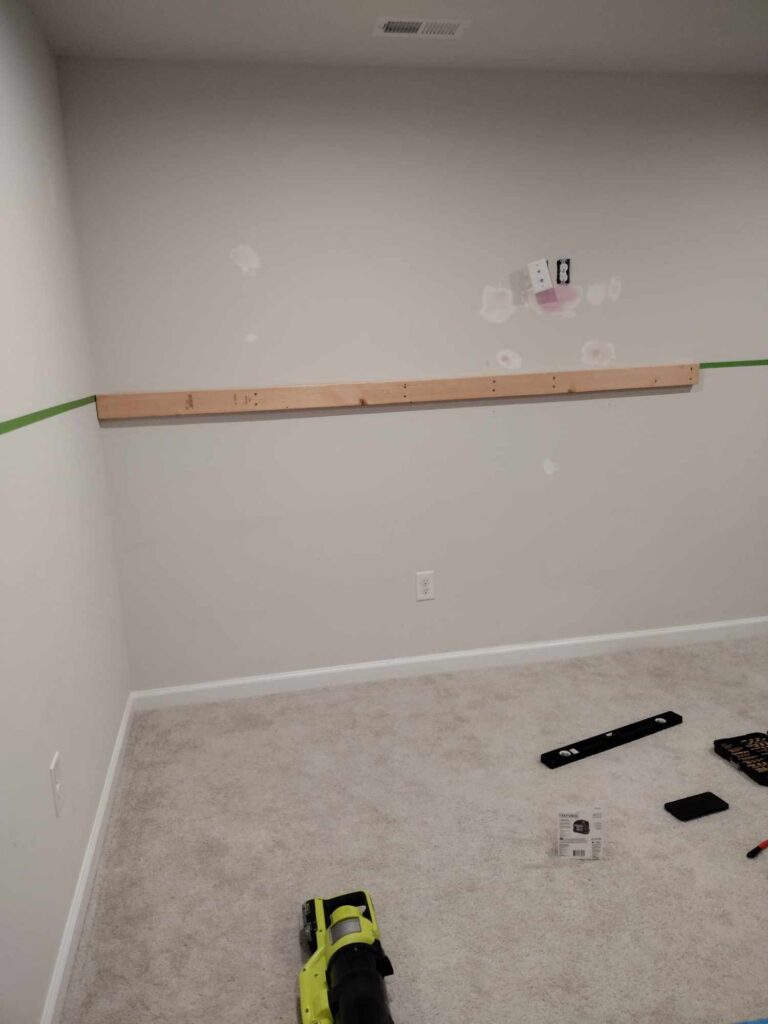
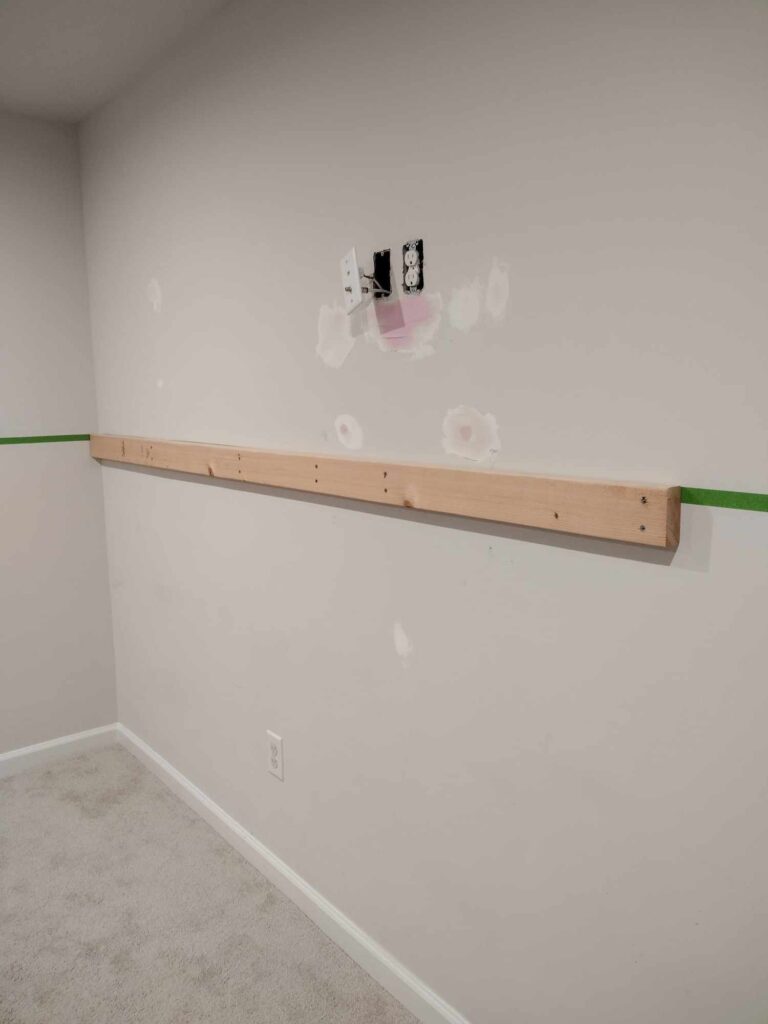
(Based on your wall, if you need to connect 2×4’s like us, you can use these mending plates).
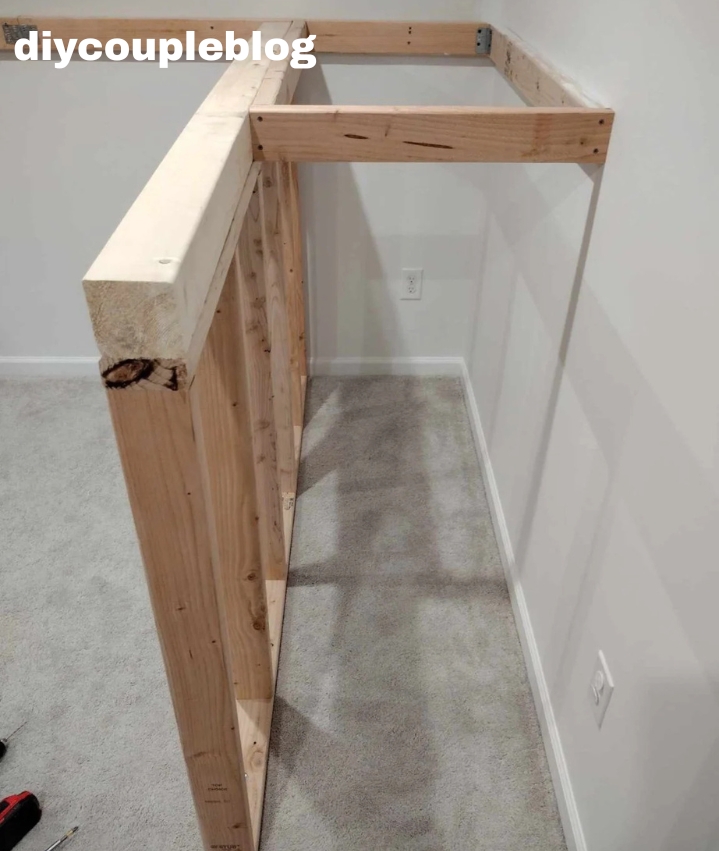
Indoor Jungle Gym Sides
The Slide Side
Cut two 2×4’s at 45 inch and one at 25 inch.
Next, attach one of your 45 inch boards to the wall, adjacent to the back wall studs. You will mount this board and the other side using the same method as you previously did by finding your stud in the wall, marking it, and attaching using 3.5 inch screws.
Set the other two boards aside temporarily.
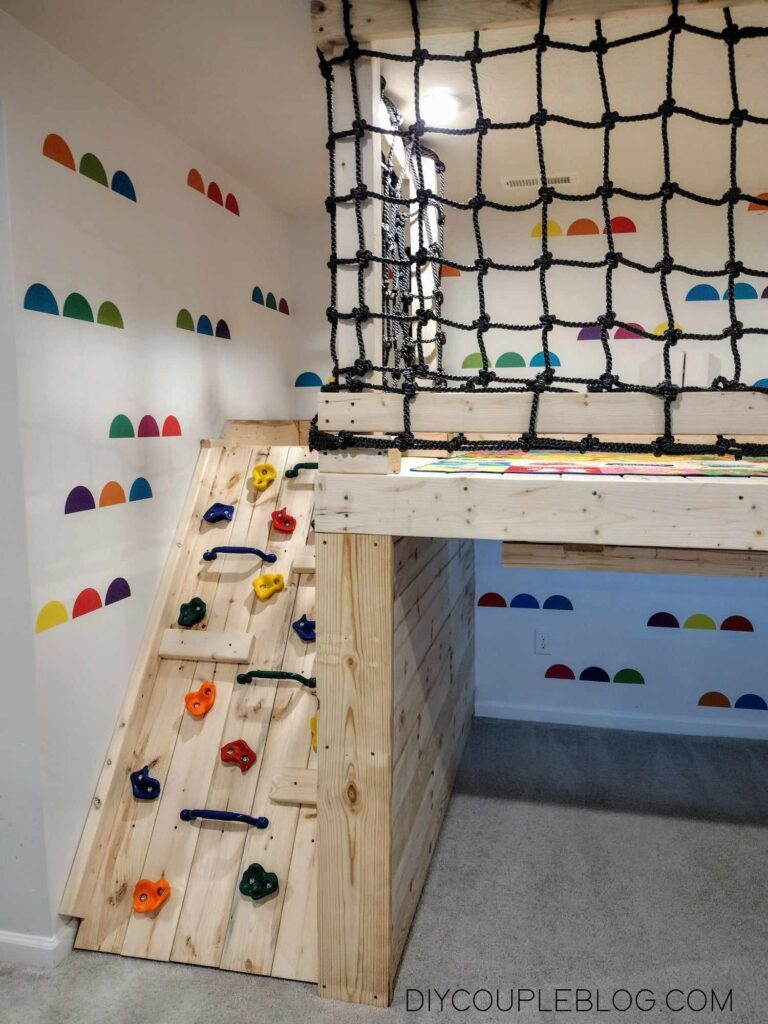
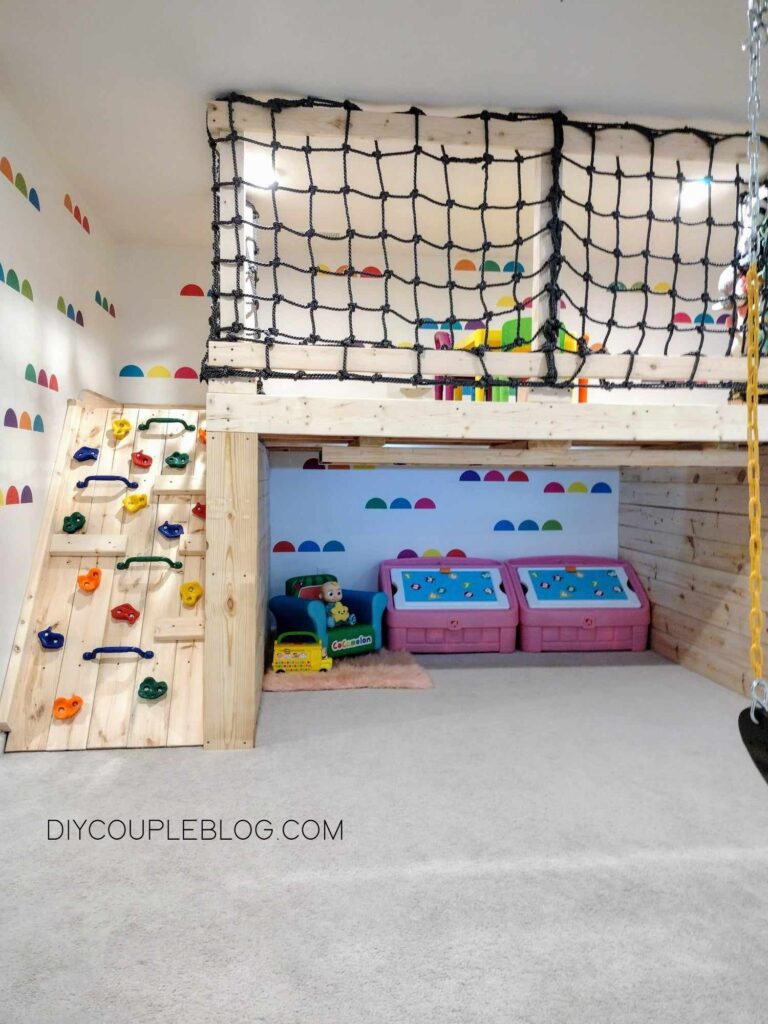
The Rock Wall Side
Cut three 2×4 boards at 30 inch. Attach one of them to the wall same as the slide step and set the other two boards aside for later.
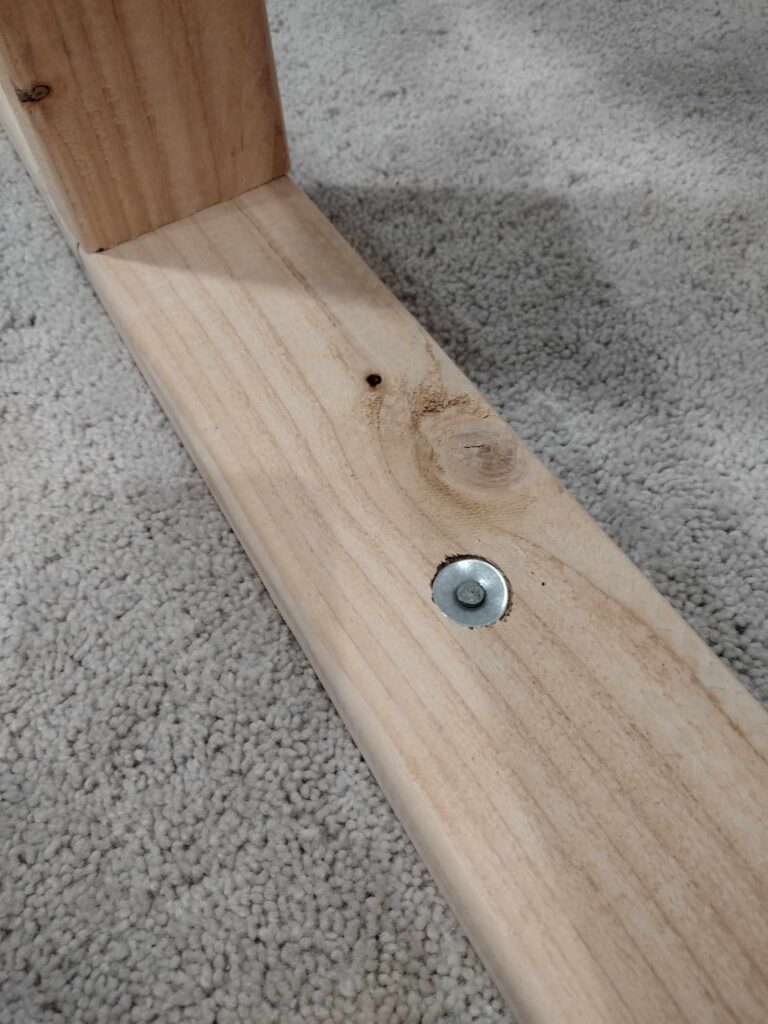
(We used angle brackets in all the corners for extra support using 2 inch screws we had on hand).
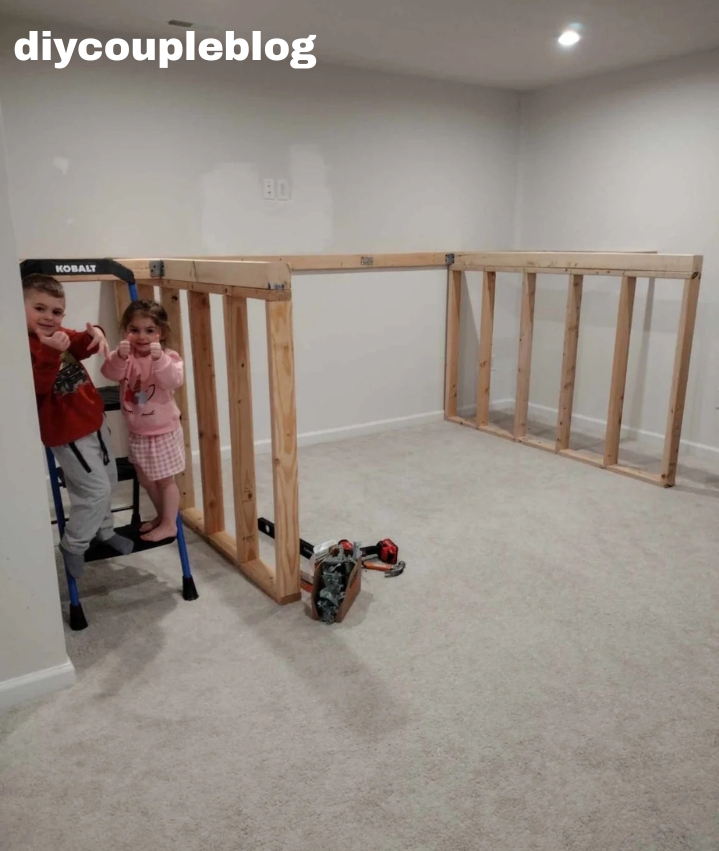
Creating Homemade DIY Indoor Playground Wall Sections:
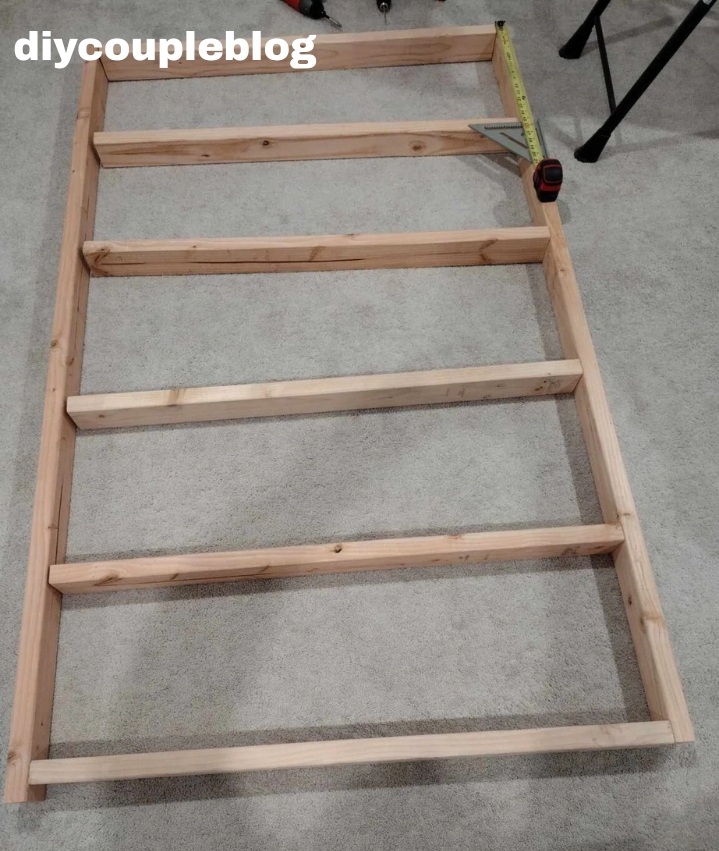
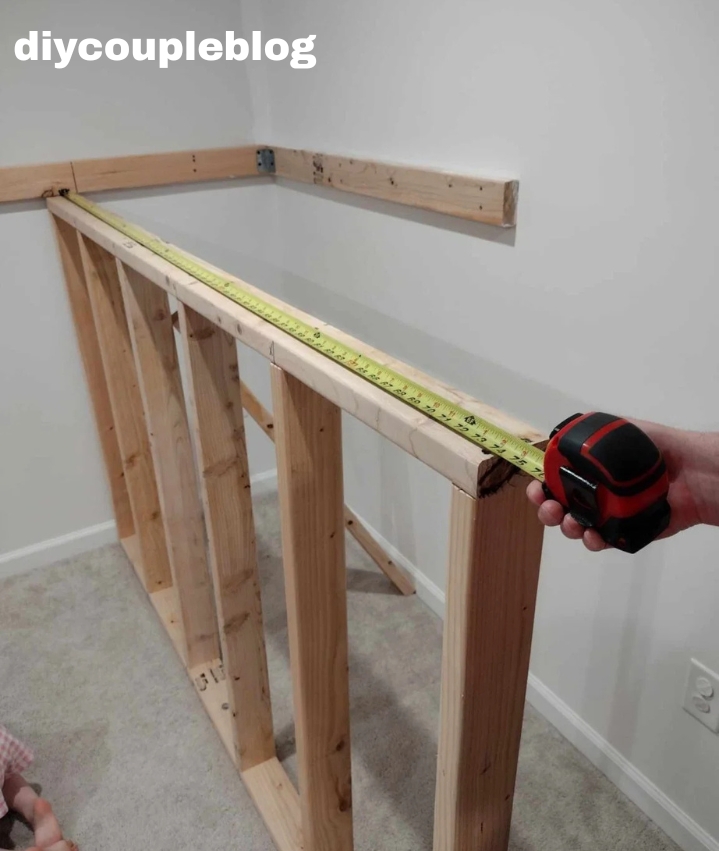
Cutting The Wall Section
We cut two pieces of 2×4 at 75 inch (for the length) and six pieces at 43.5 (for the height). Your height dimension could vary slightly depending on the thickness of the carpet, in this case your total height of your wall should be from the carpet (minus the carpet padding) to the bottom of the wall stud.
Assembling The Wall Section
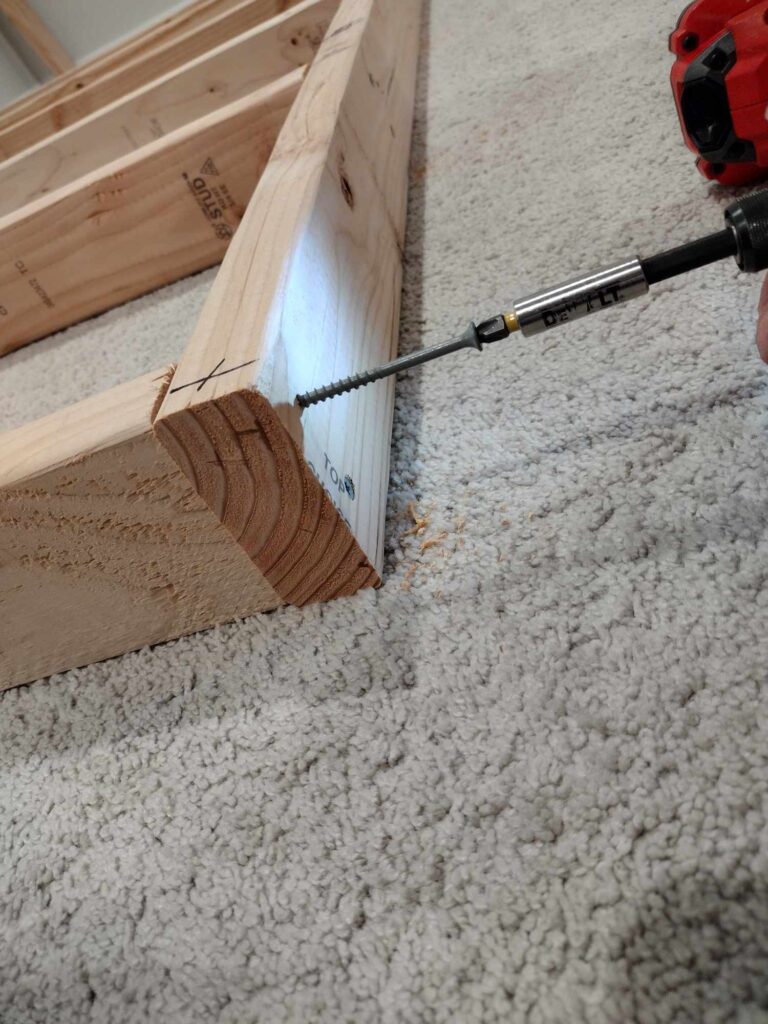
Lay out the frame (as seen in picture), use a square on the top and bottom and mark 14.75 on center. Once marked, you’ll attach your boards using 3.5 inch screws. As mentioned earlier, pilot holes are recommended and 1/8 inch drill bit will work just fine.
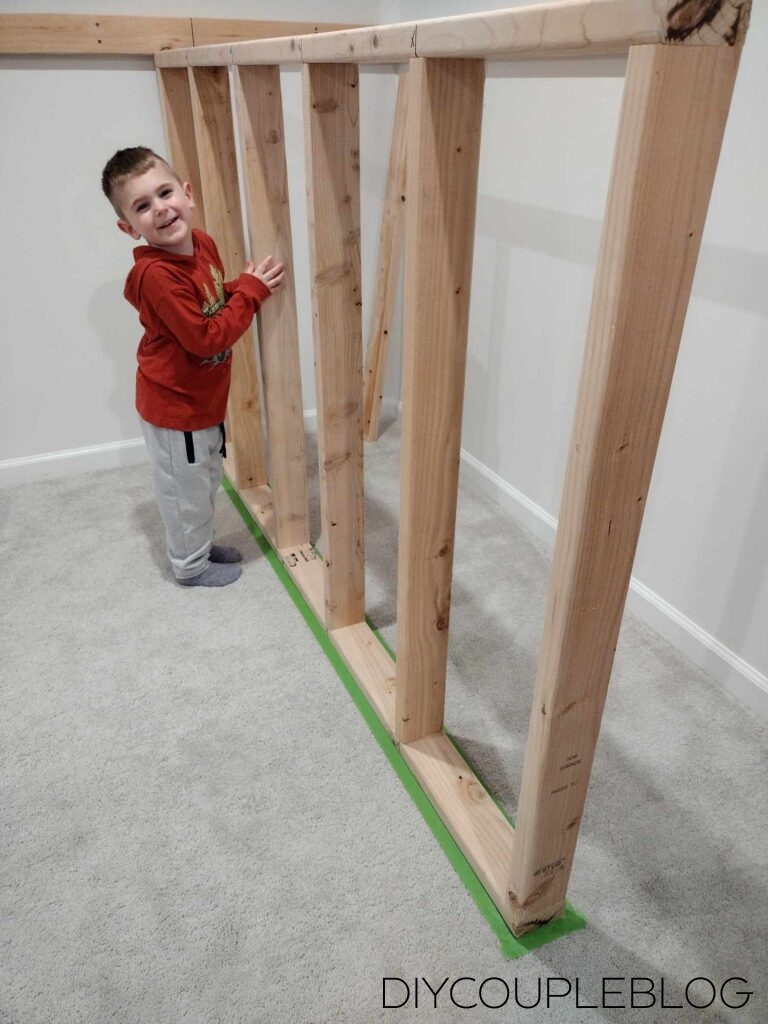
Attaching Platform Wall to Frame
At this point, we stood up our frame and placed it 25 inches from the slide wall as seen in the picture. Peep our little guy helping and waiting for this playground in house to get completed.
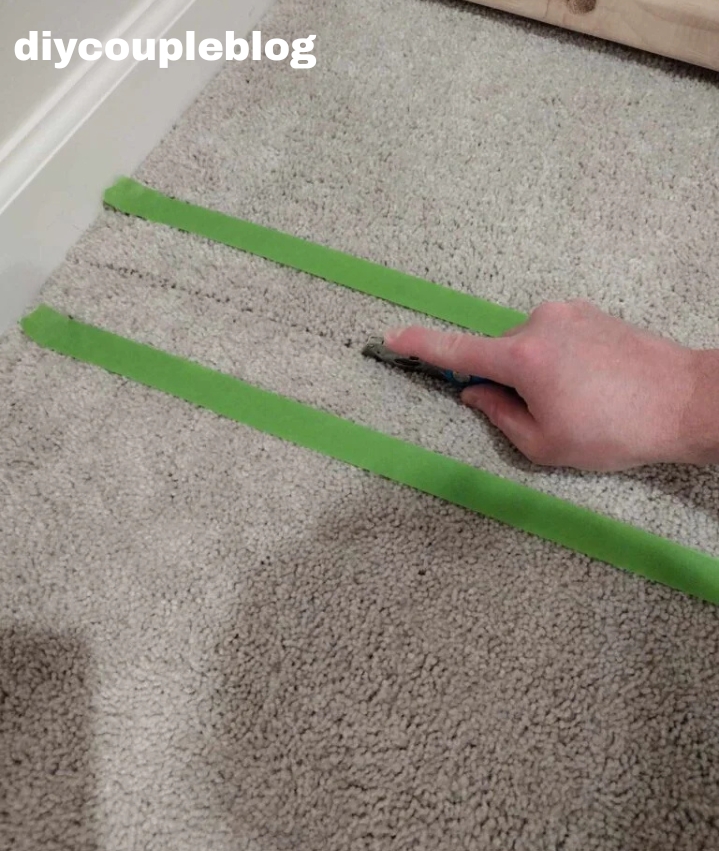
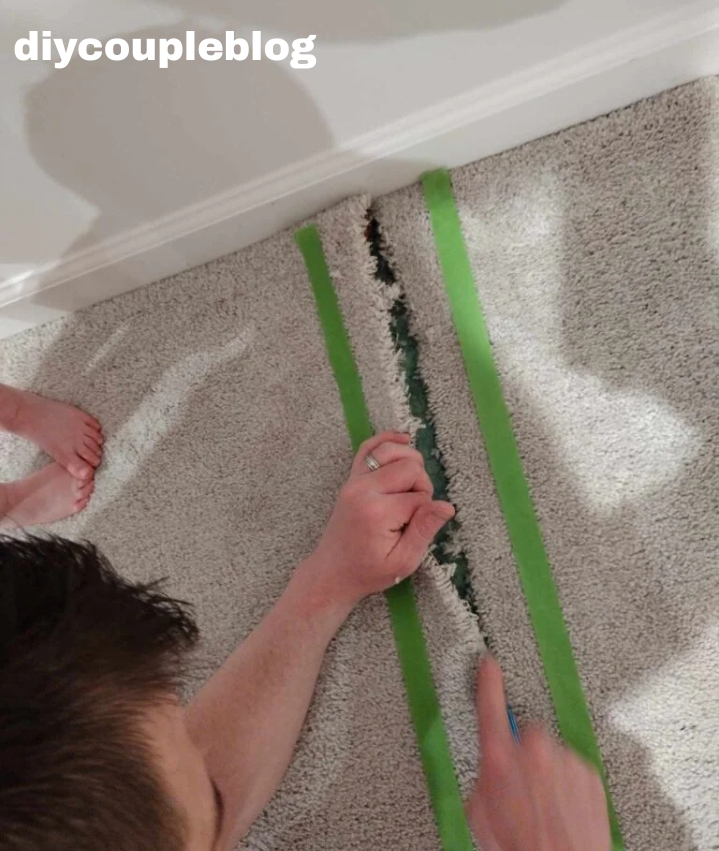
We used frog tape to outline the frame on the carpet then we moved our frame out of the way in order to use a razor knife to cut a slit in the center of the taped lines. We removed the carpet padding and section of tack strips between those taped lines.
Indoor Playground Frame Fastening:
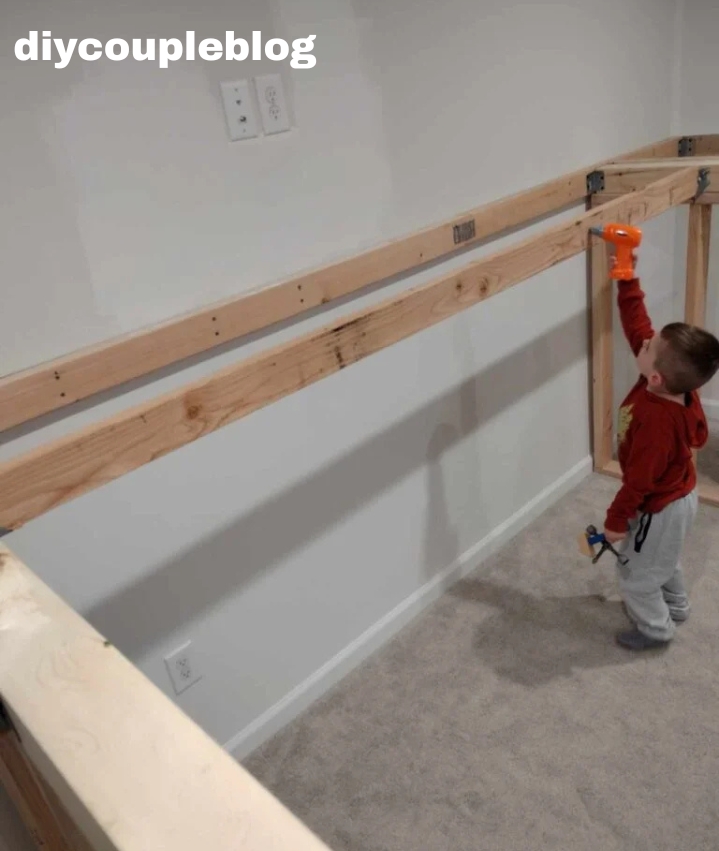
Onto Fastening the Frame
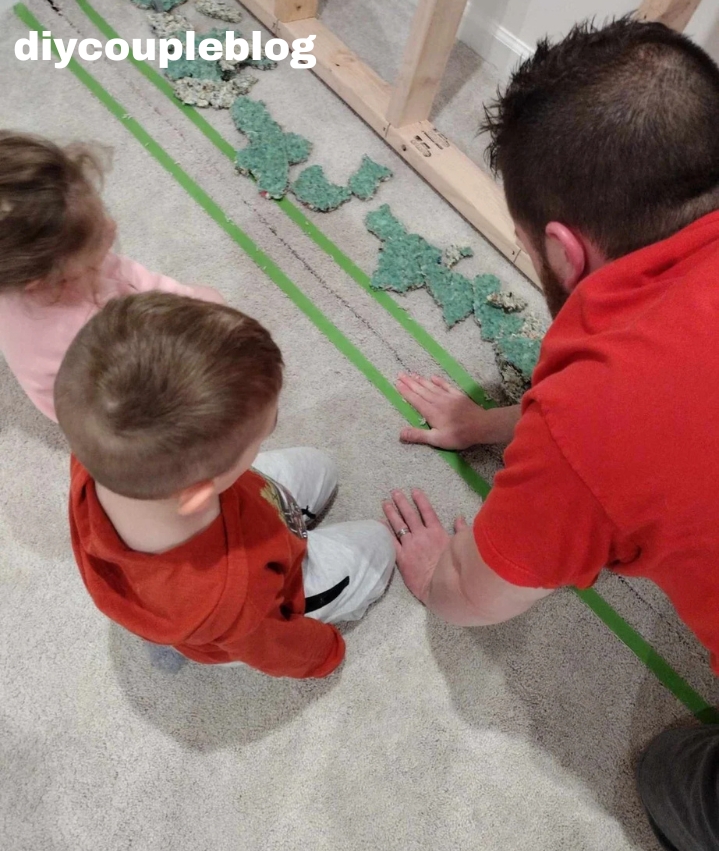
Now the frame can return back in the proper section keeping it 25 inches from the slide wall. Be sure it’s level and using a ram set, shoot the base through the concrete.
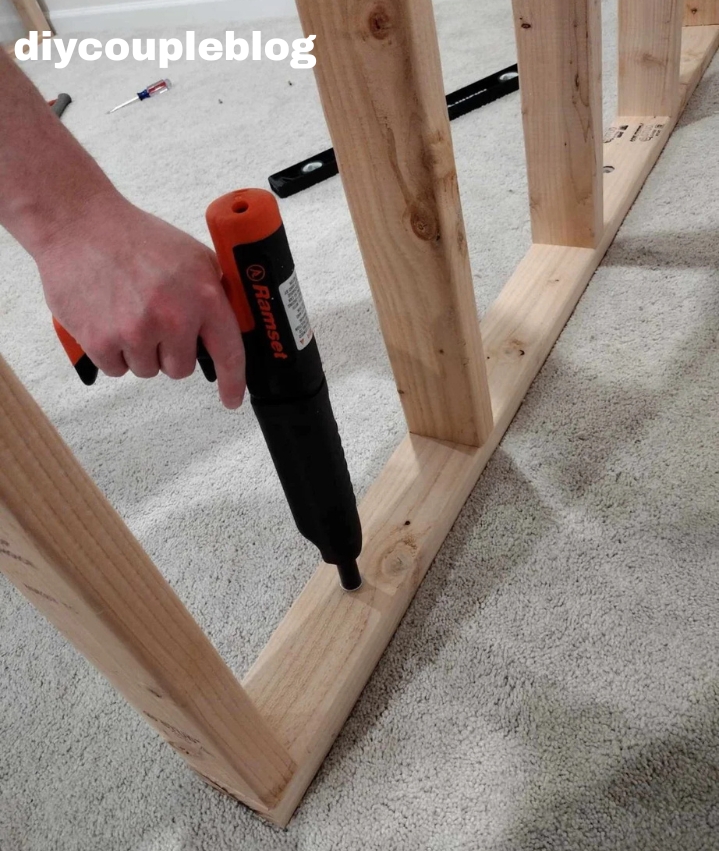
Measure the distance from the back wall stud to the end of the frame and cut a 4×4 to that length. Place the 4×4 on top of your frame and attach it from the top of the frame using pilot holes and 3.5 inch screws.
Add an angle bracket on each side of the 4×4.
Now, remember the boards we cut and set aside, back to those.
Attach the 45 inch board to the slide side of the 4×4 using the same attaching method mentioned earlier.

Now attach the 30 inch board on the front of the two 45 inch pieces.
Rock Wall Side
We repeated building the framed wall for the rock wall side, attaching it 30 inches from the wall. Again, get your two 30 inch boards from earlier and attach the same way as slide side.

Be sure to add the angle brackets to all the corners. Once both walls and sides are up it should look like this.
Thumbs up for progress!
DIY Indoor Jungle Gym Platform Floor:
The Floor Joist
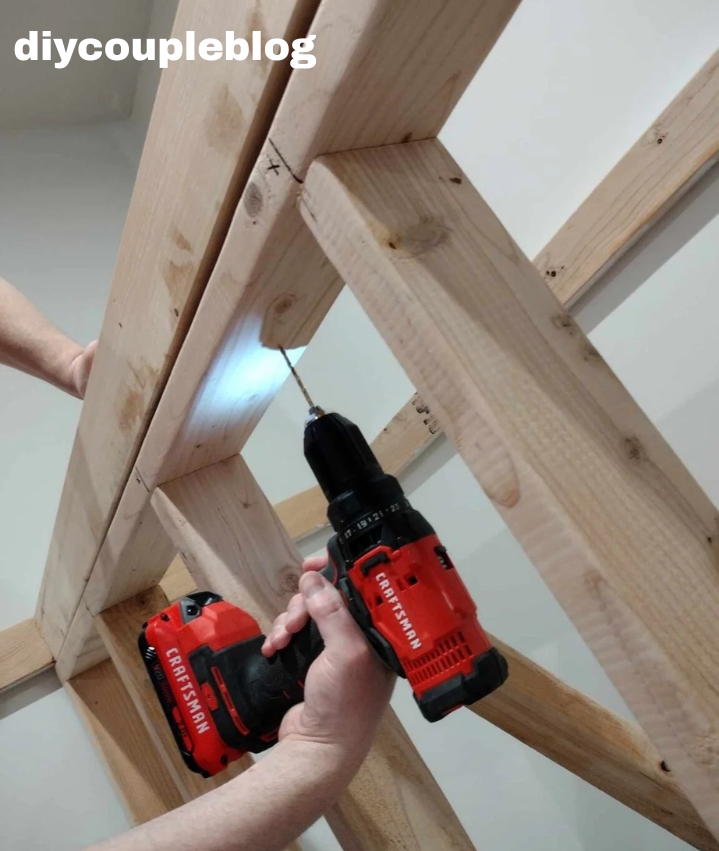
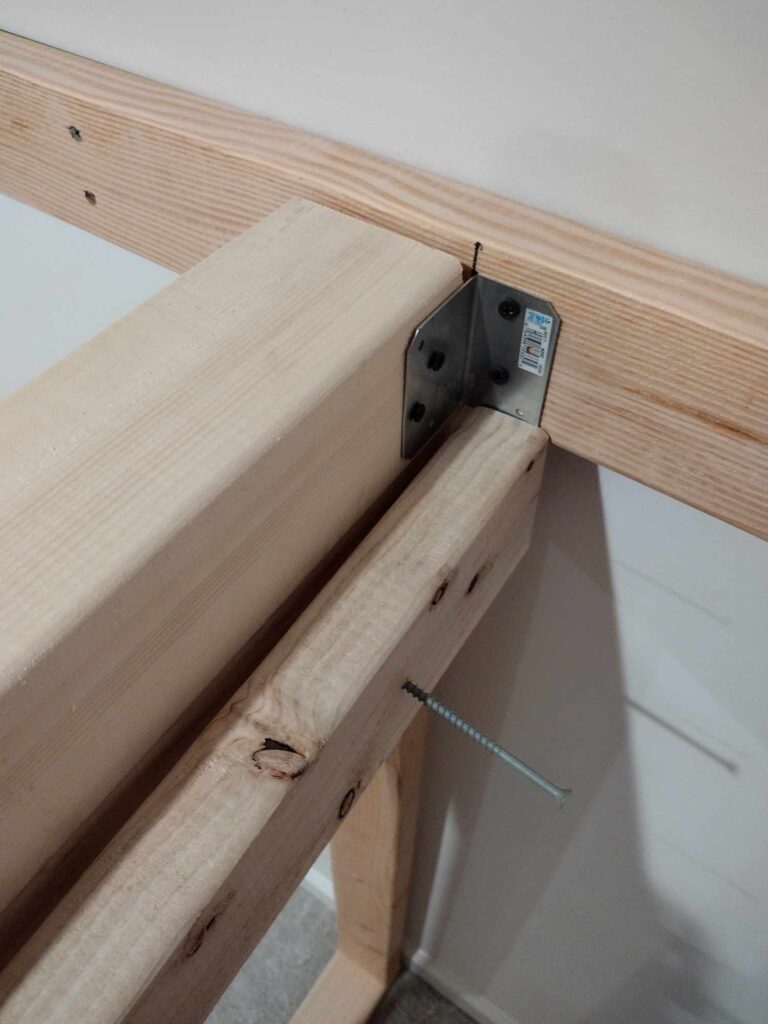
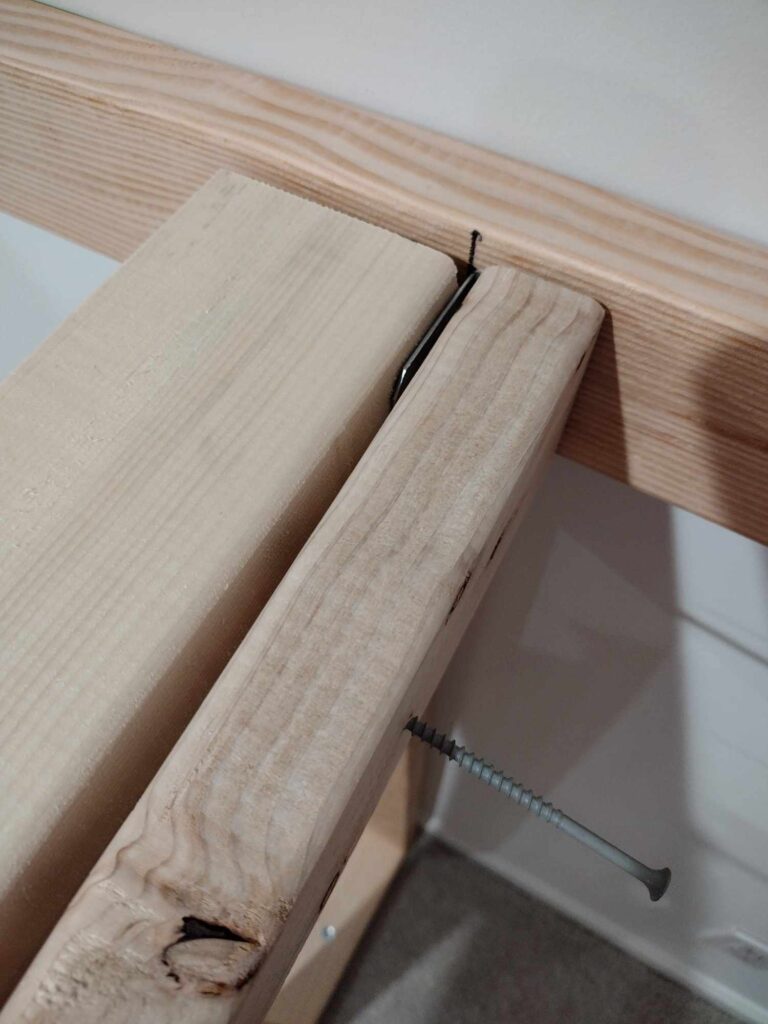
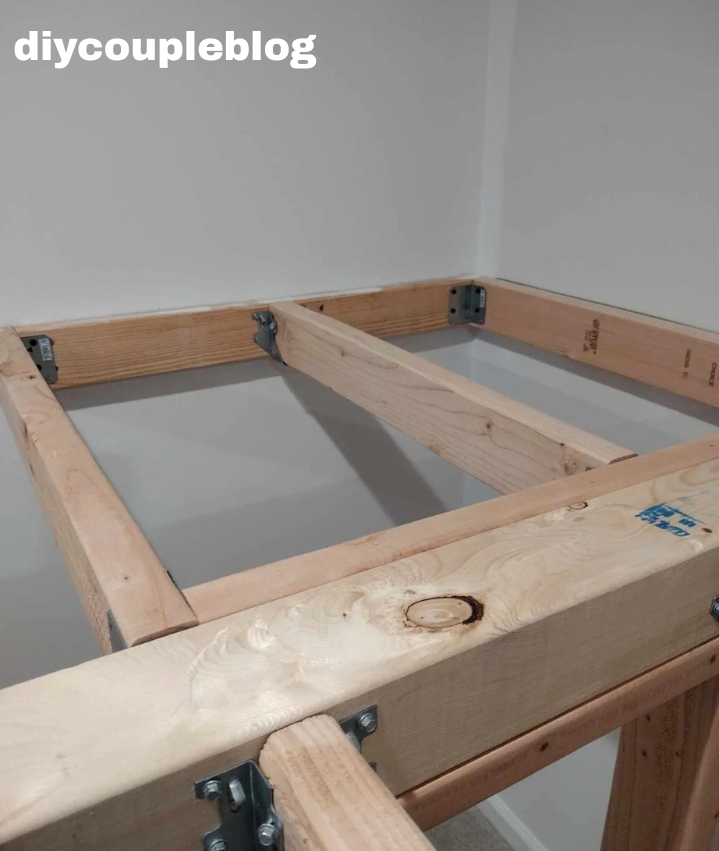
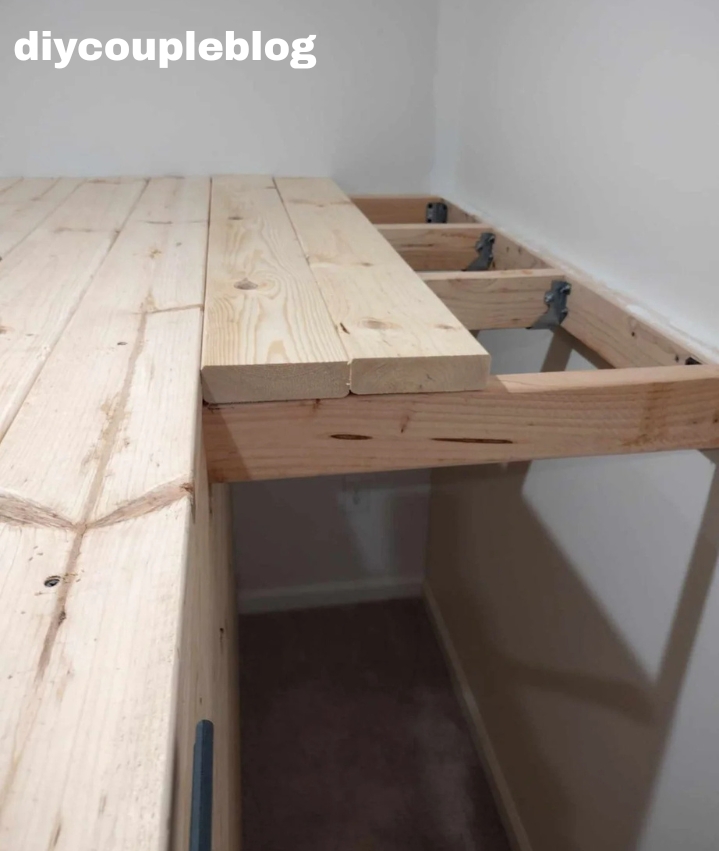
For the floor, we measured from both insides of the frame we built. Then cut five 2×4’s to the length that we measured. Next, fastened with 2×4 hangers using #9 by 2.5 inch connector screws following the 2×4’s from the walls.
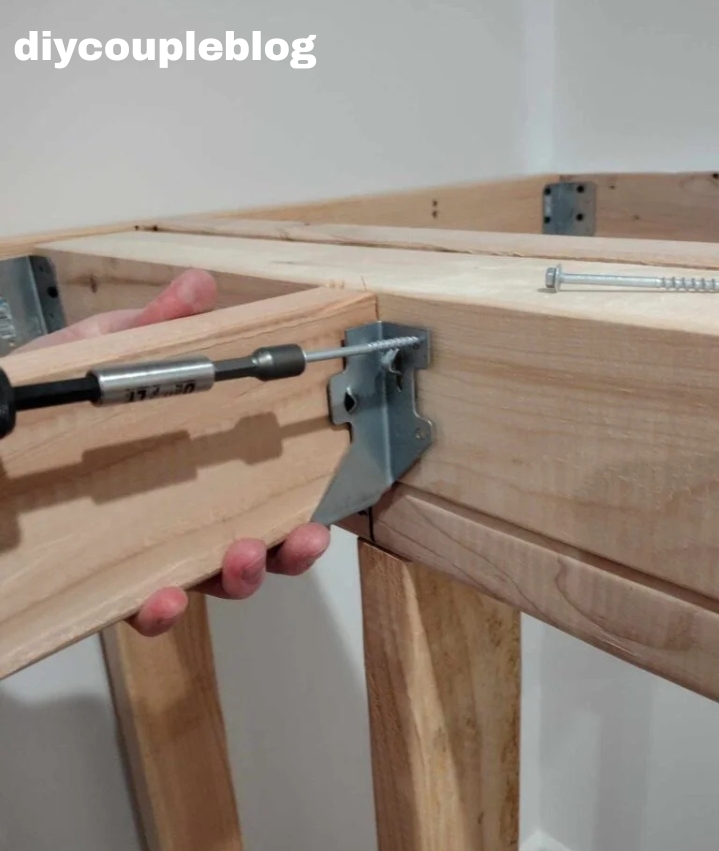
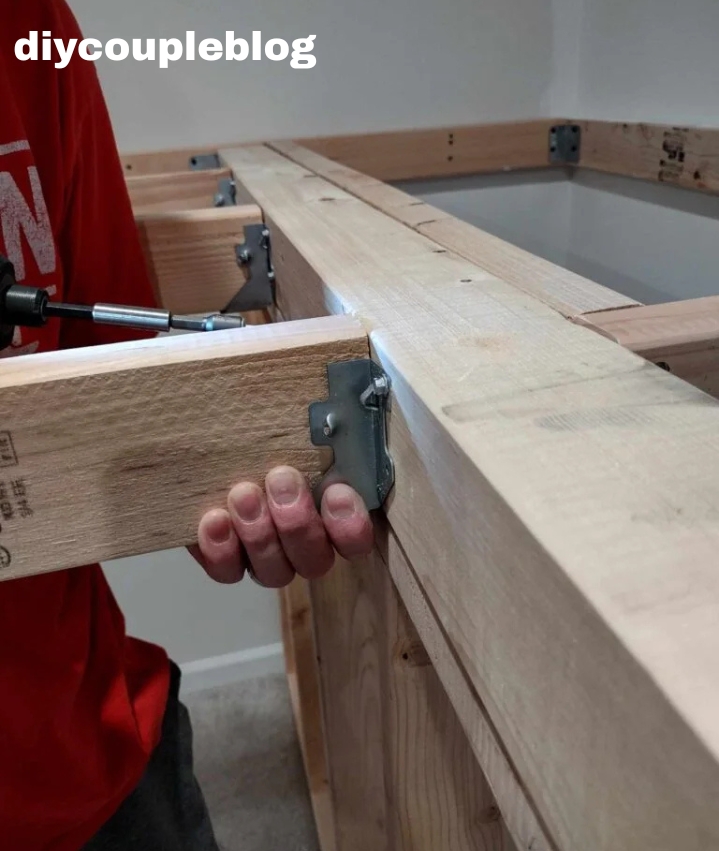
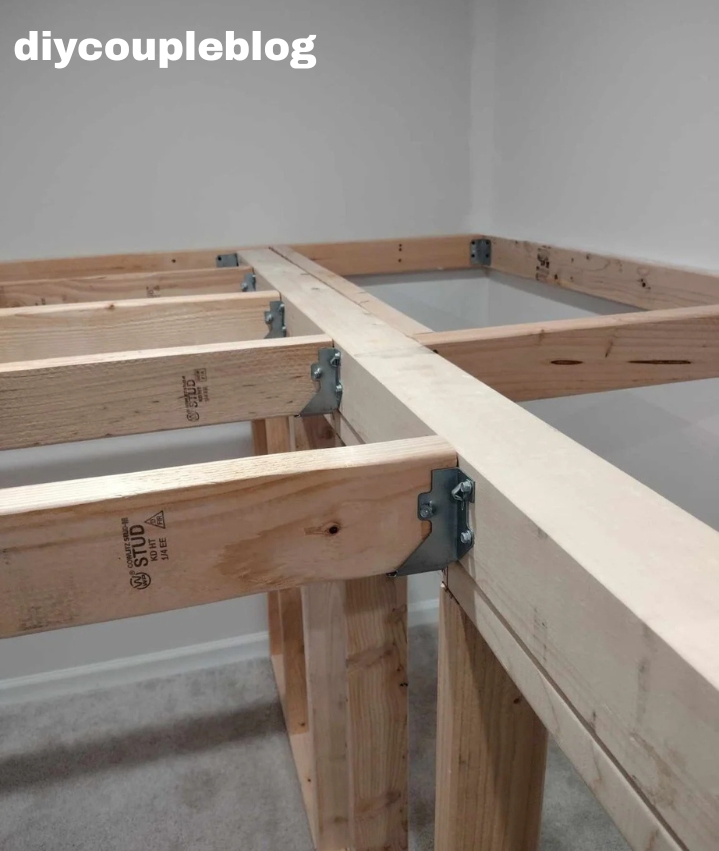
Add a floor joist across the center of the rock wall side, then add two across the slide side as seen in photos.

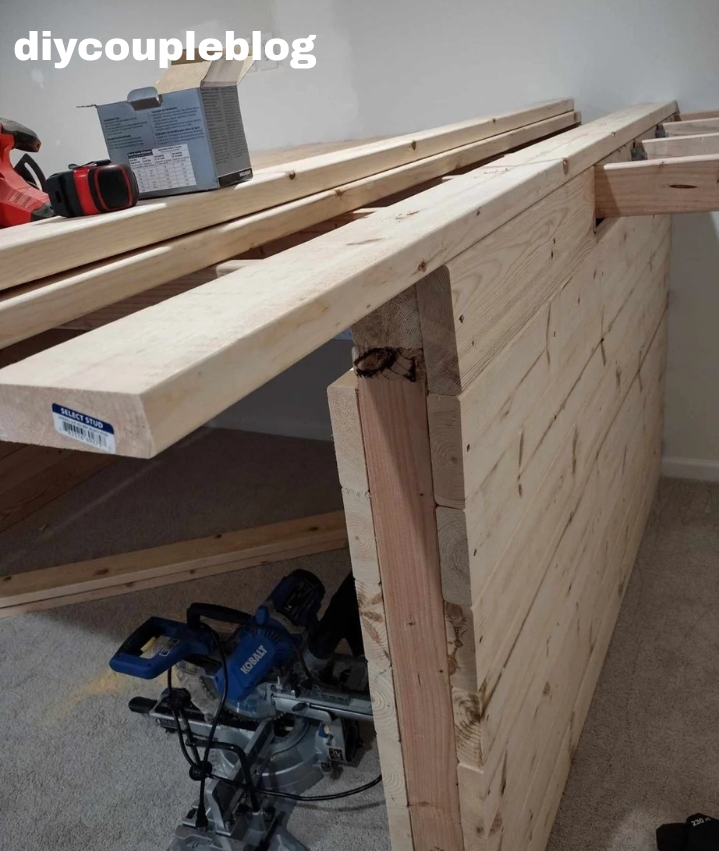
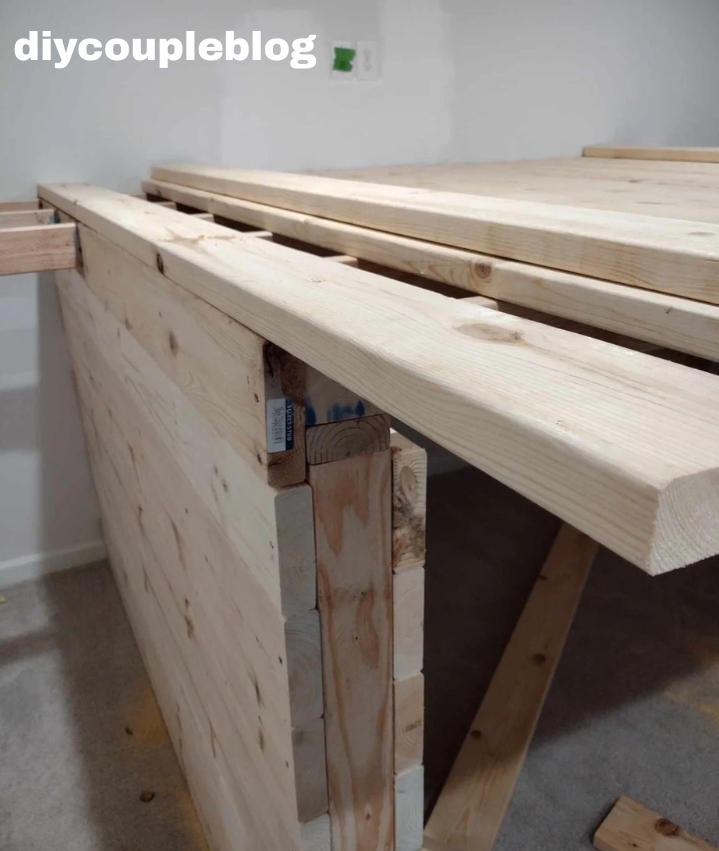
Attaching Indoor Playground Platform Frame Sides:
Putting the Sides on Frame
Start by laying a 2x6x8 board on the side and mark it to the end, cut it with a miter saw then attach to the frame ensuring that the first board is level and using the 1/8 inch drill bit and the 3.5 inch screws.
Once it’s mounted, lay the next piece on top of that one and repeat the process all the way up. Keep doing this on both outsides of the frame including the inside. If you have a small gap on the top of the inside, you can rip a board to the correct size using a table saw.
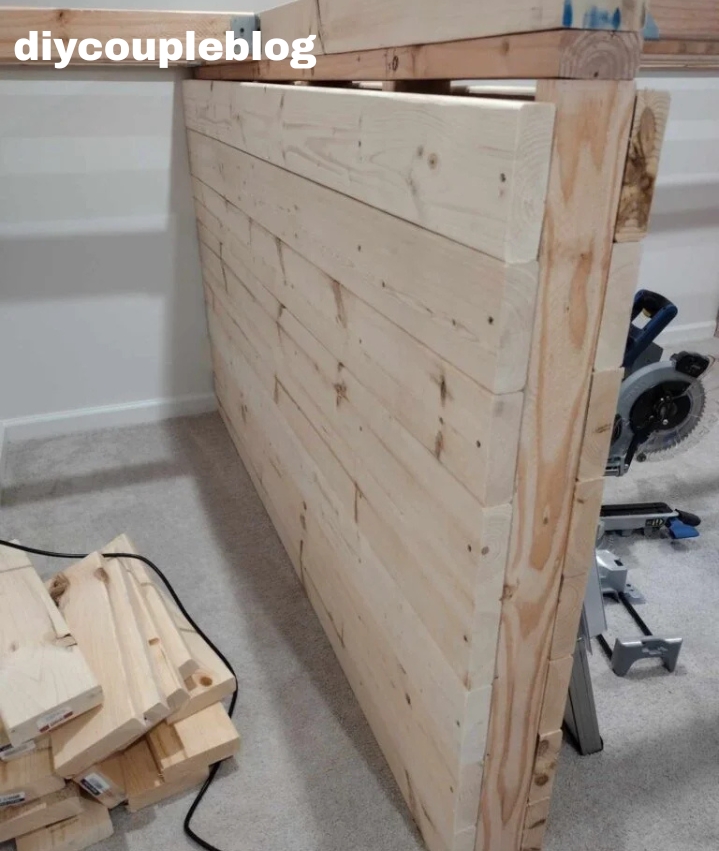
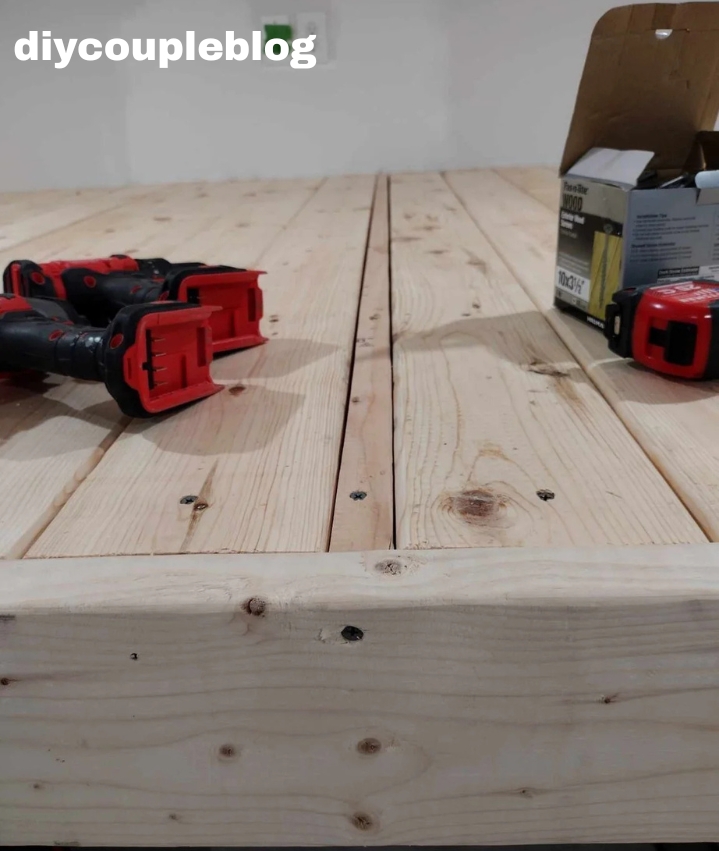
Building Our Indoor Playground Platform:
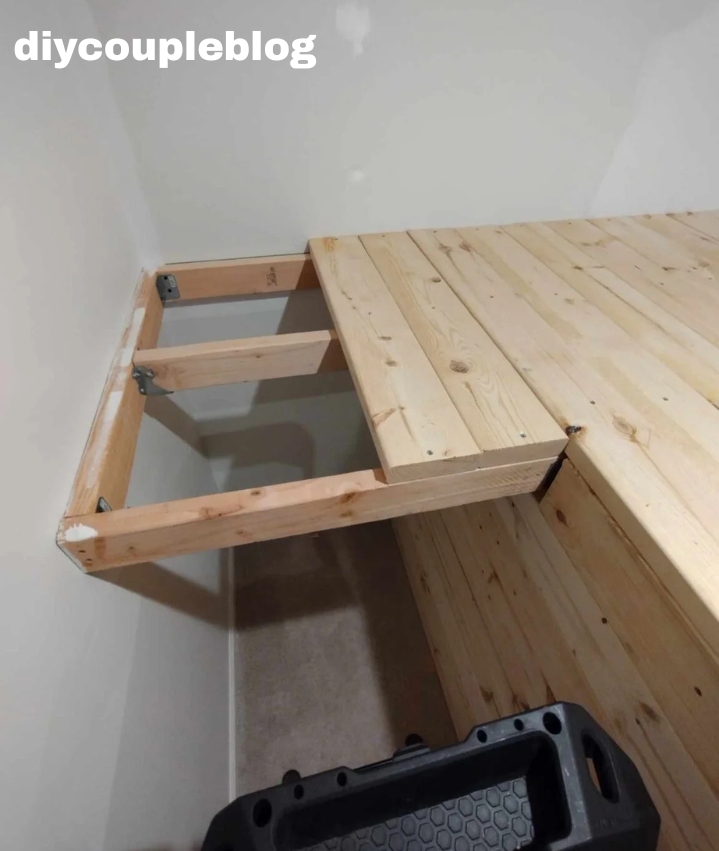
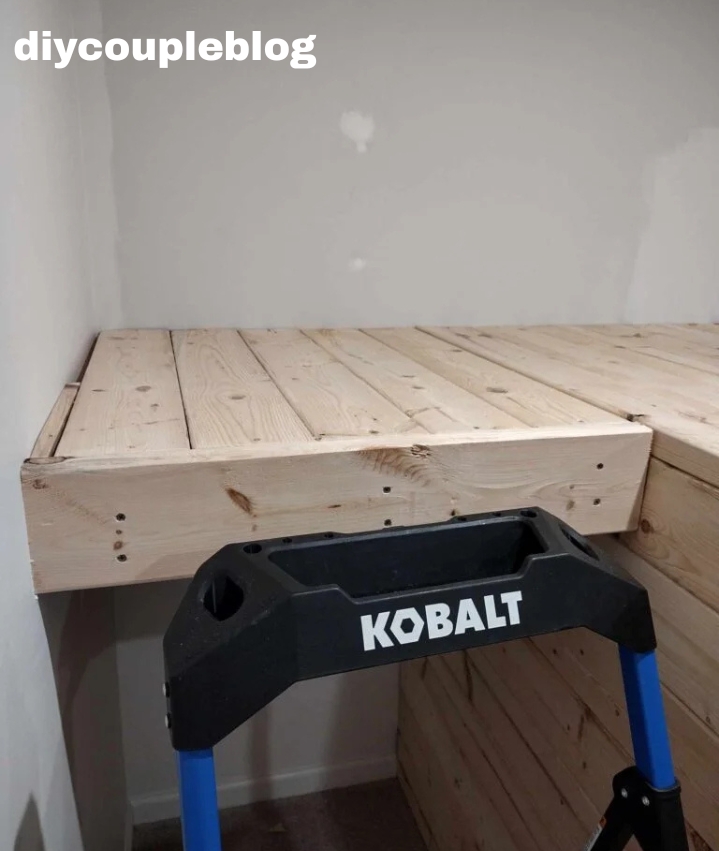
The Planked Platform
Line up the first board on the framed wall at the edge and fasten it down making sure it’s squared to the wall. Repeat the process on the other framed side. Then start mounting the rest of the boards. Do one on each side at a time until you work your way to the middle using same 3.5 inch screws for installing.
Note: You may have a gap in the middle. For this, you’ll need to rip a board to the exact size with a table saw.
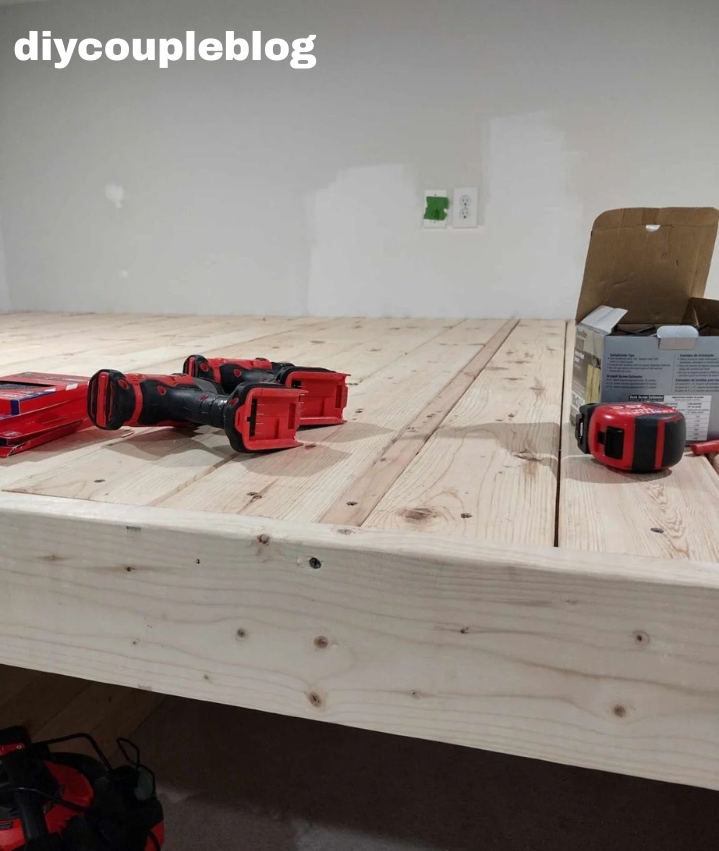
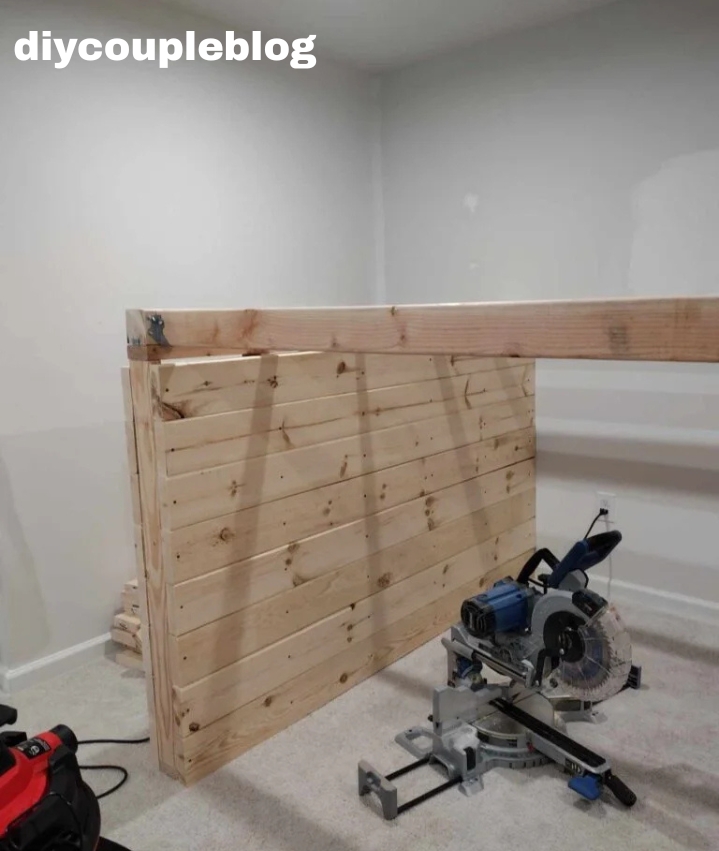
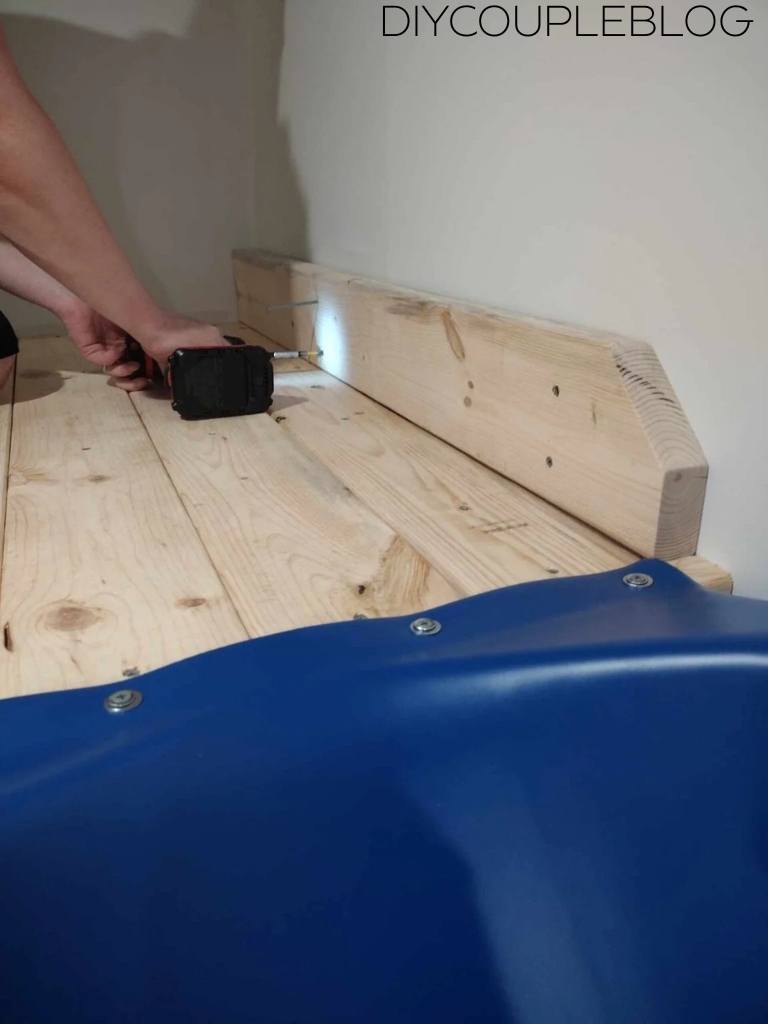
Then do the same process covering the slide platform and the rock wall platform. Measure and cut 2×6’s the exact size and mount with the 3.5 inch screws.
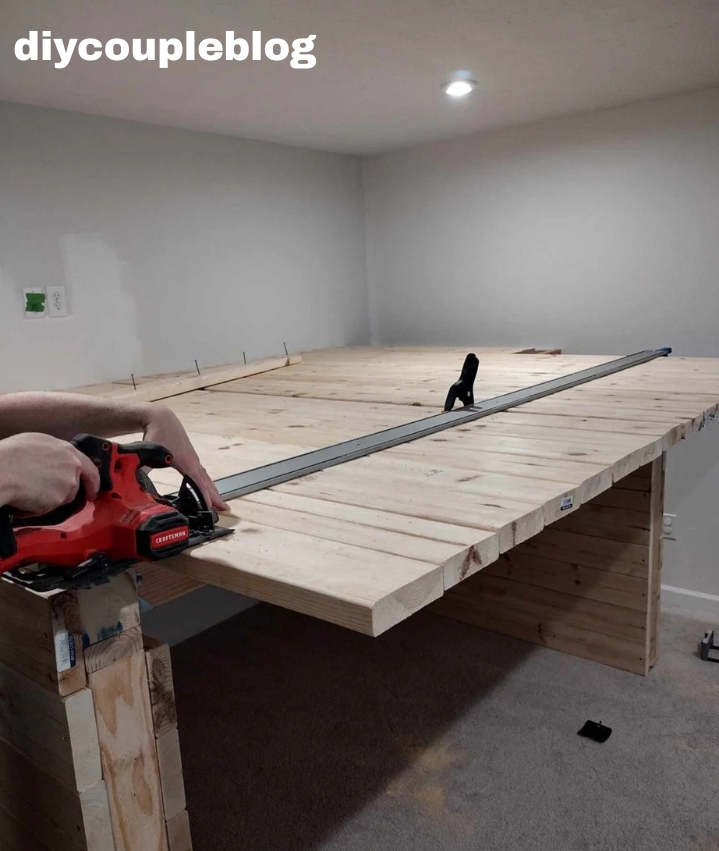
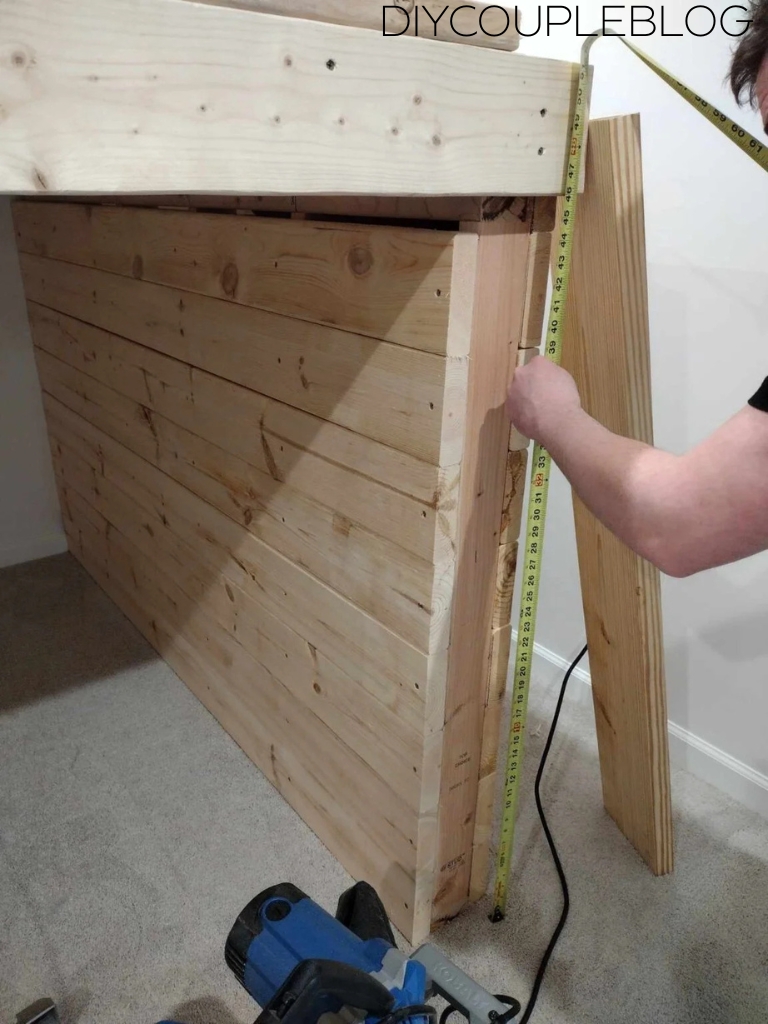
We opted to cut off our longer boards in the front afterwards for a straighter line, so we did this now. We used a Kreg Jig straight edge and cut all the boards flush to the end of the framed walls.
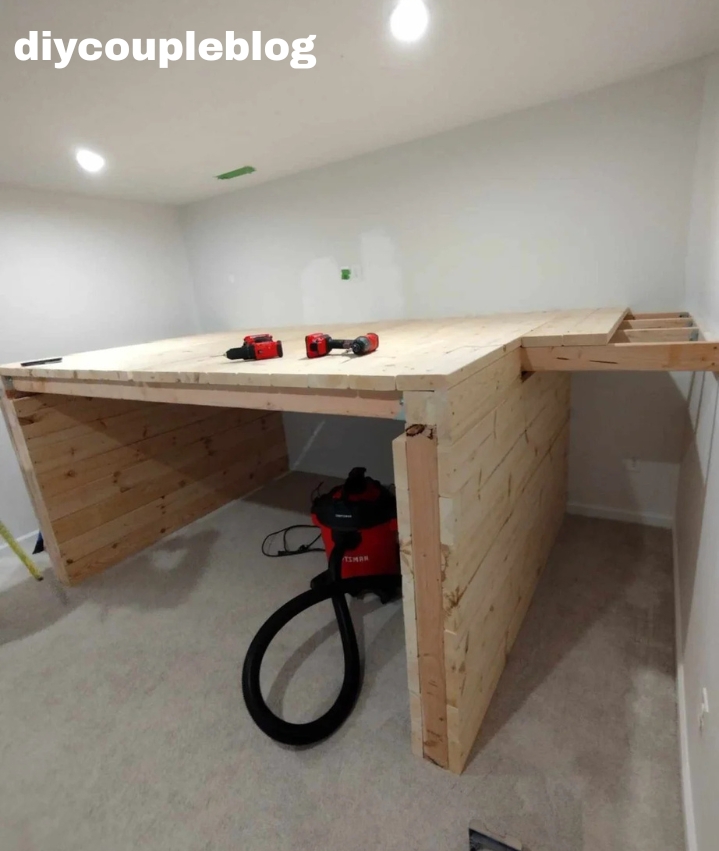
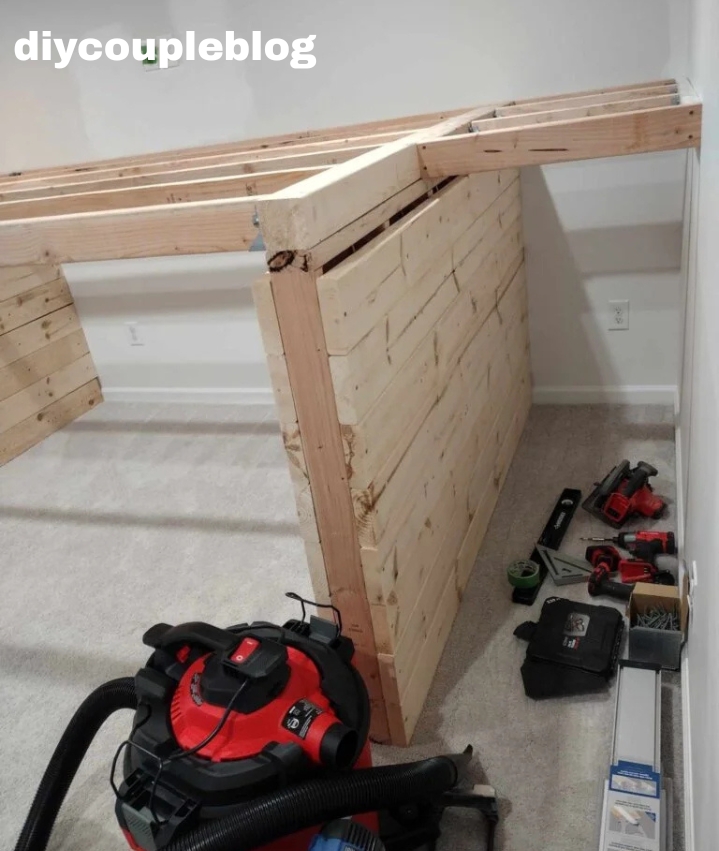
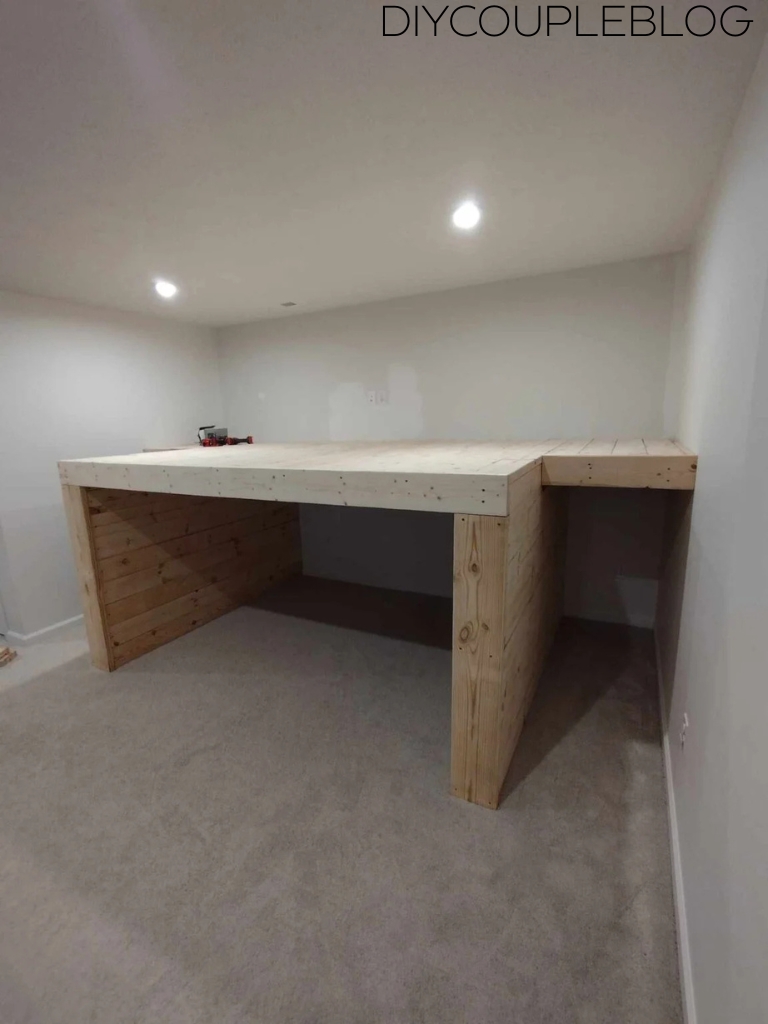
Once this was completed and the platform boards were on, we mounted the front boards. We sanded the front two sides of the platform before attaching anything to the front and sides using our orbital sander and 36 grit extra course sandpaper to smooth it up for the best fit.


Once the first header is attached using a 2x6x10, you can use a 2x8x8 to put the front sides on. Once finished, we sanded the whole thing to give it a smooth soft finish. We used 36 grit then went back over with 320 grit sandpaper.
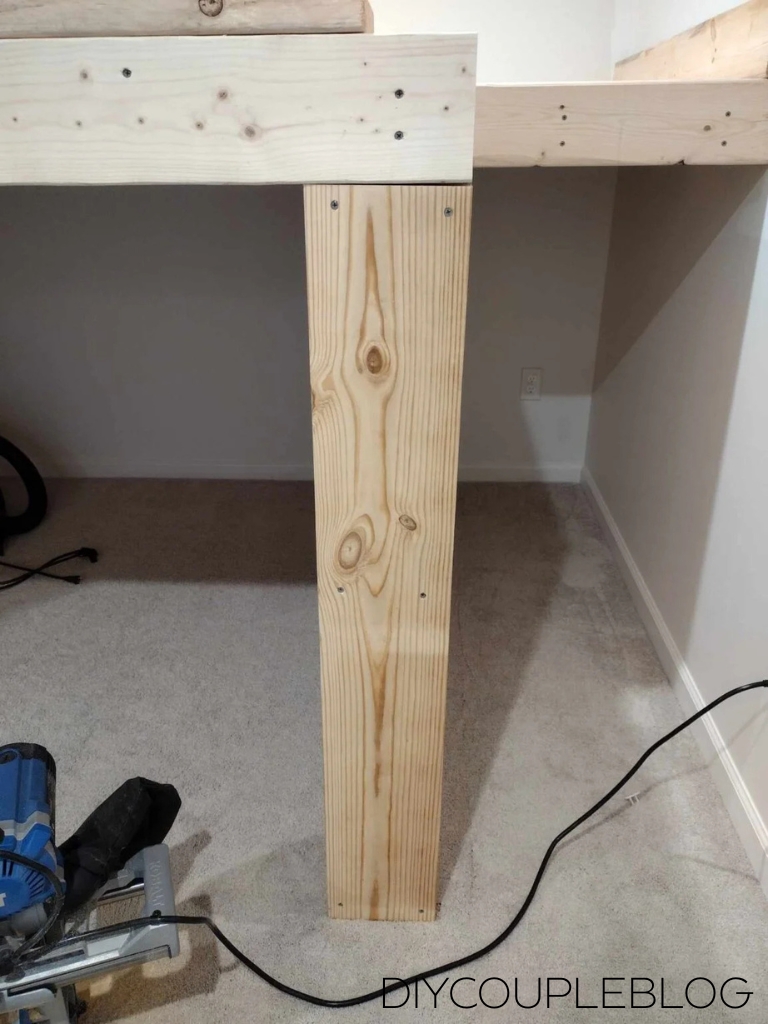
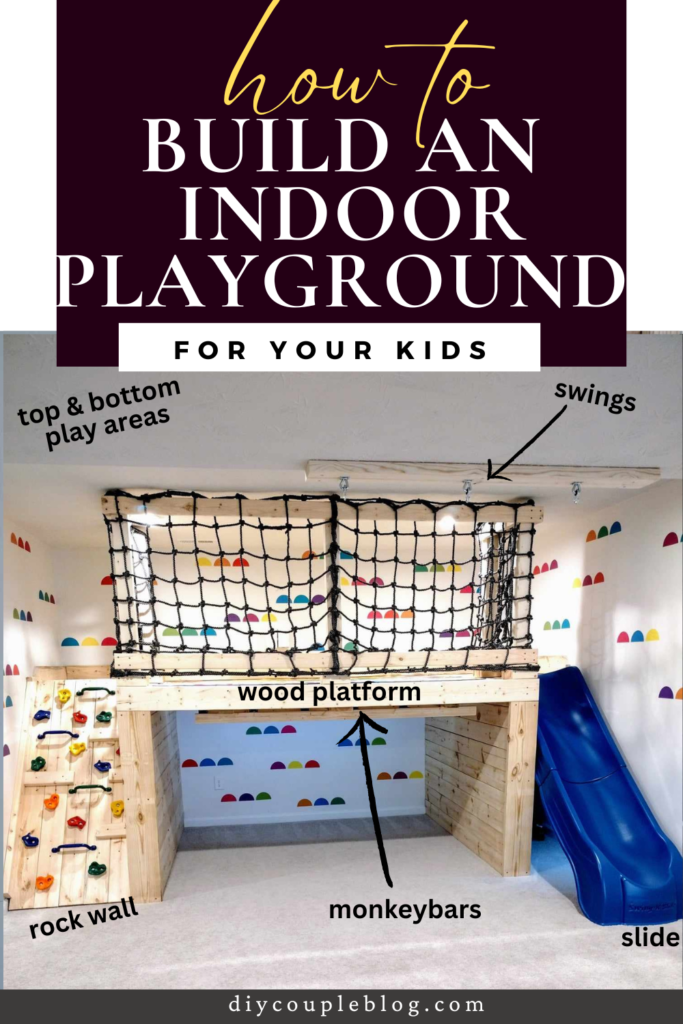
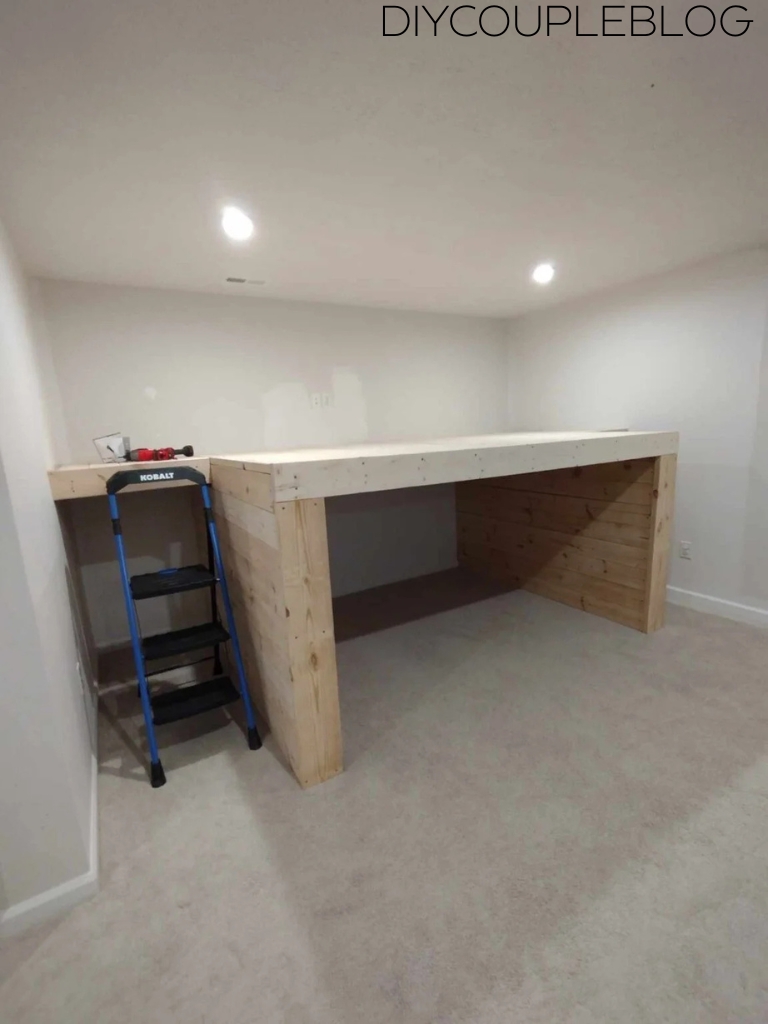
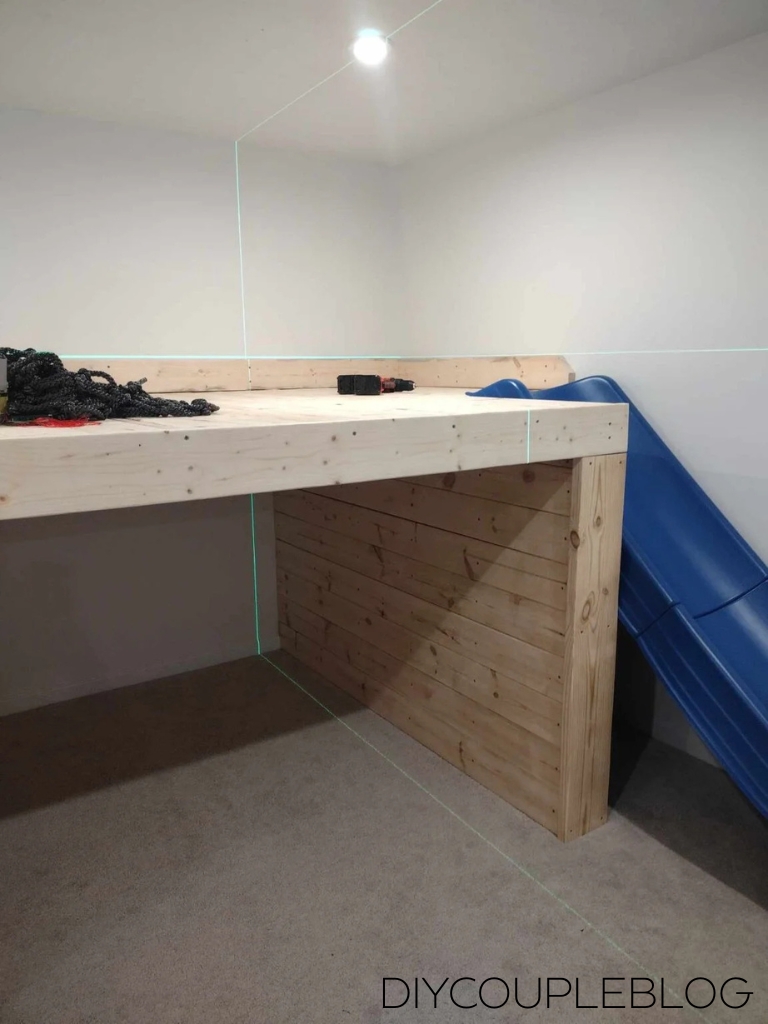
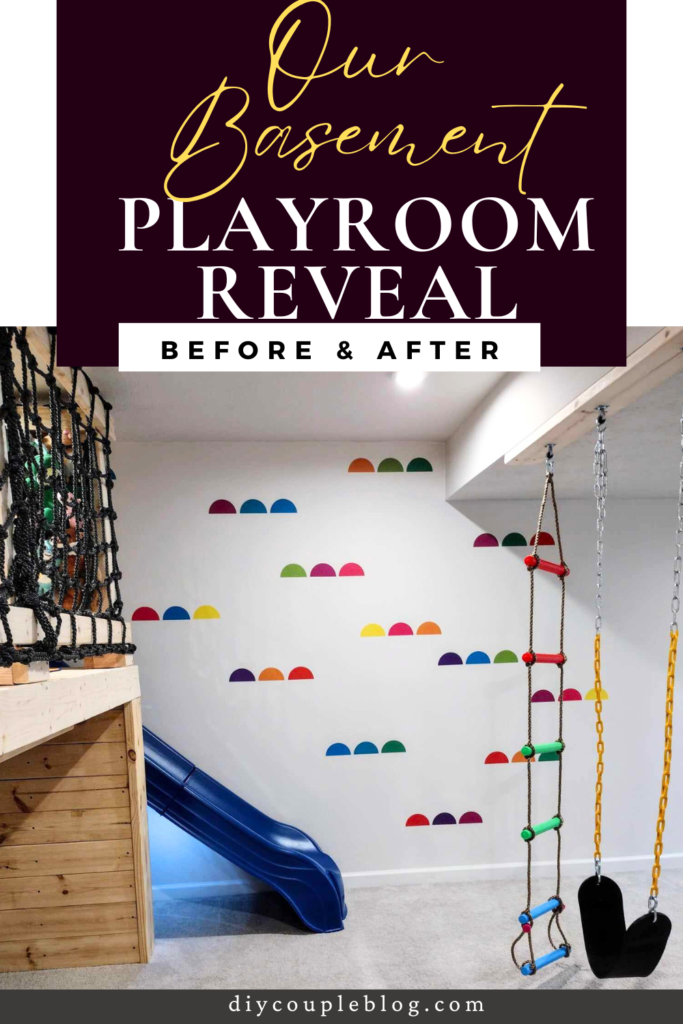
At this point, here is what the platform looks like and how far we’ve got. We still need to add the top trim to give it a nice finish (keep reading for that) and also install the kids playground railing to keep them from falling off. The rock wall needs built, as well as adding some other things like monkey bars beneath. We’re also painting this room and will be applying colorful wall stickers for kids on this side of the playroom which I mentioned before.
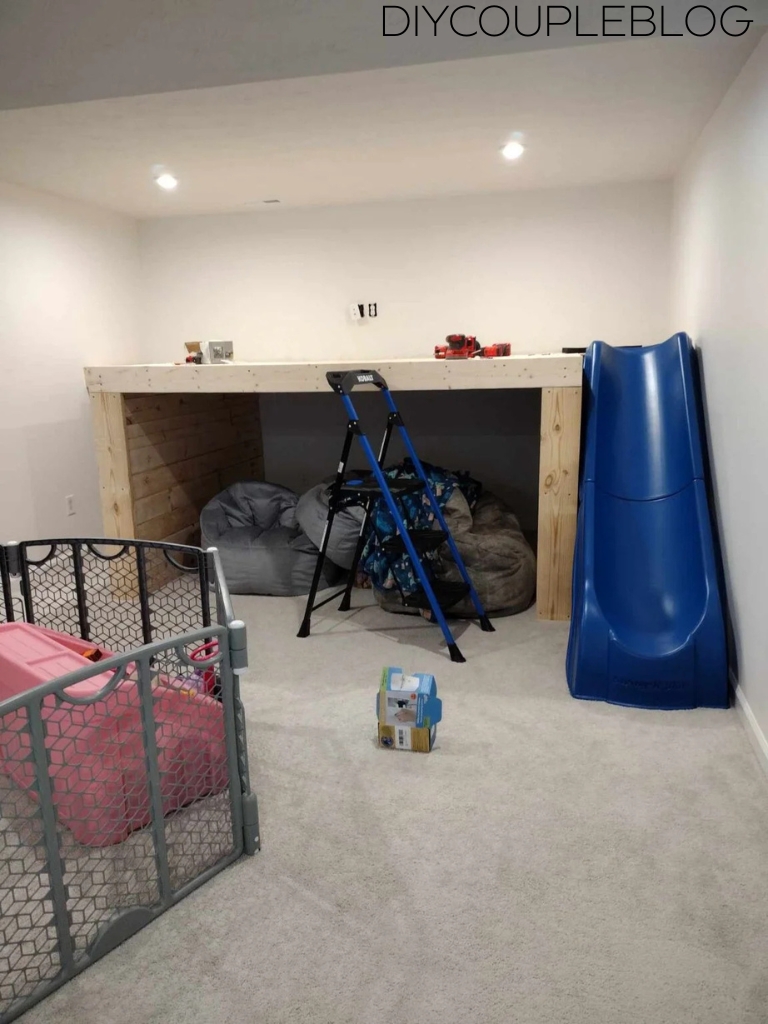
Lately we’ve got around to painting the basement playroom walls and also got the slide attached. The kids just could not wait to test it out.

Simple DIY Indoor Playground Finishing Touches:
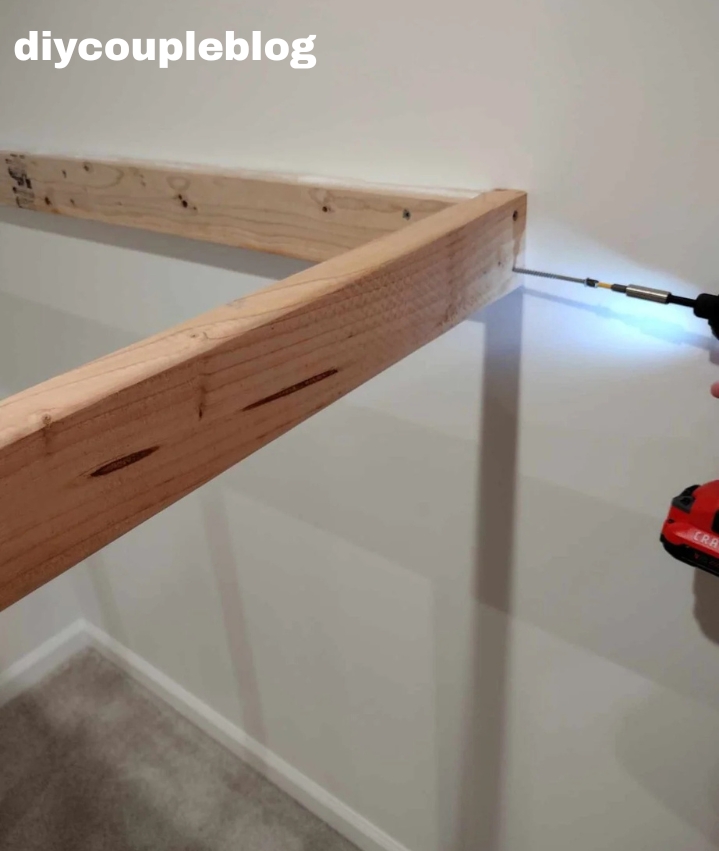
Adding Trim to the Top
We used our 2×6 board to cut trim pieces that will go all the way around the top edge of the platform for a nicer finished look. (Do not go all the way to the front face boards when doing the sides)
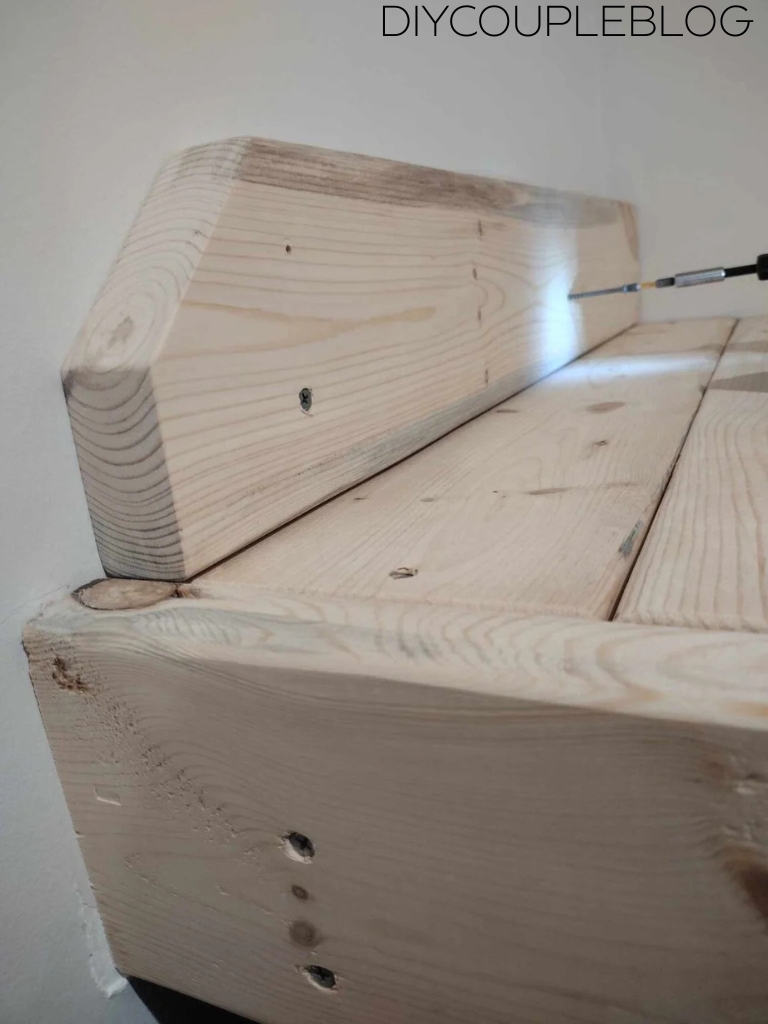
On the two side pieces we cut the front top corner off at a 45 degree angle, down halfway to the center of the board and attached to the wall.
(we used the markings for studs we made in the beginning along with our laser level to make it easier to attach as seen in this photo).
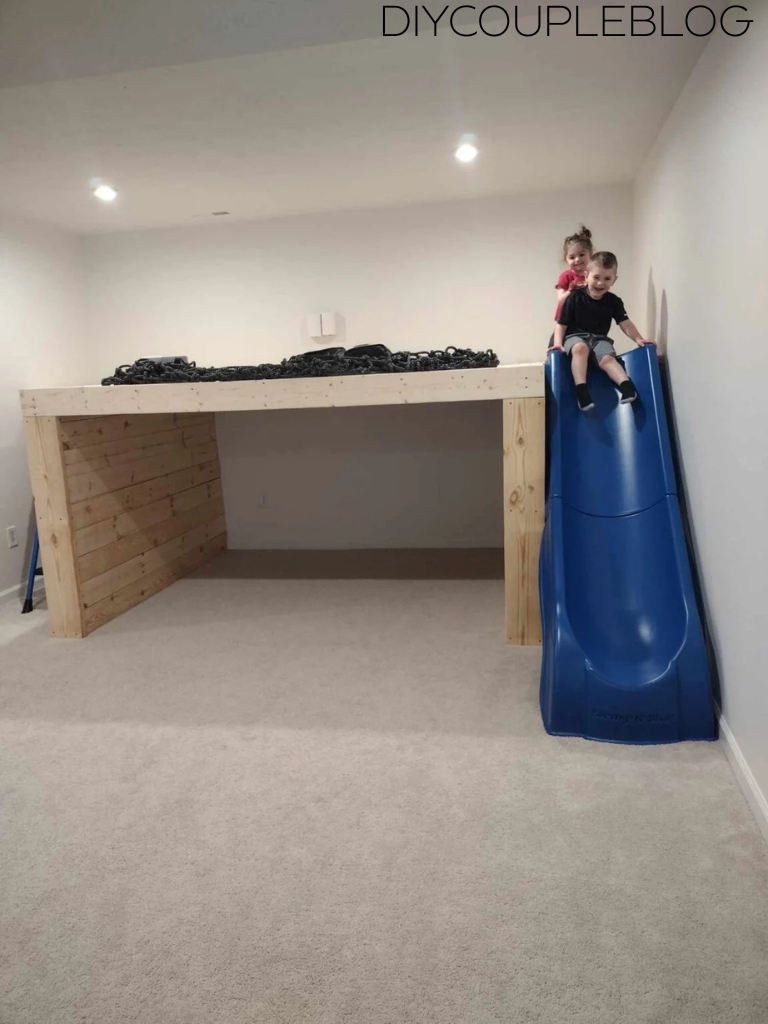
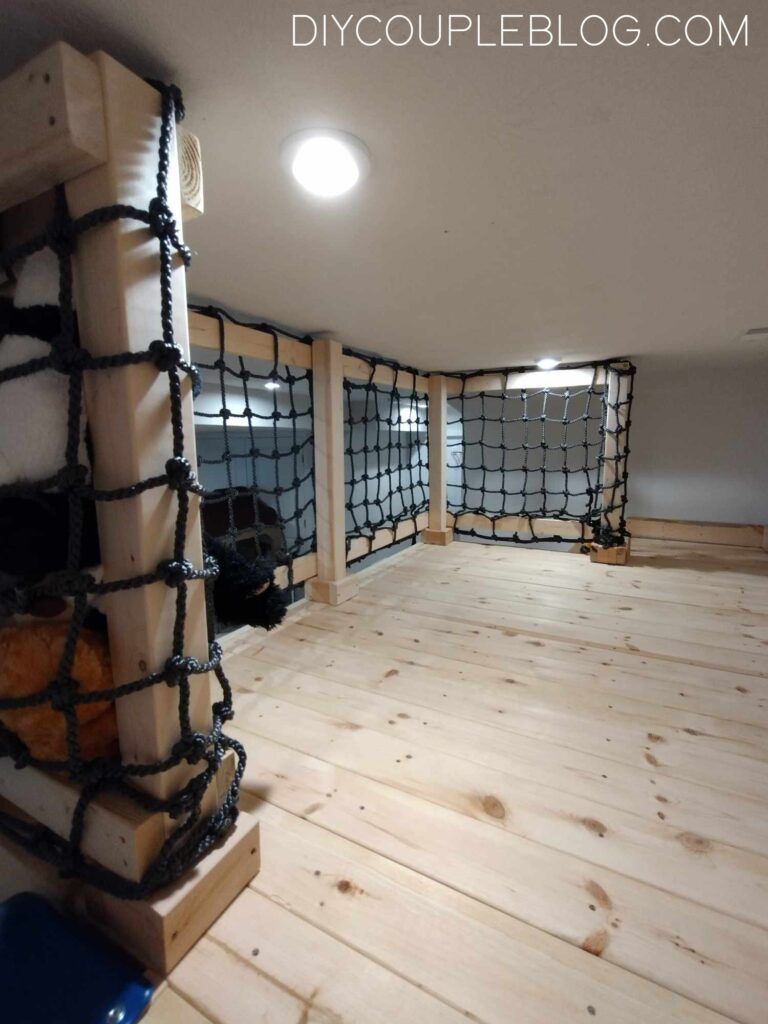
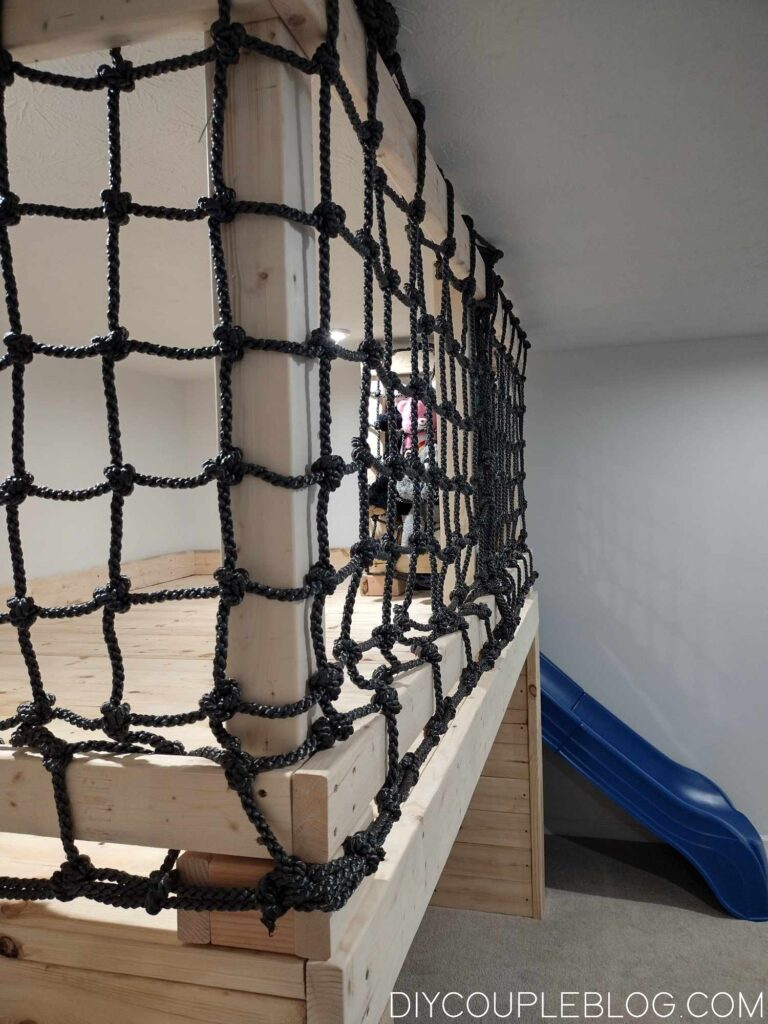
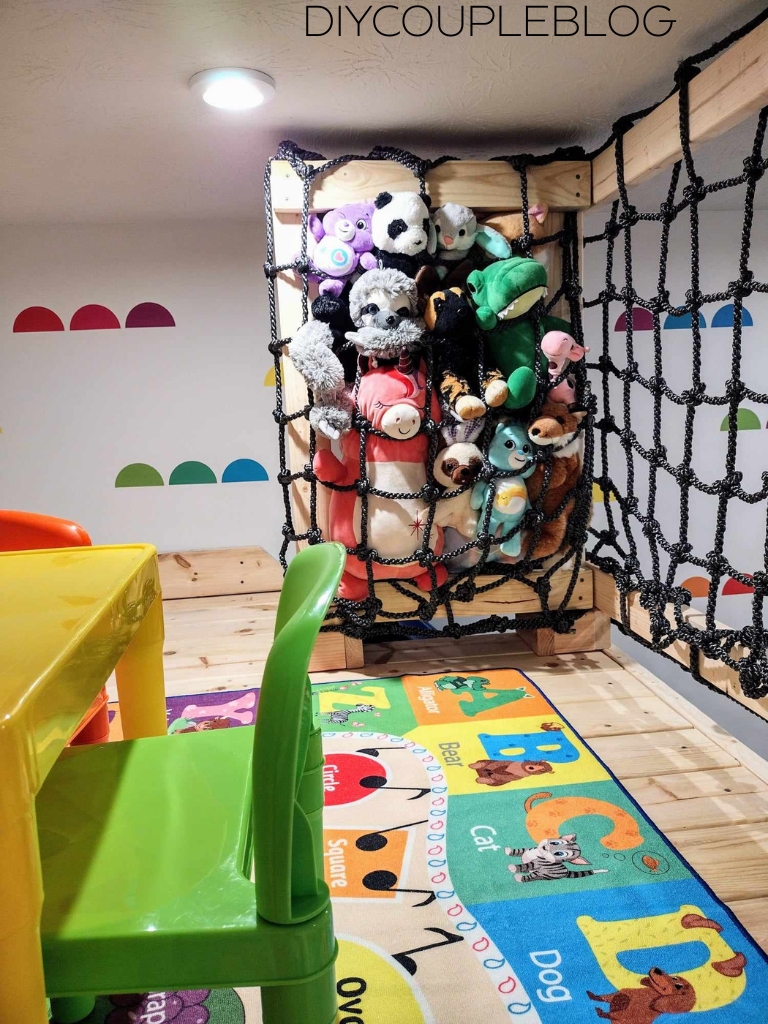
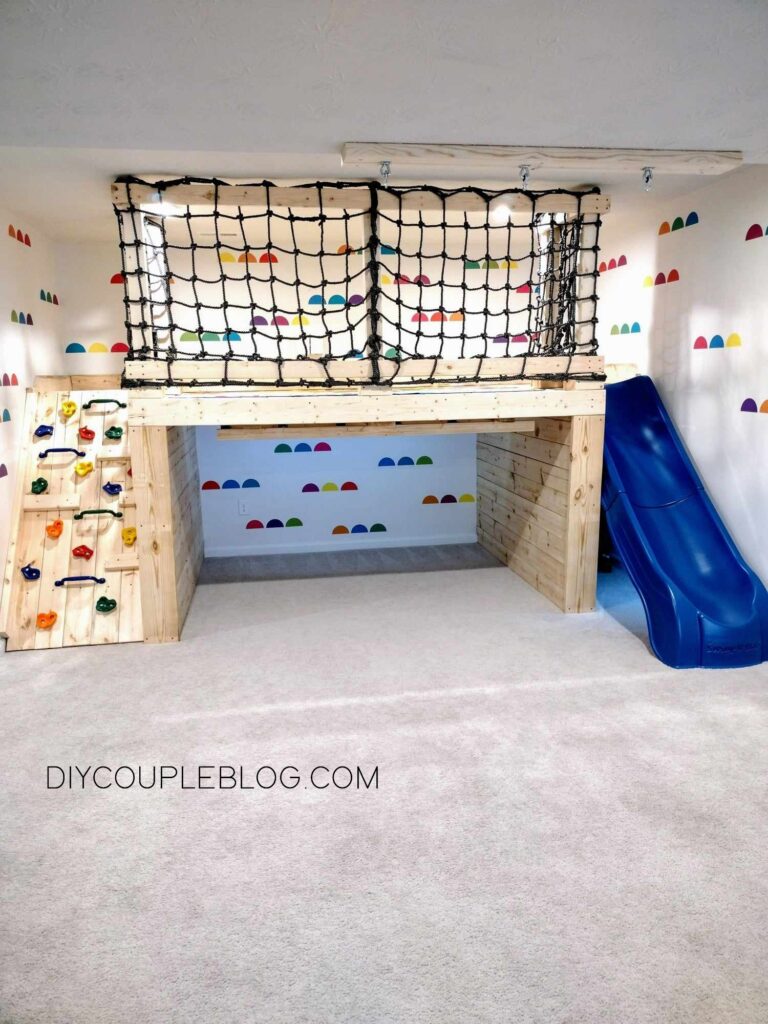
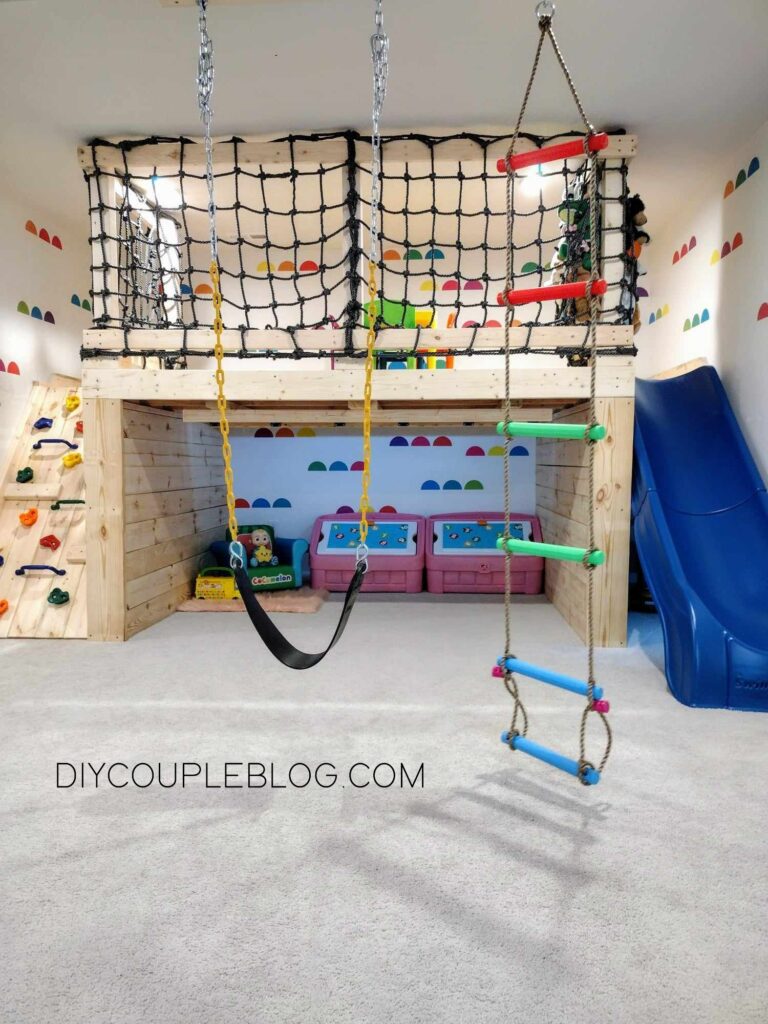
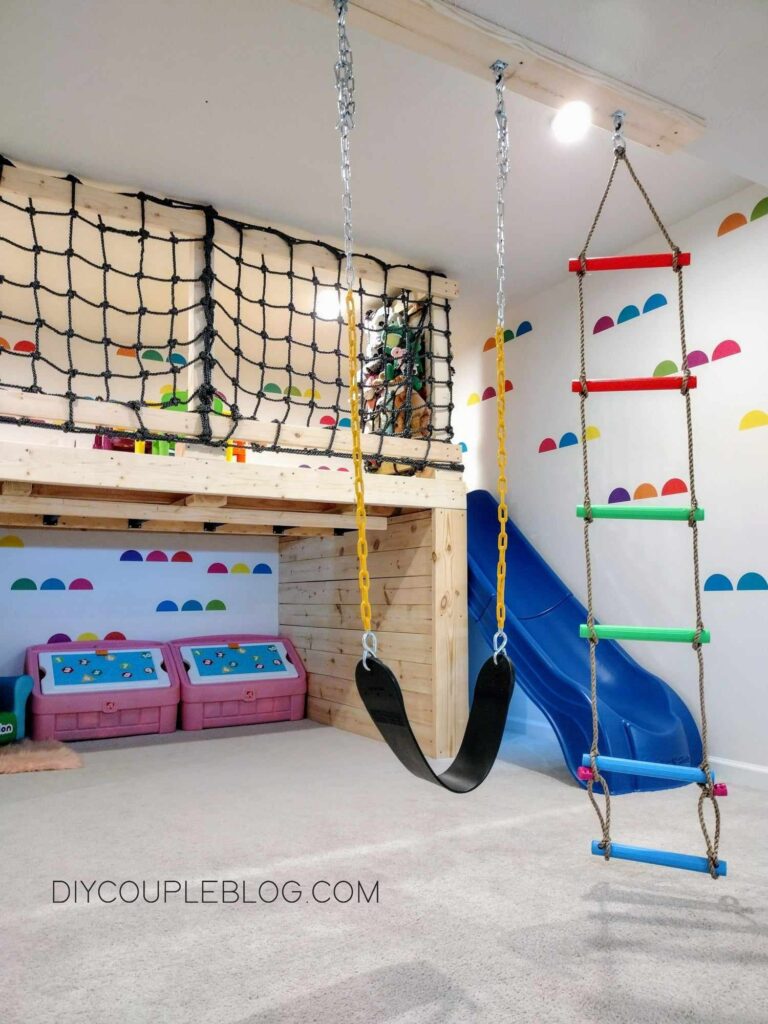
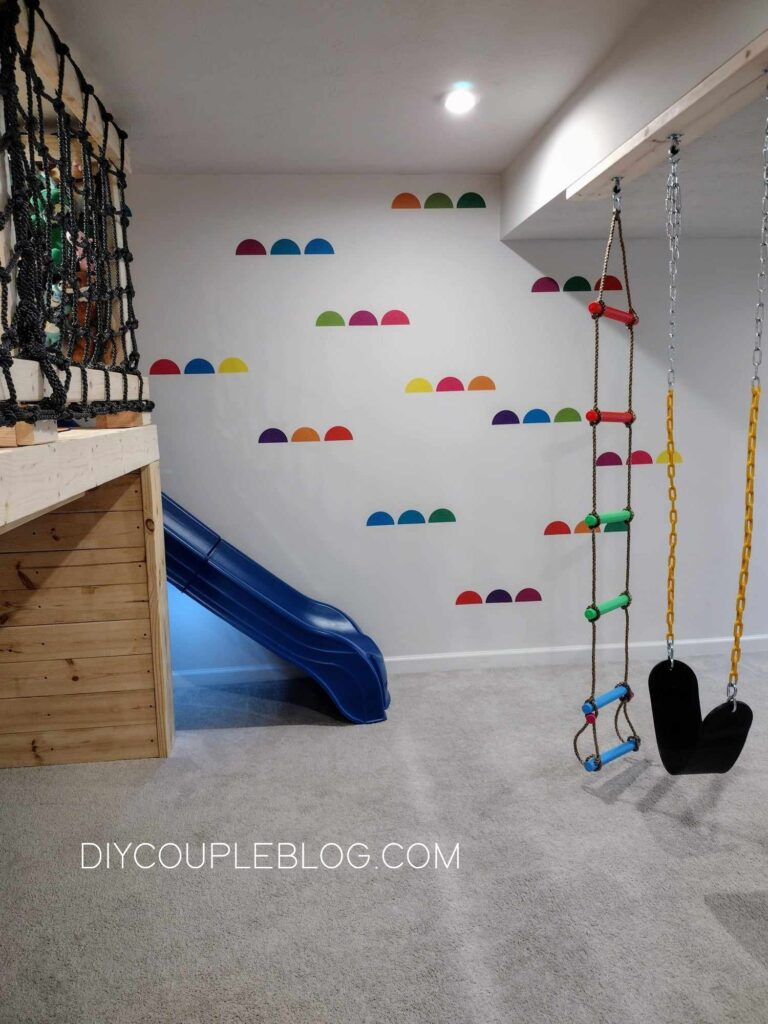
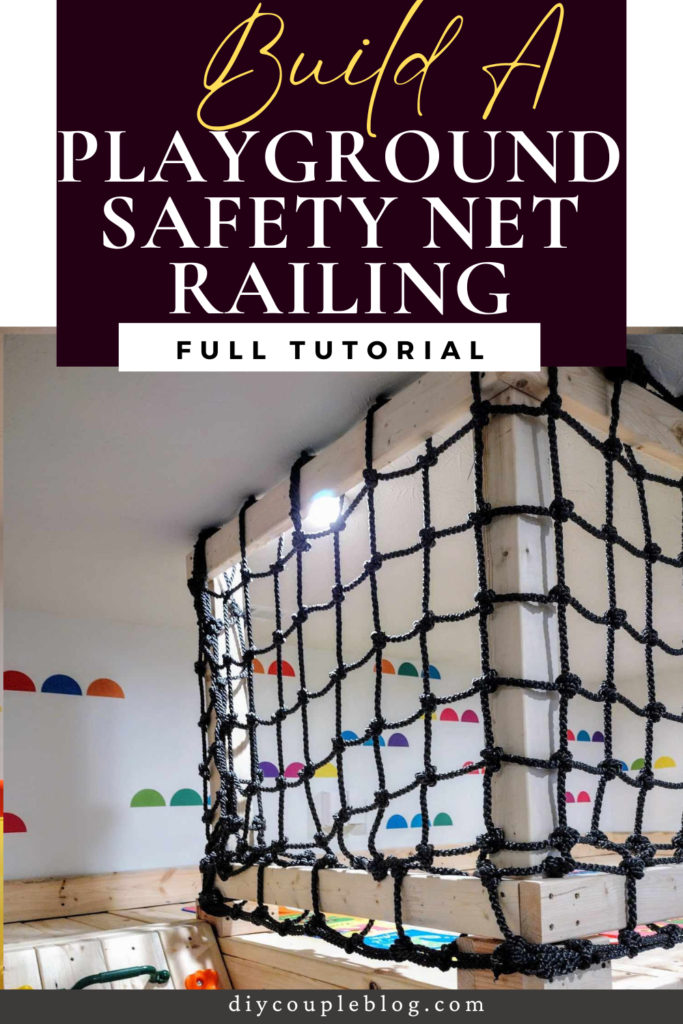
After finishing up the platform, the cargo railing, and the rock wall here is the current state of our indoor playground. The kids absolutely love it. The board and hooks on the ceiling are where our swing and swing ladder will be hanging.
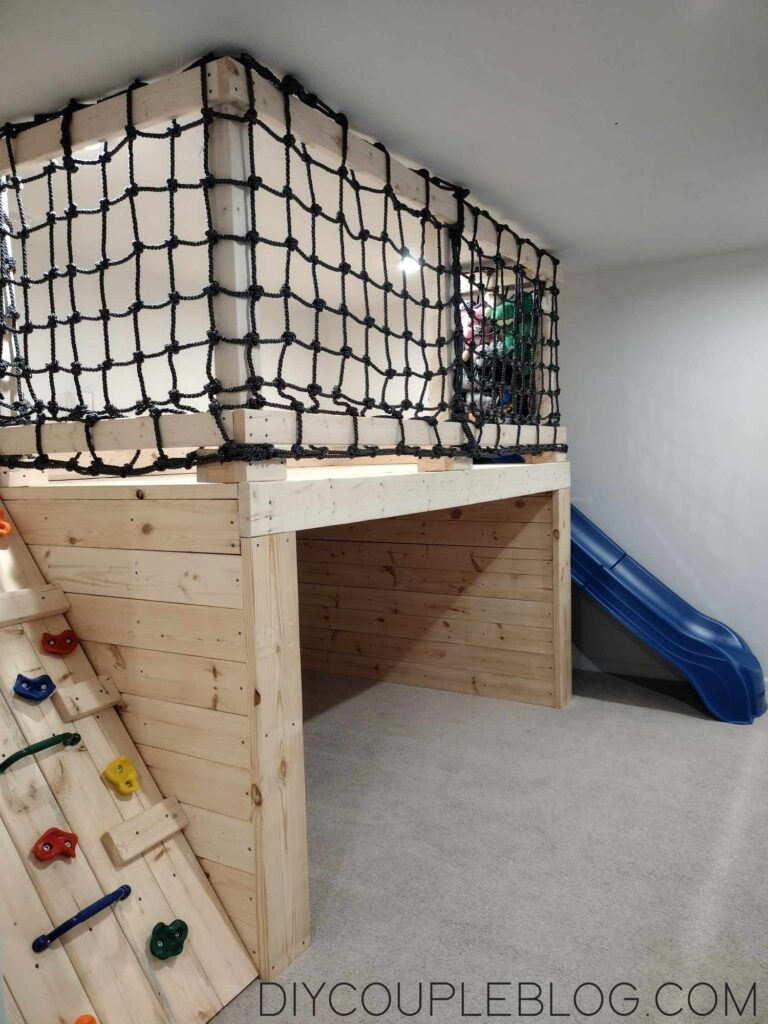
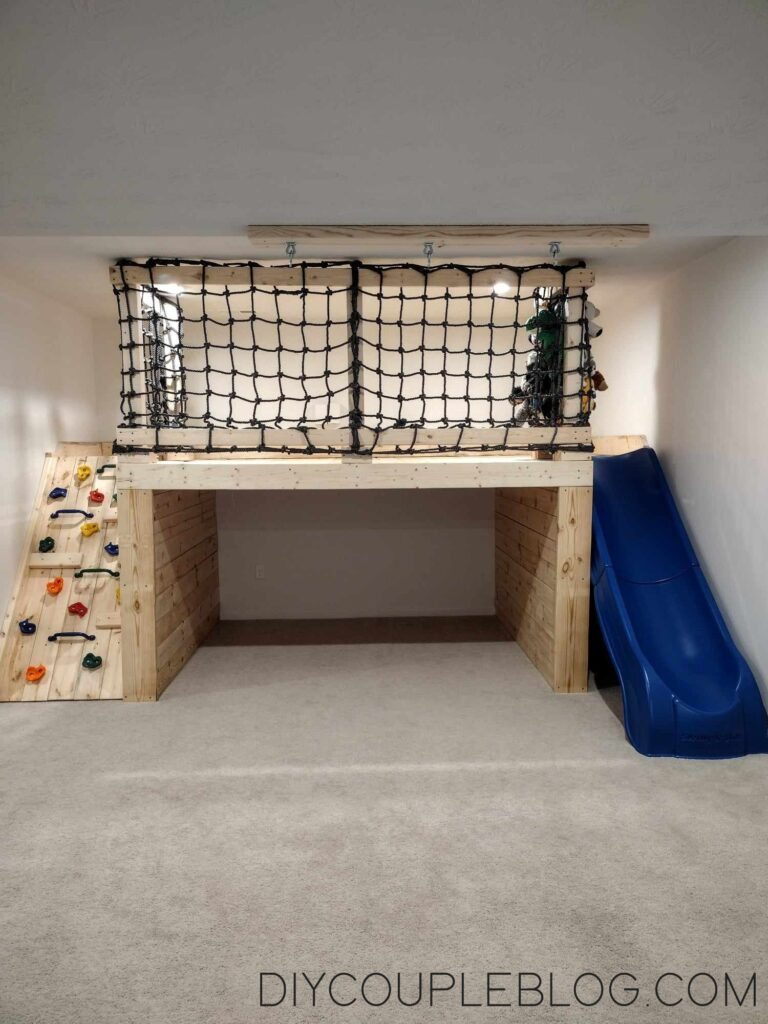
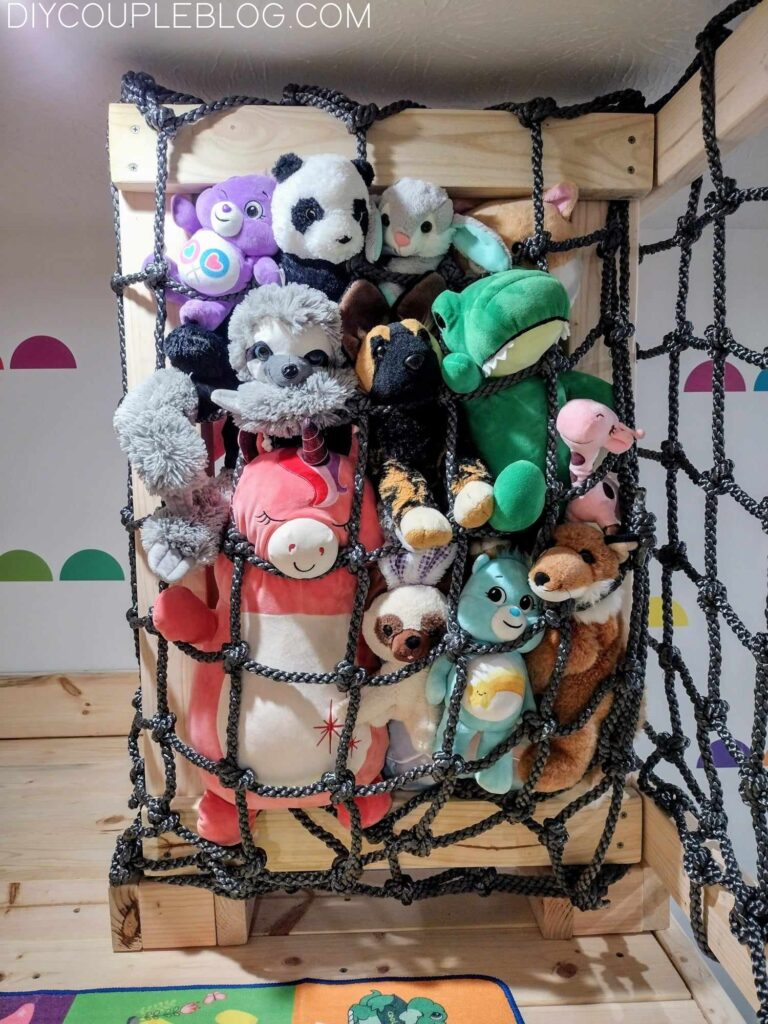
My favorite part is the creative way we added DIY storage for stuffed animals. We made it with the extra cargo netting on the right side. The kids can reach through or pull the side of the net over to get to them and take them out.
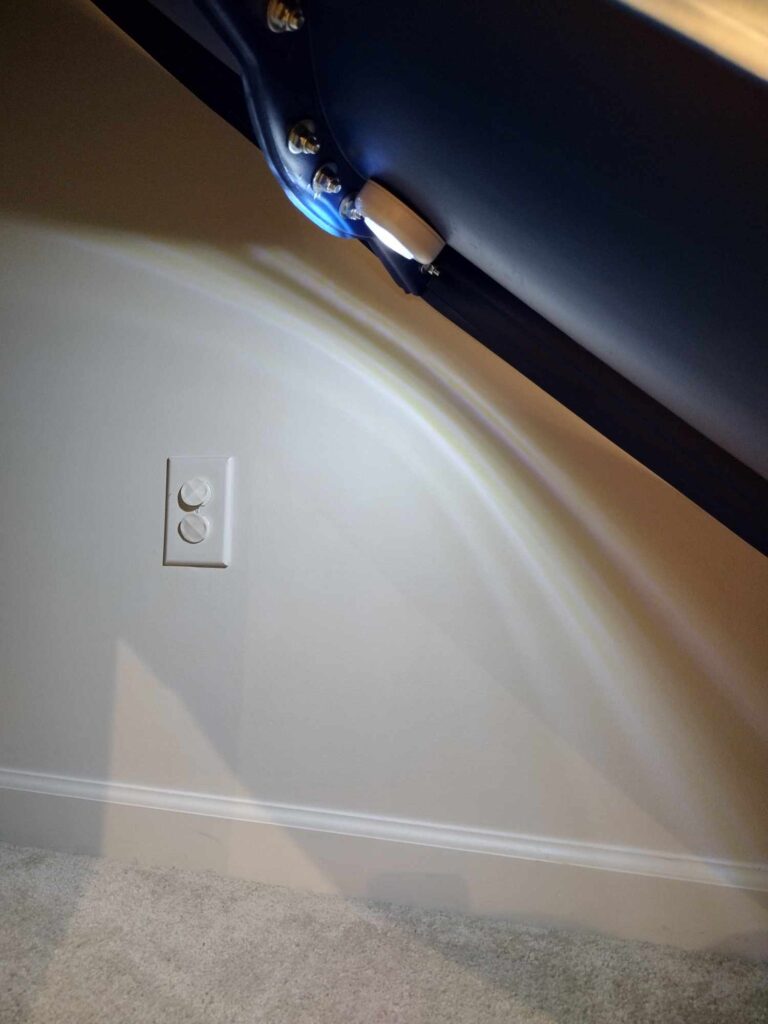
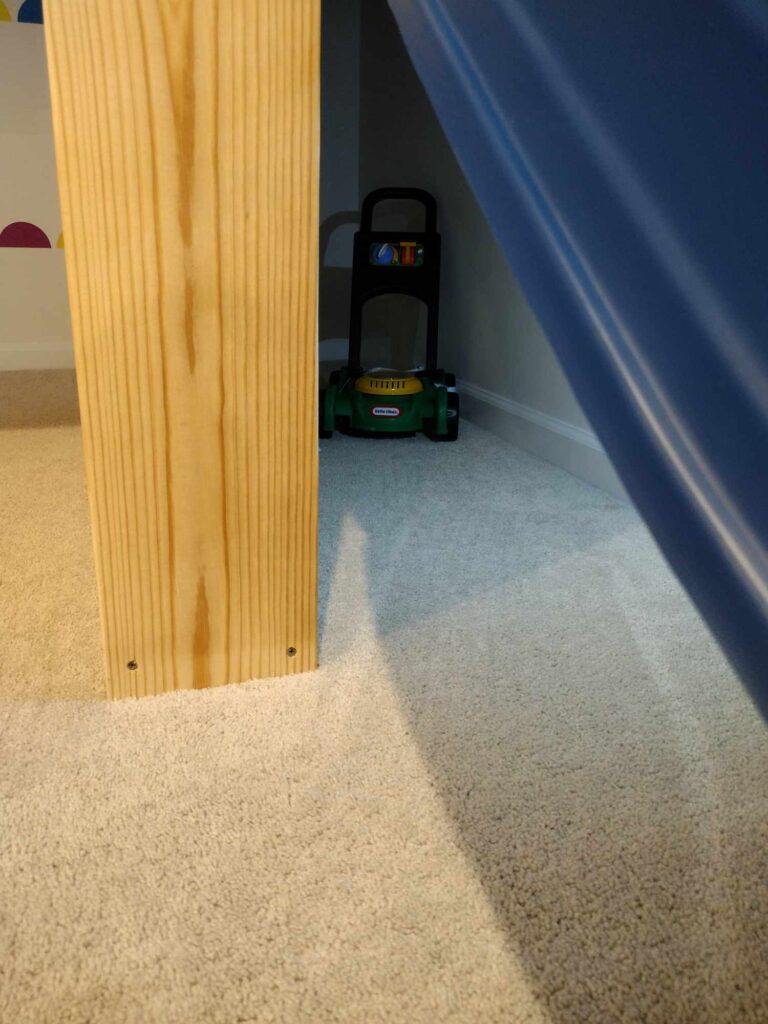
There is also a bit of storage space underneath the slide. We mounted a push puck lights on the back of the slide for lighting.
Our son likes to keep his mower back there.
After starting to add the rainbow wall stickers, it started really looking like a kid’s room for sure. The monkey bars were then attached on the bottom.
Click any of the pictures below to be directed!
Shop our Indoor Playground:
Swing & Swinging ladder / swing hooks
Related Posts
DIY safety net railing for kids playground