This post may contain affiliate links, which means we'll receive a commission if you purchase through our links, at no extra cost to you. Read the full disclaimer here.
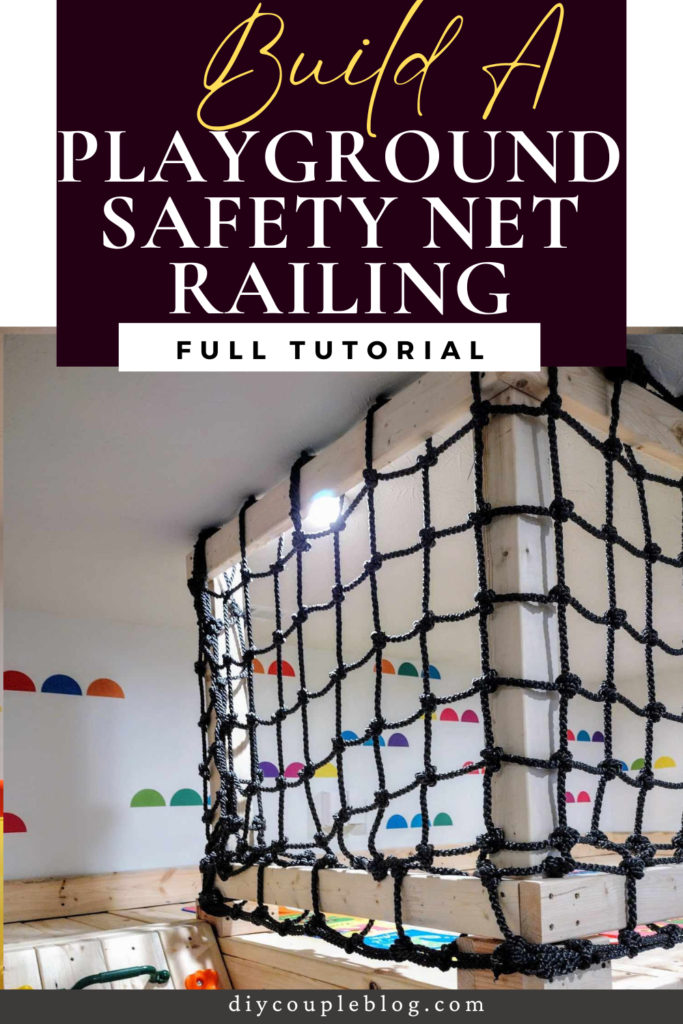
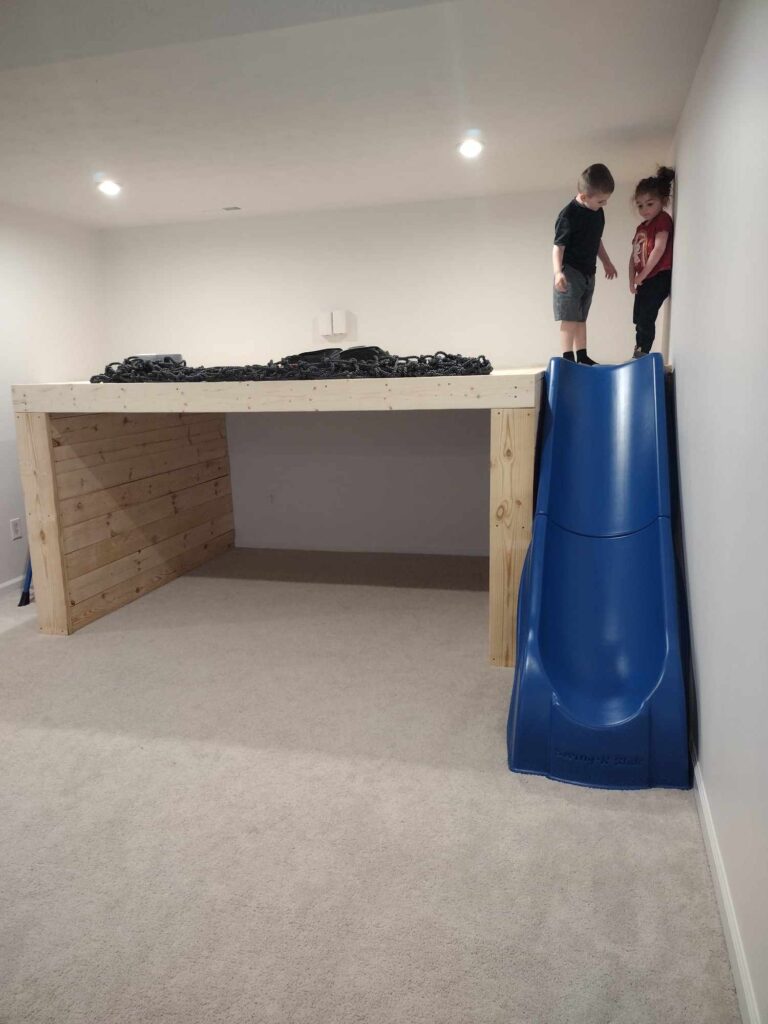
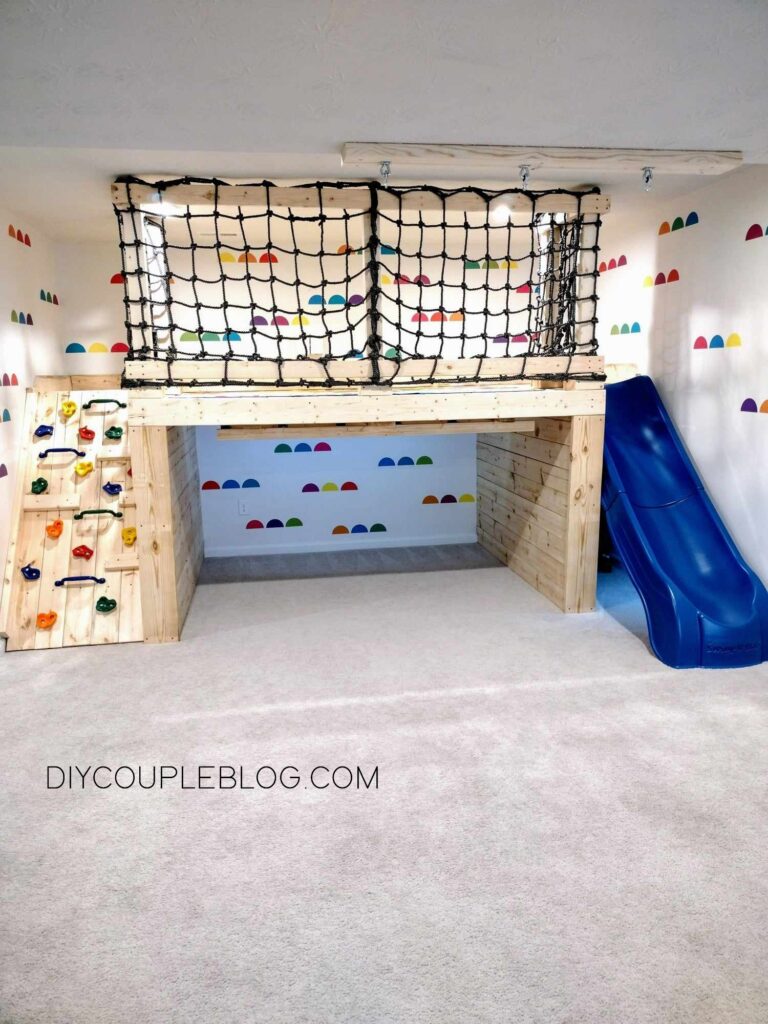
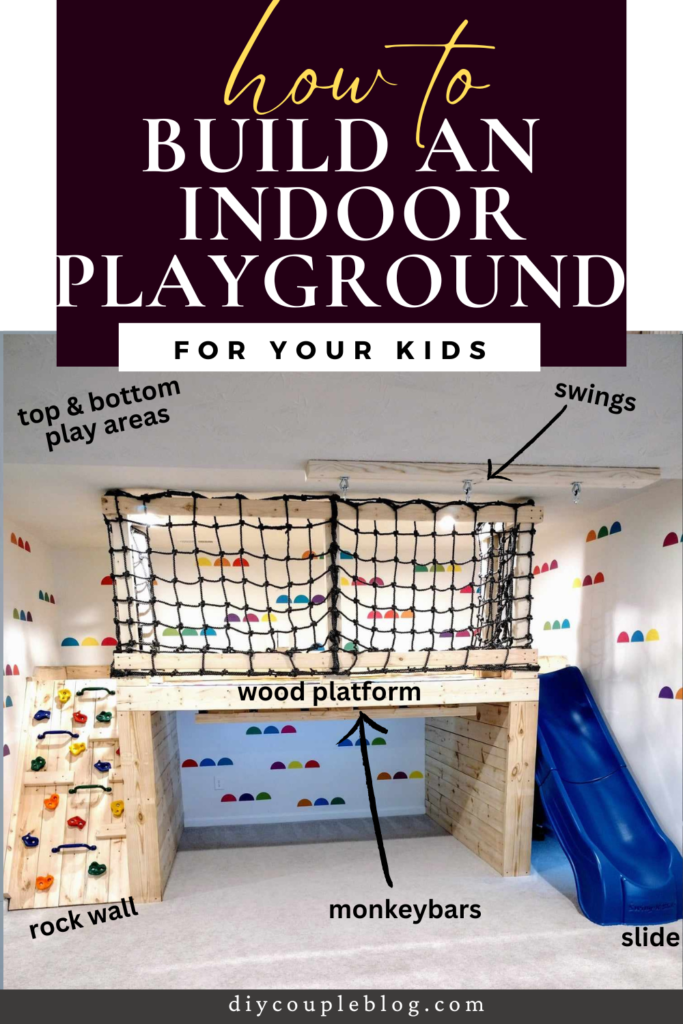
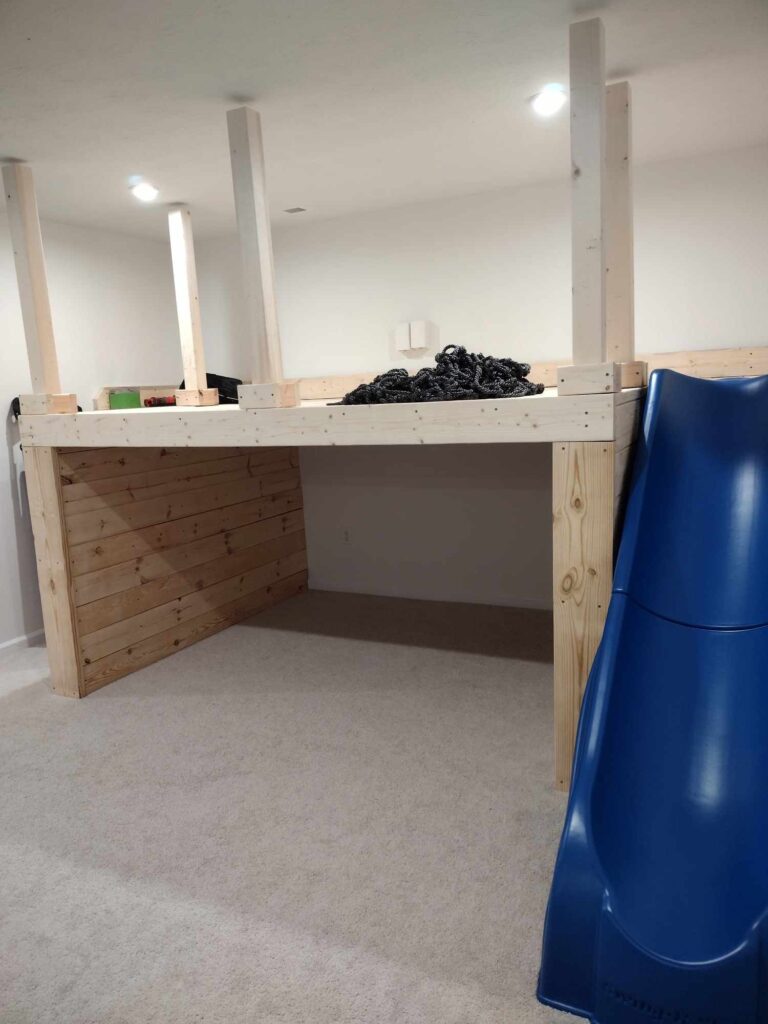
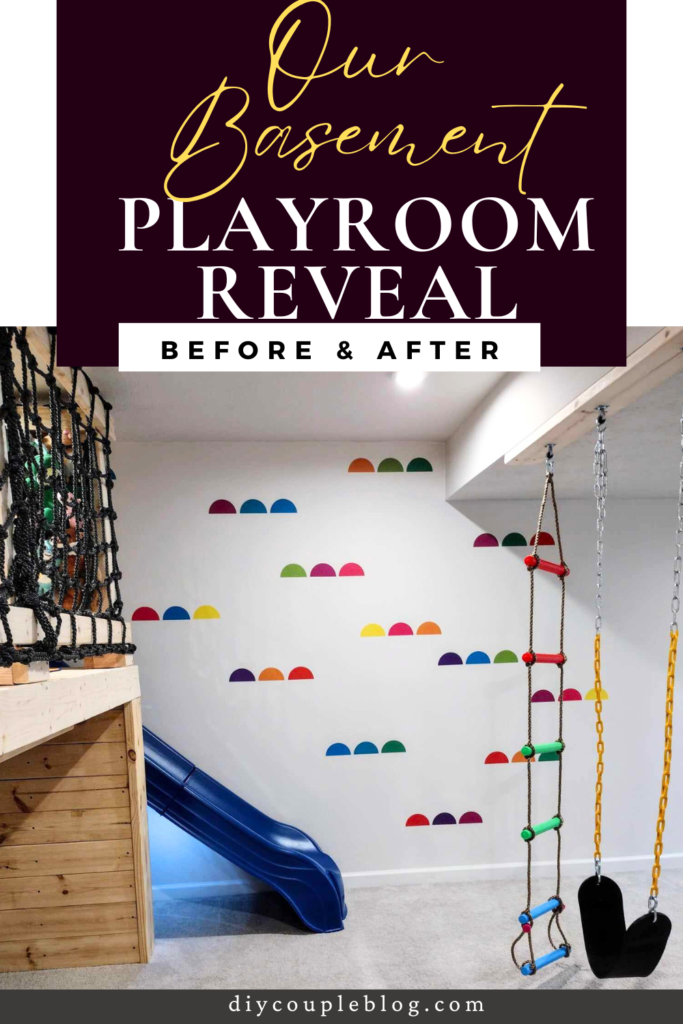
We’re finally onto the next part of building our kids playground! Once we had our indoor playground platform completed along with attaching the slide, and the kids rock climbing wall built, it was time to add something to make it safe so that our kids would not fall off. Here is our step-by-step tutorial for building a fun playground railing using wood and cargo netting.

Our playroom has definitely come a long way since the picture above. If you are looking for kids playground ideas for indoors, I hope ours is an inspiration and can be an easy guide for how you can make it!
PIN IT FOR LATER!

Kids Playground:
How to Build a Safety Playground Railing (with bonus storage)
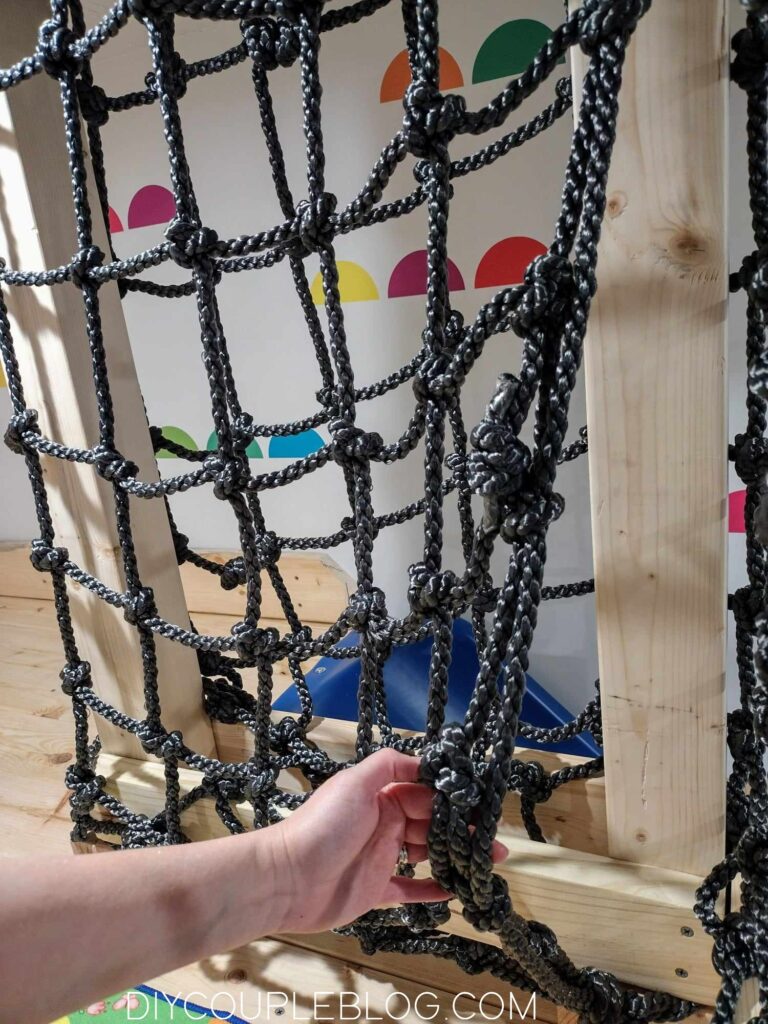
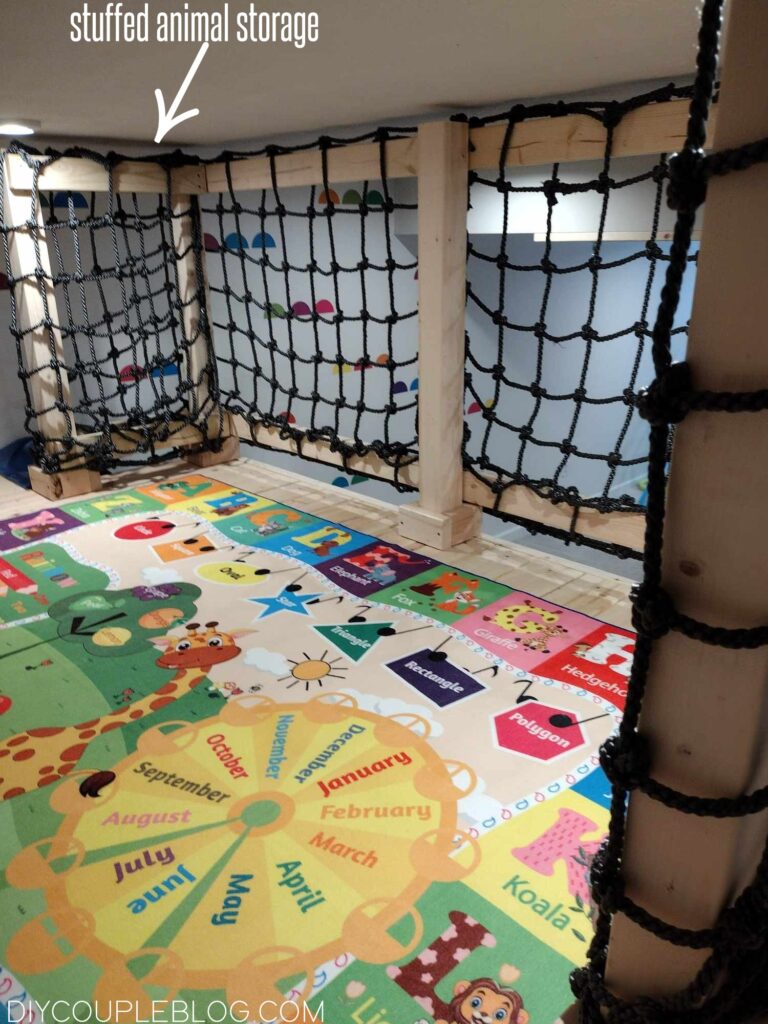
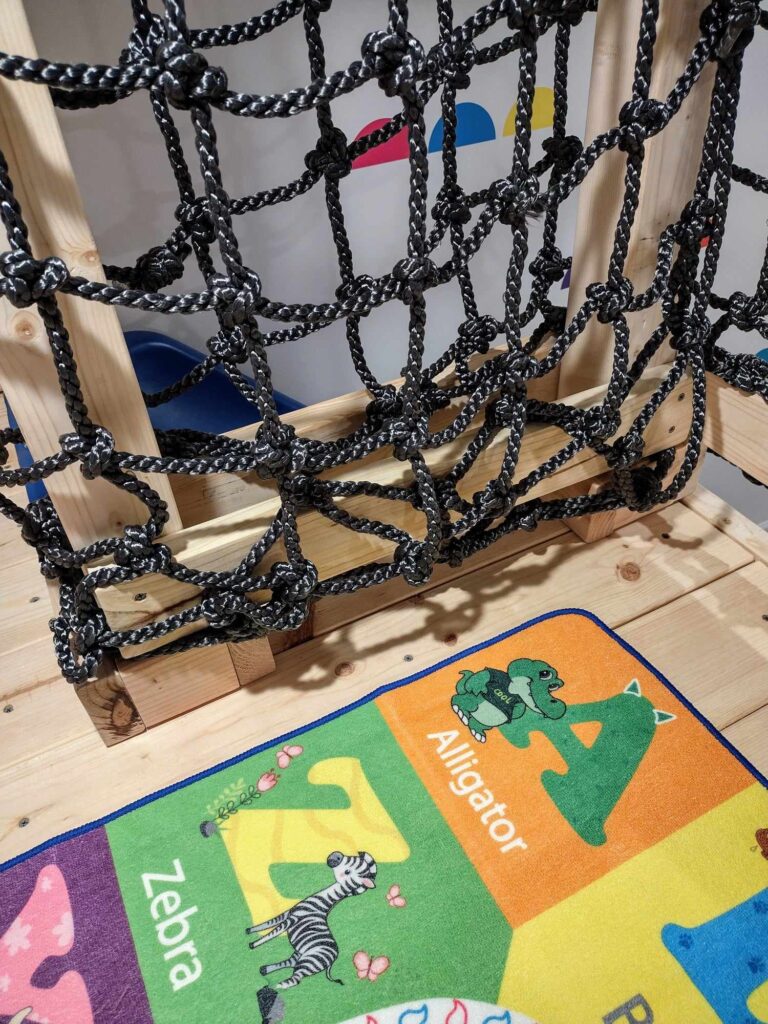
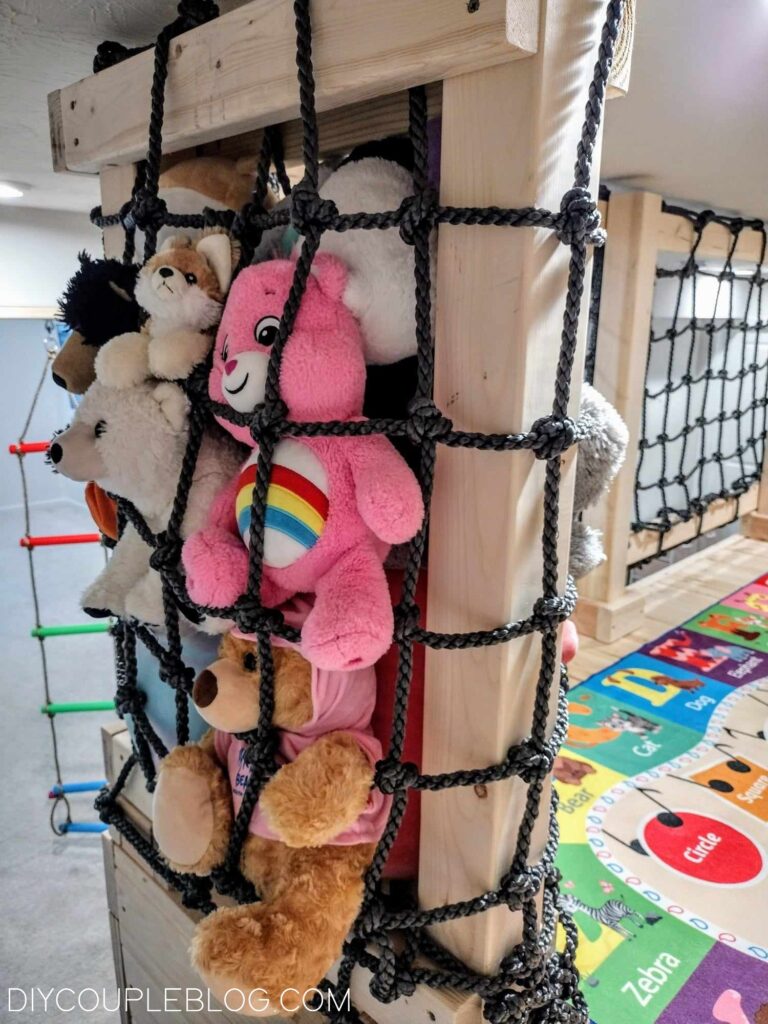
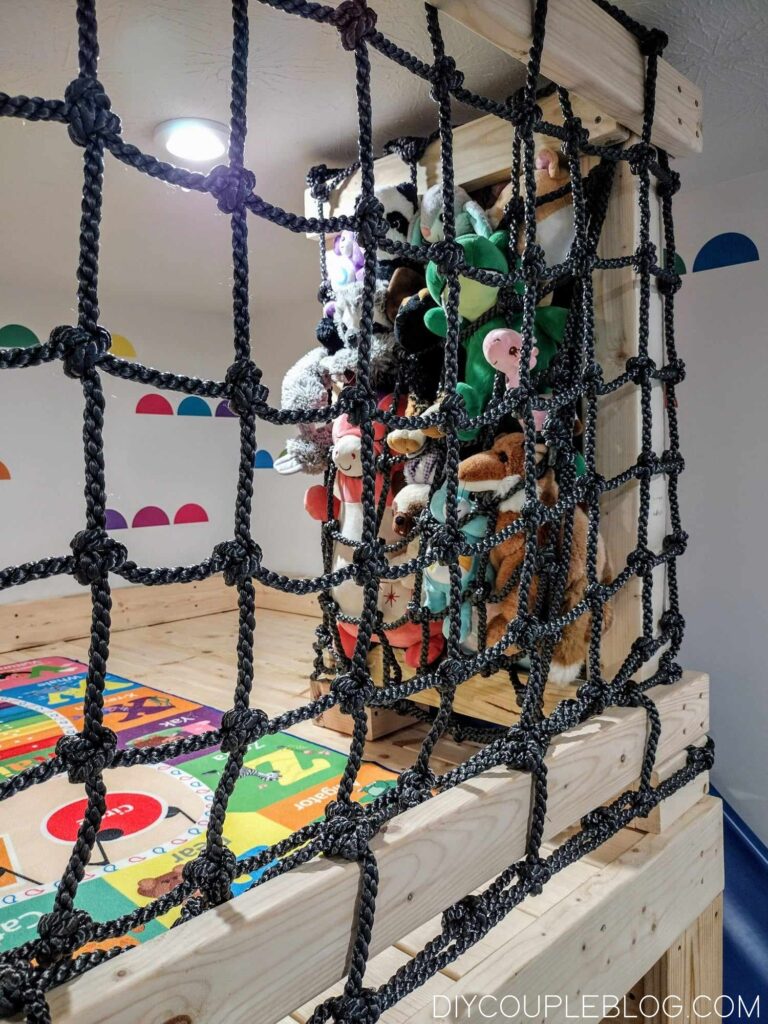
One bonus about our railing we love is adding DIY stuffed animal storage! Our kids have way too many! Your kids too? We got creative with our extra slack of cargo netting on one end and made it a custom storage space.
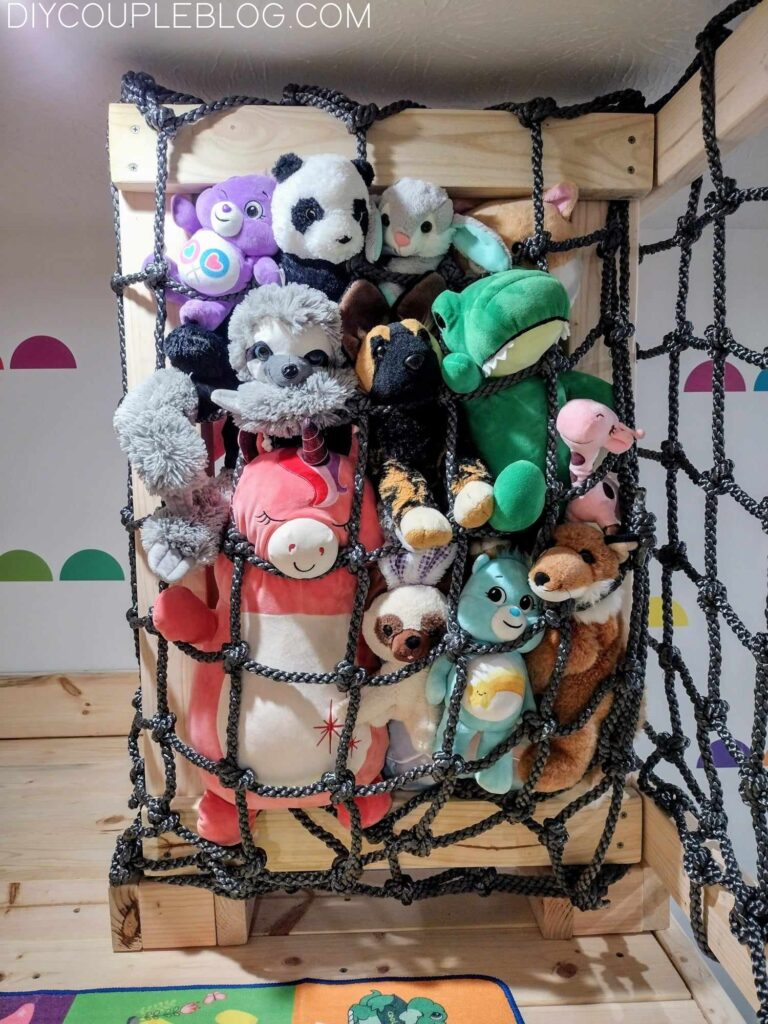
The side is available for kids to pull out their stuffed animals or they can also pull them through the cargo net squares. It turned out so cute!
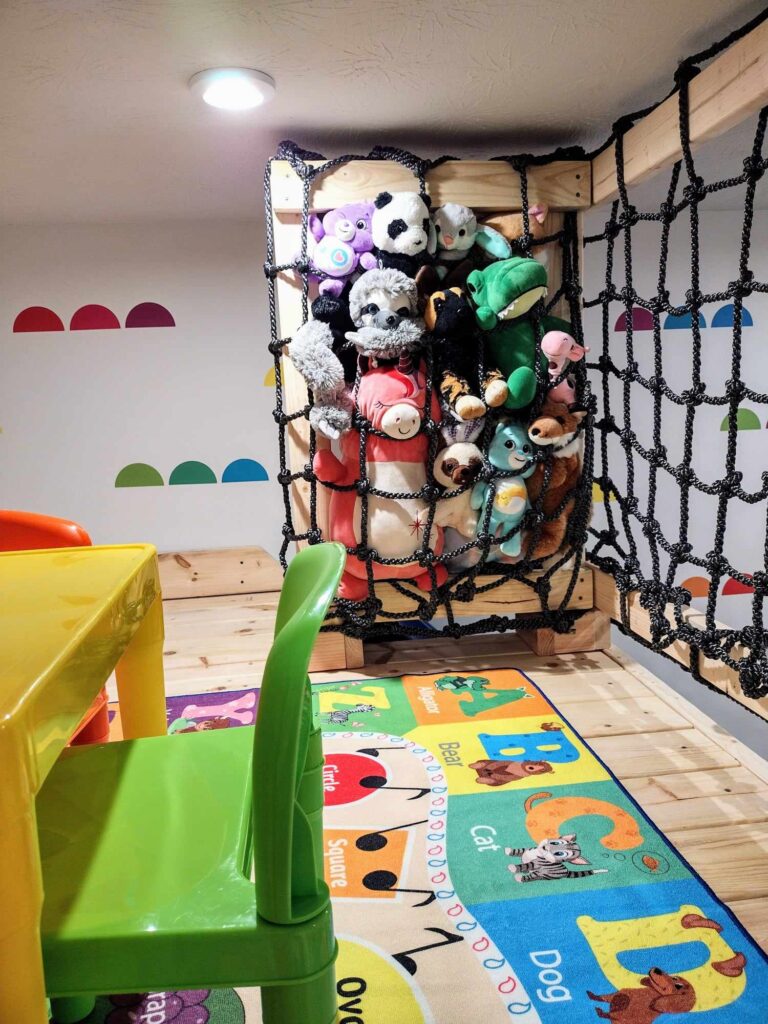
Here is what is looks like from inside the top platform.

Supplies for Kids Indoor Playground Rail:
(2) Cargo nets
Marker
(3) 4×4 wood posts
(2) 2x4x10 lumber
(2) 2x4x8 studs
3.5 inch screws (we used leftover exterior screws we already had on hand to save $)
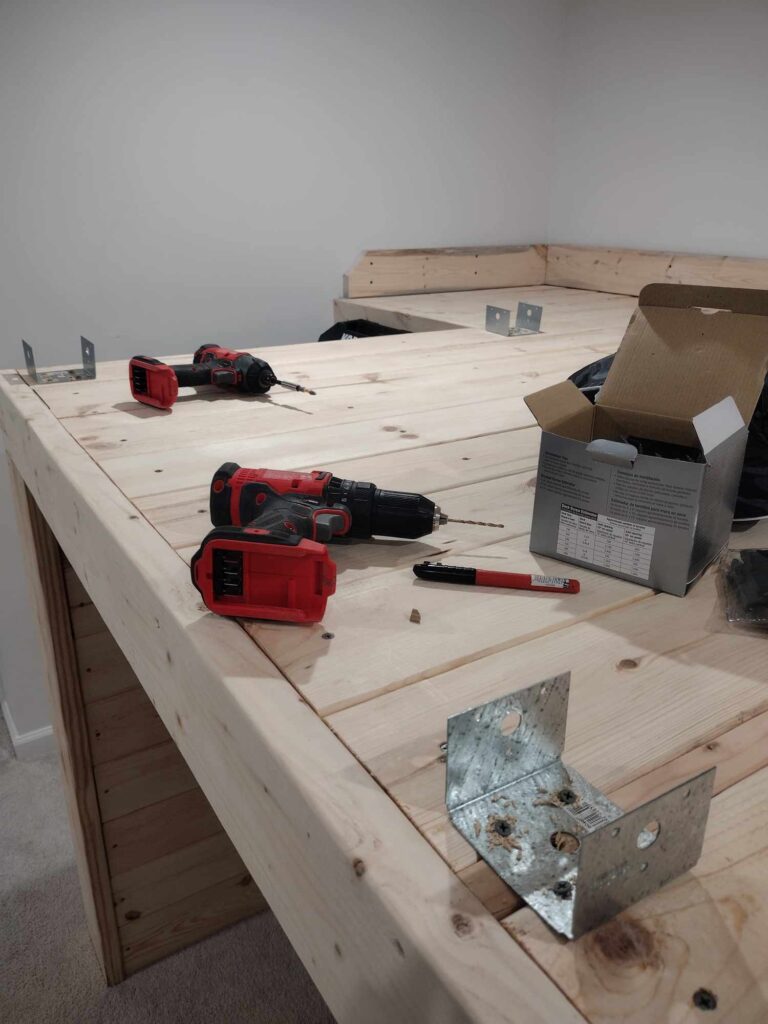
Tools Required to Build Our Playground Safety Net:
One thing to note, we did sand all of our wood boards prior to installing which made it way easier.
Installing Posts:
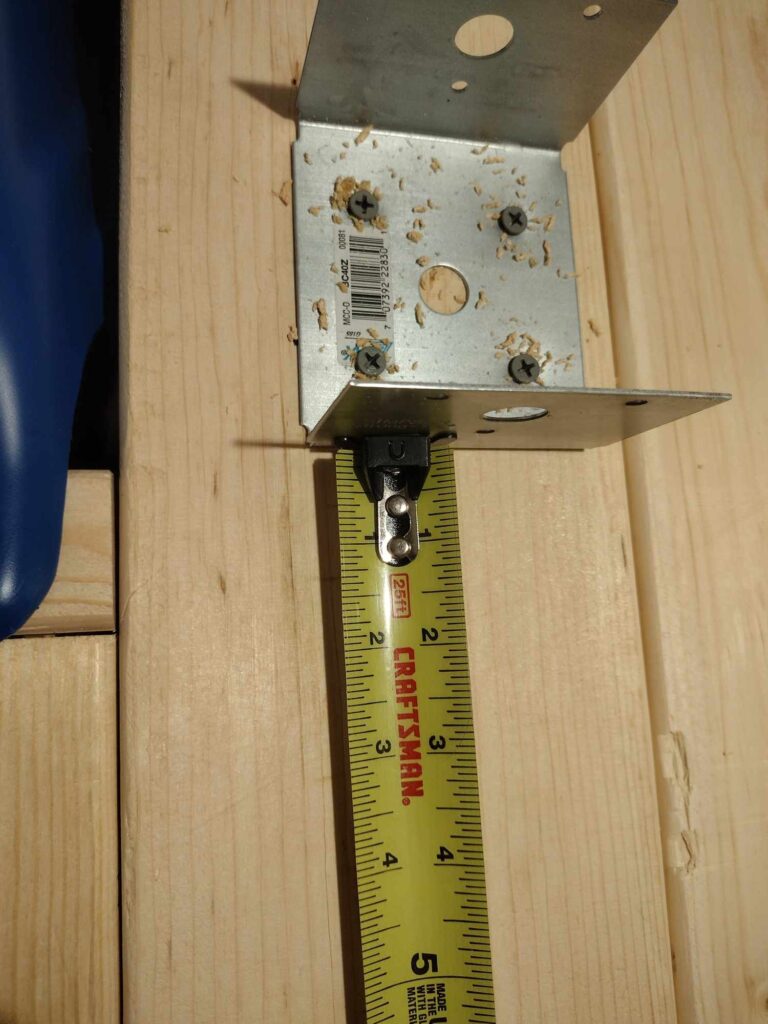
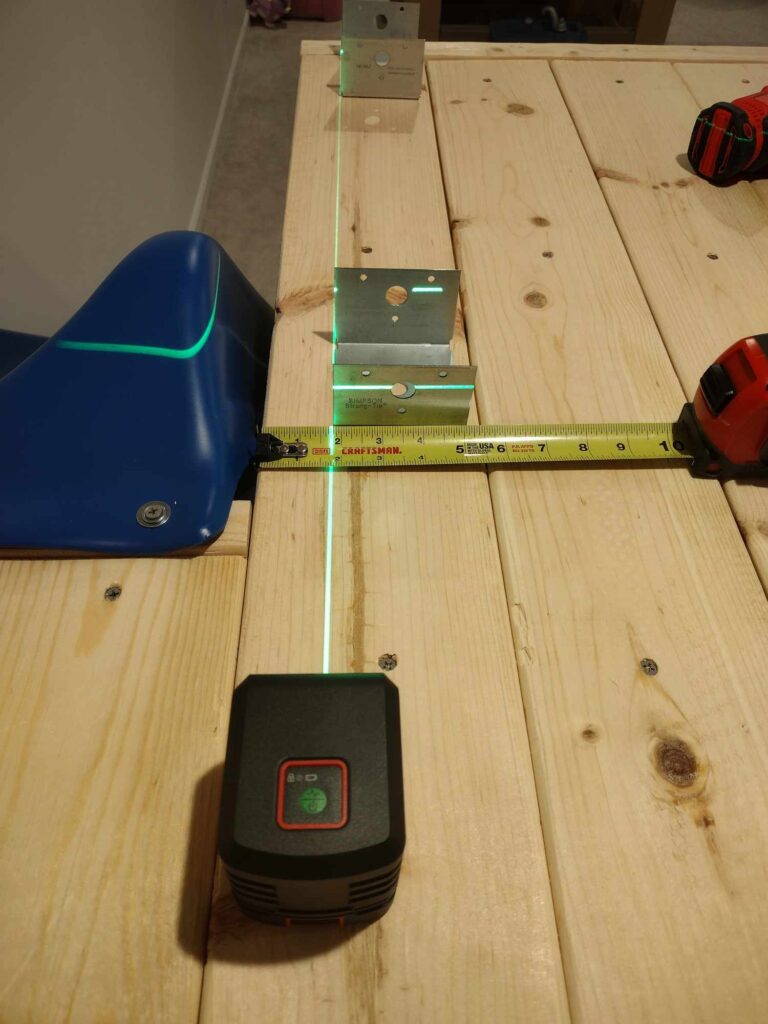
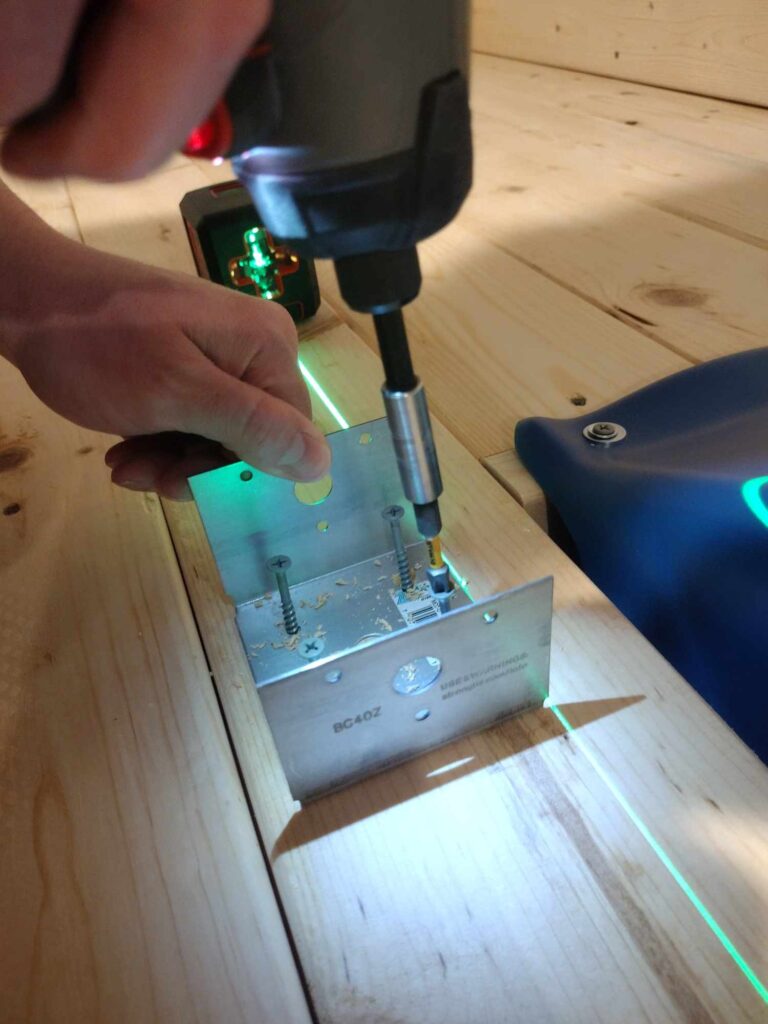
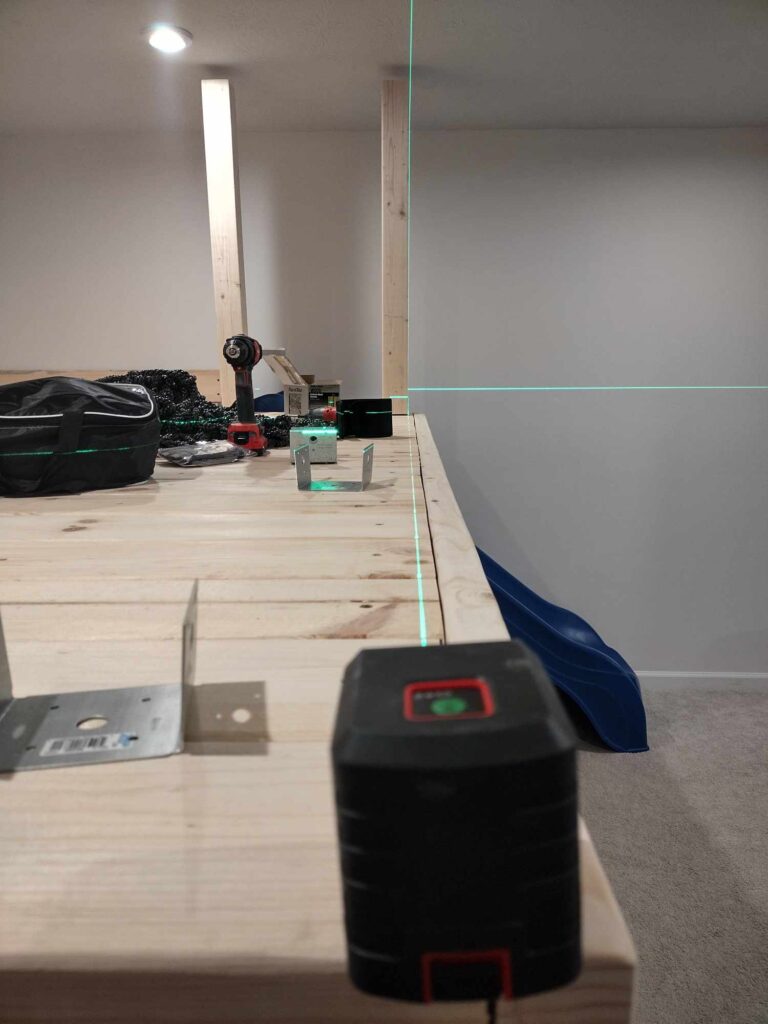
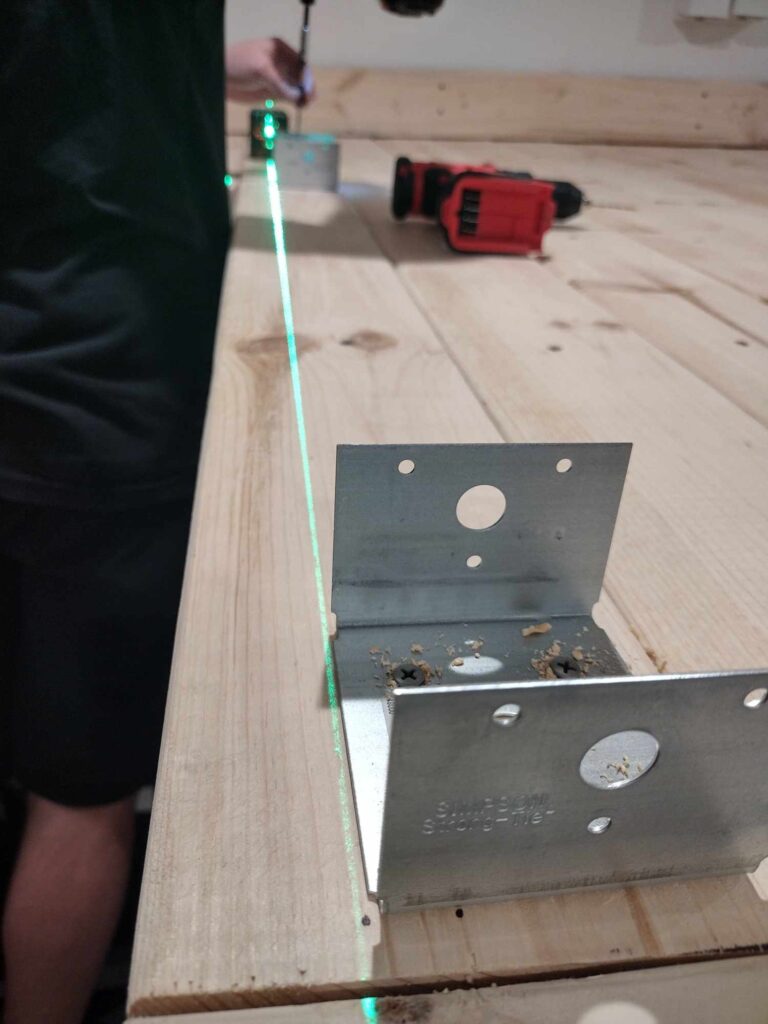
You’ll first need to use a laser level to mount the brackets to the playground platform.
Using a tape measure, mark 1 3\4 from the edge of the board (slide side of our platform), where you plan to mount your posts.
Then use a laser level to line it up on the two marks that you made.
Once you get your line set, go ahead and mount the post base brackets using 2 inch screws. You’re going to want to drill pilot holes with a 1\8 inch drill bit, then attach.
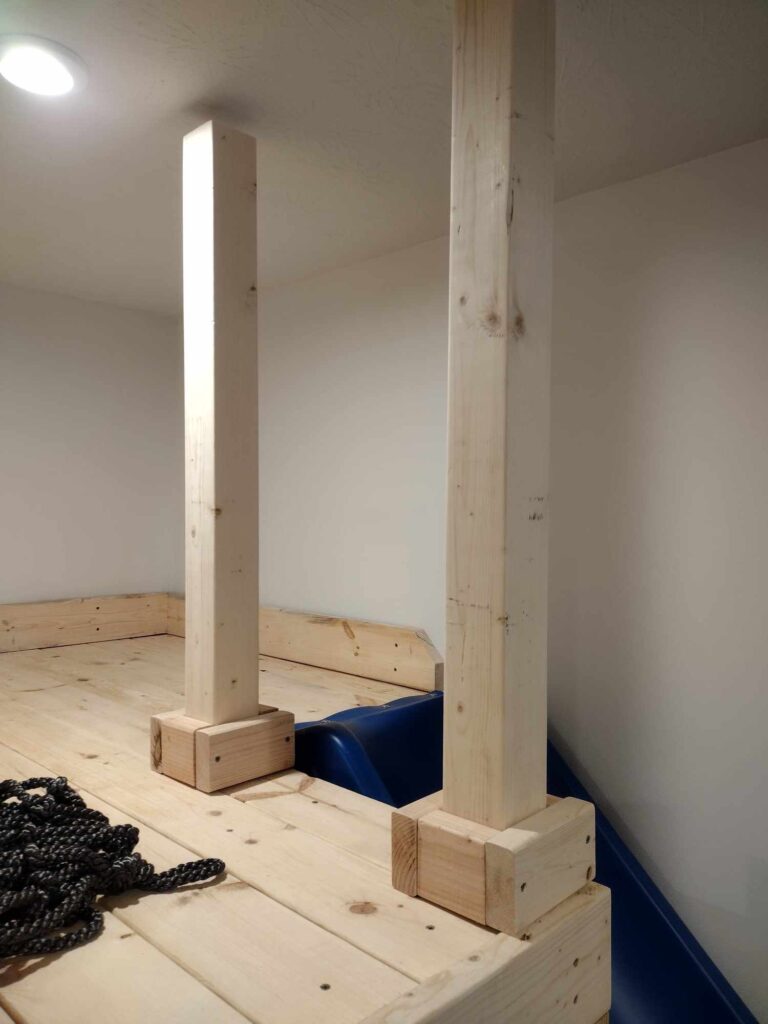
Measure and cut the posts from the platform to the ceiling. You’ll subtract roughly two inches from your measurement.
If you are building our indoor playground, when you set this first post next to the slide, put the bracket lined up with the front face board under the slide.
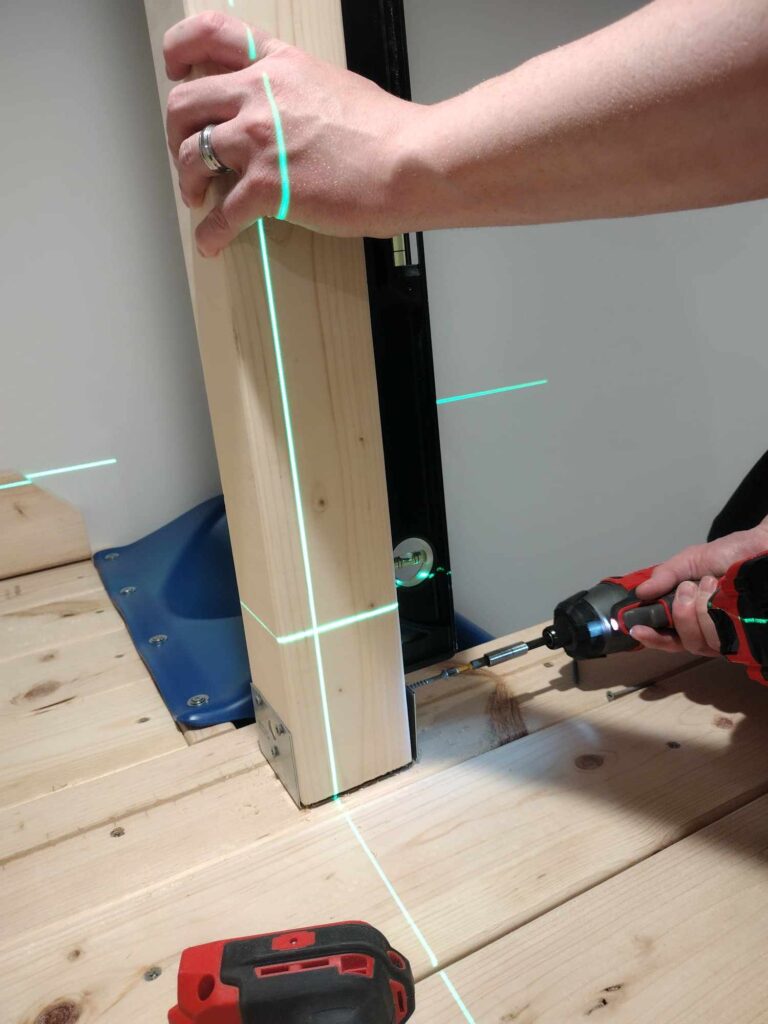
Set the laser level up to go across the platform using the same method as the first two you screwed down.
Repeat this step one more time for the last side. The front of your bracket should be 2 3\16 from your front face board.
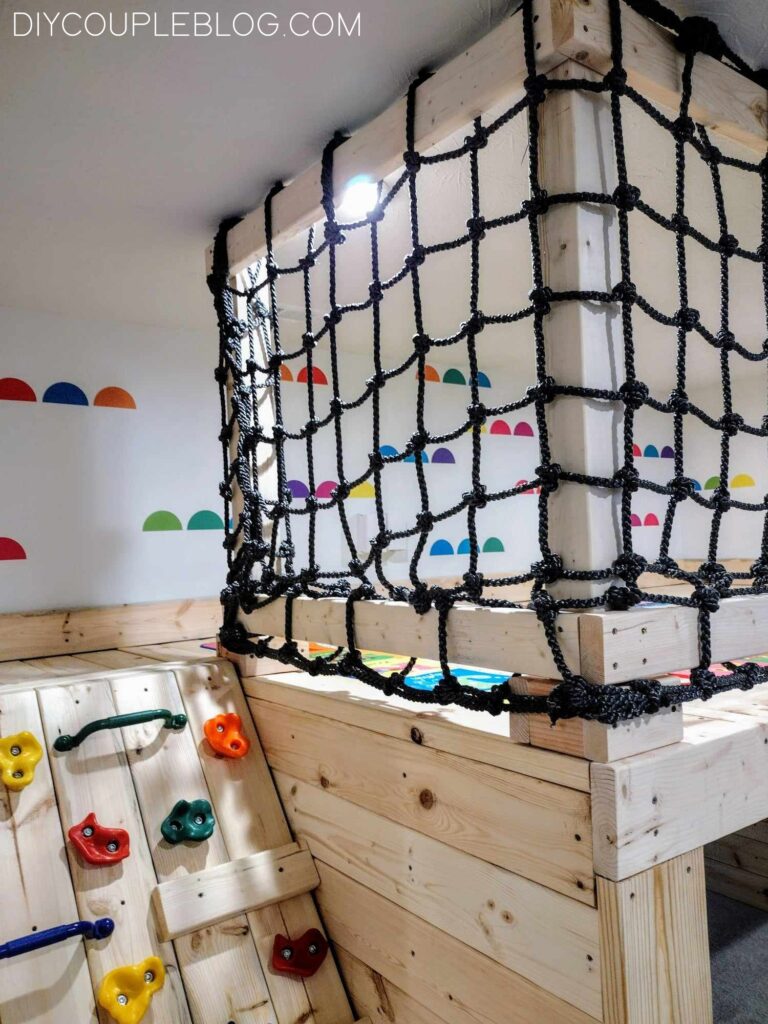
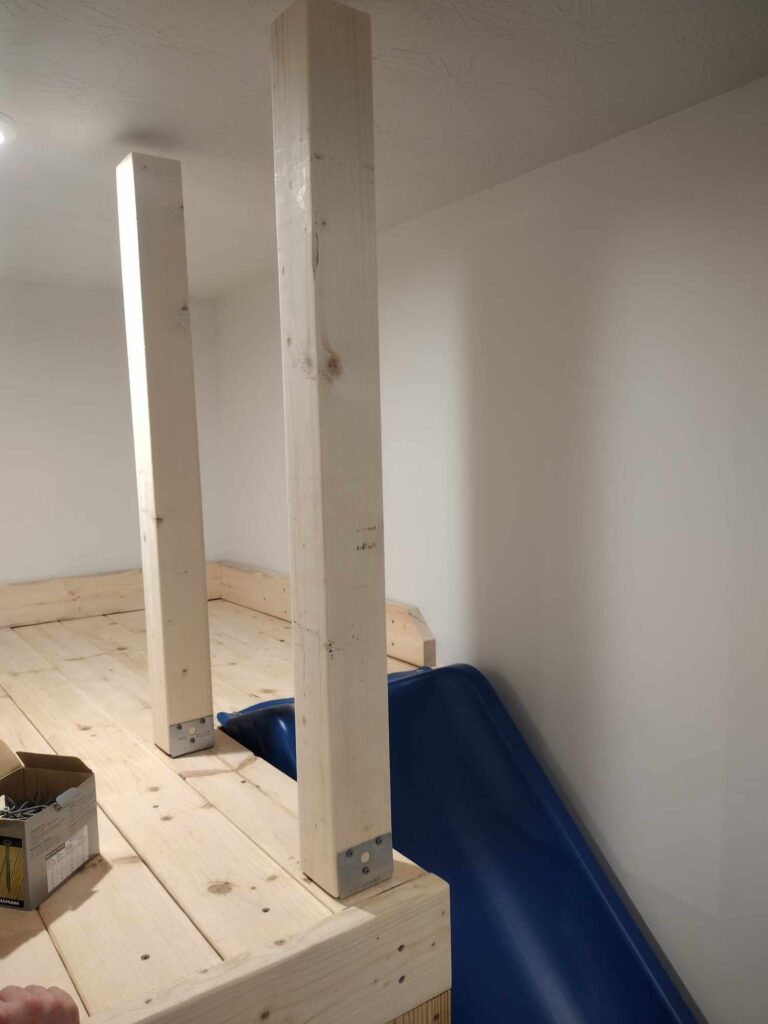
Once you get the post set, you’re going to trim out the base of the posts with 2×4’s. Sqaure up the pieces and screw them together with 3.5 inch screws.
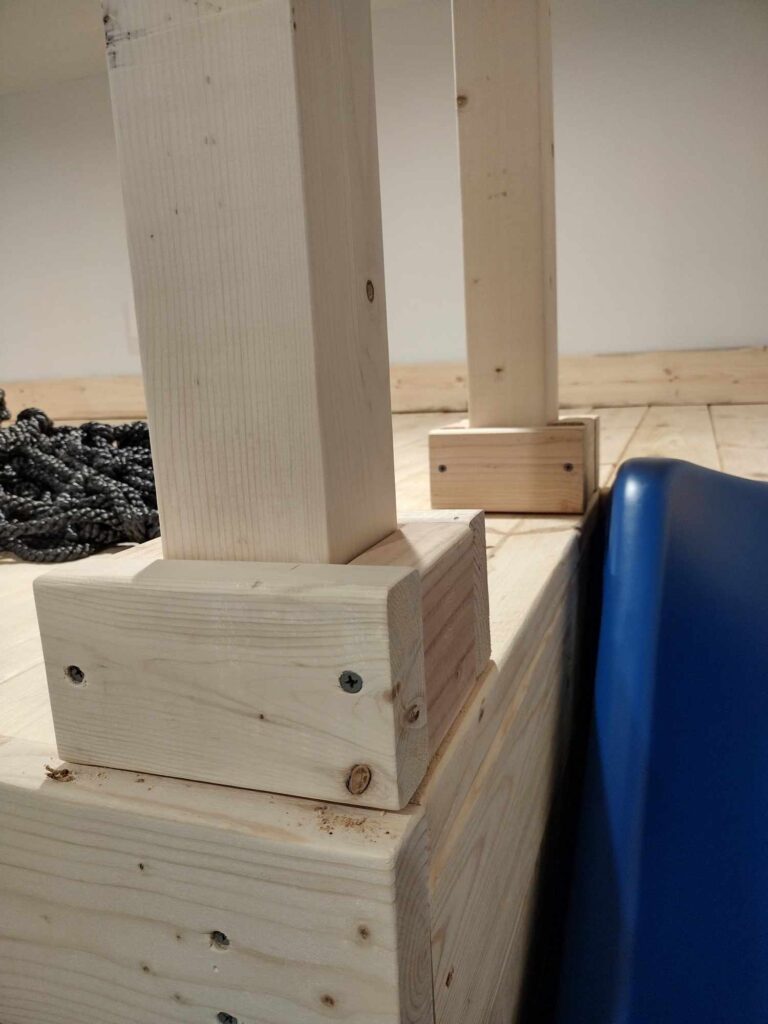
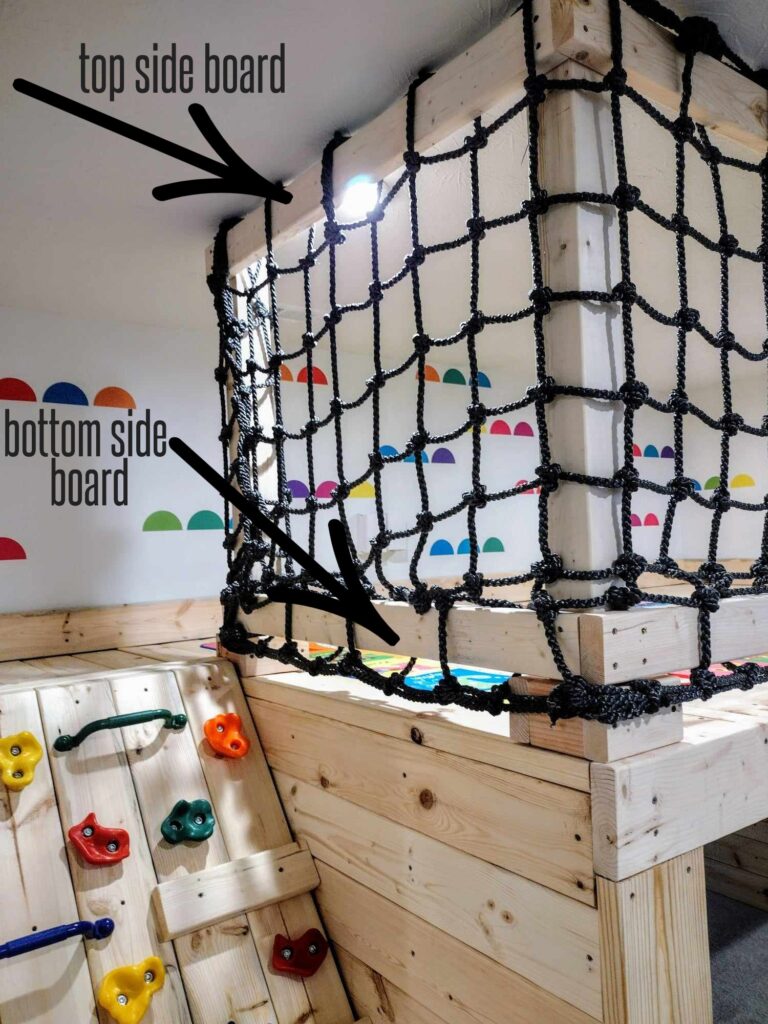
Starting on either side, cut the 2×4 for the length of the side posts x2 (for top and bottom). Repeat this process to the other side.
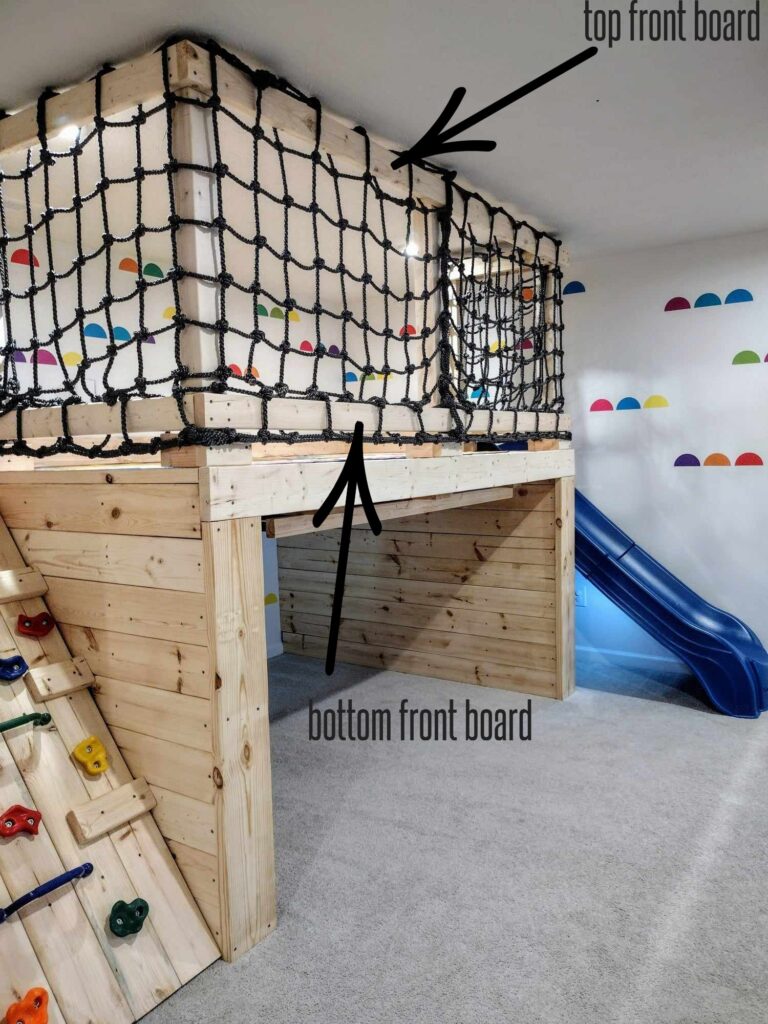
For the front boards, measure from the two corner posts at the base of the trim (outside to outside of the trim) then the top.
Playground Cargo Net:
For the cargo net we used (two) three foot by nine foot cargo nets.
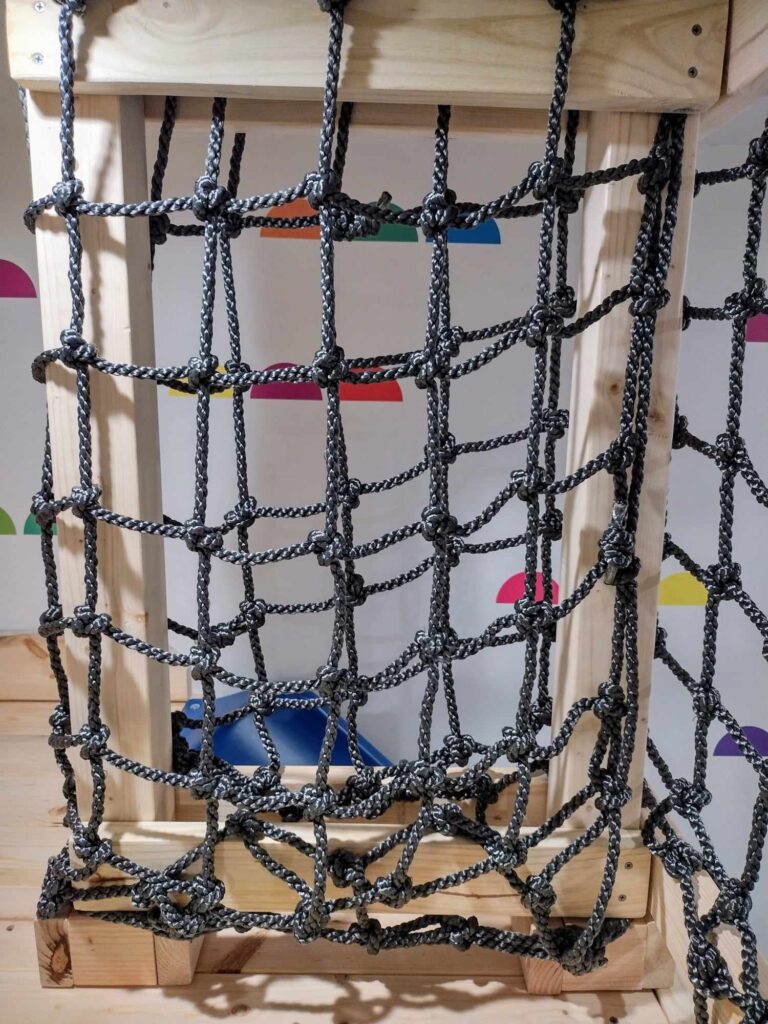
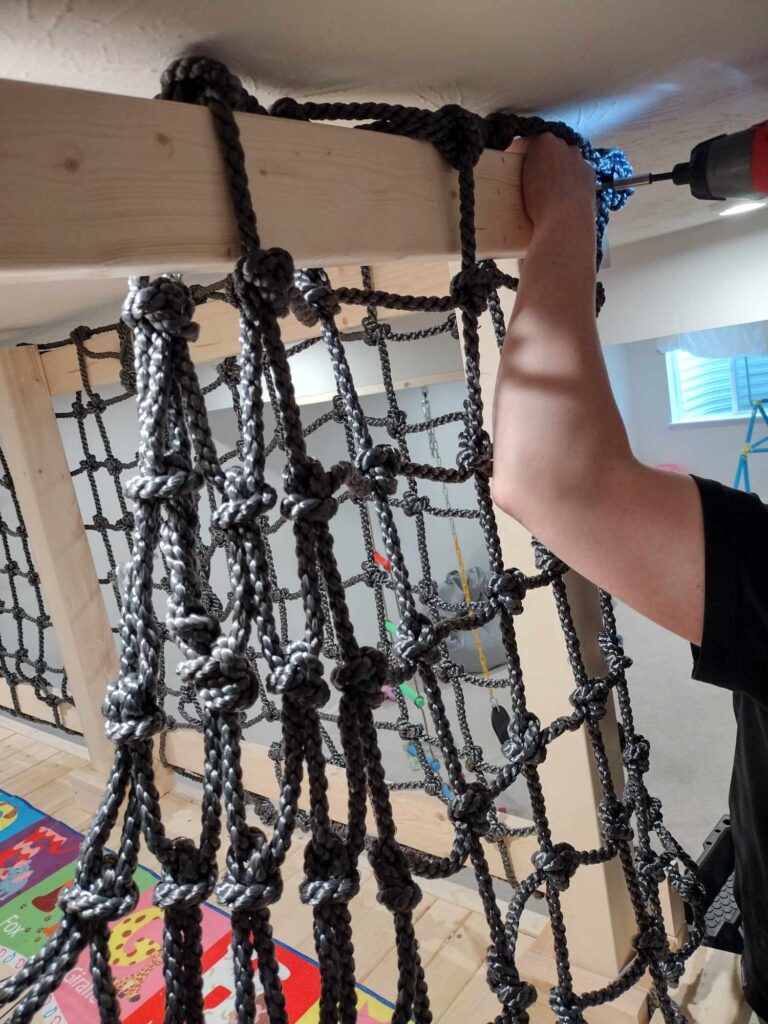
We laid it on the floor and zip tied the two together. We used the front boards of our platform to weave through the top and bottom sections of the cargo netting so that the seam that we zip tied would be in the center of the front center post (as shown in the photo above).
Once we had our boards right where we wanted them in the cargo net, we then held it up to our posts, ensuring that the middle seam was kept in the middle of that center post.

Now using a 1/8 inch drill bit, drill two pilot holes for each post on the board.
Level and attach using 3.5 inch screws (be sure that the cargo net is pulled somewhat tight so that it doesn’t look baggy).
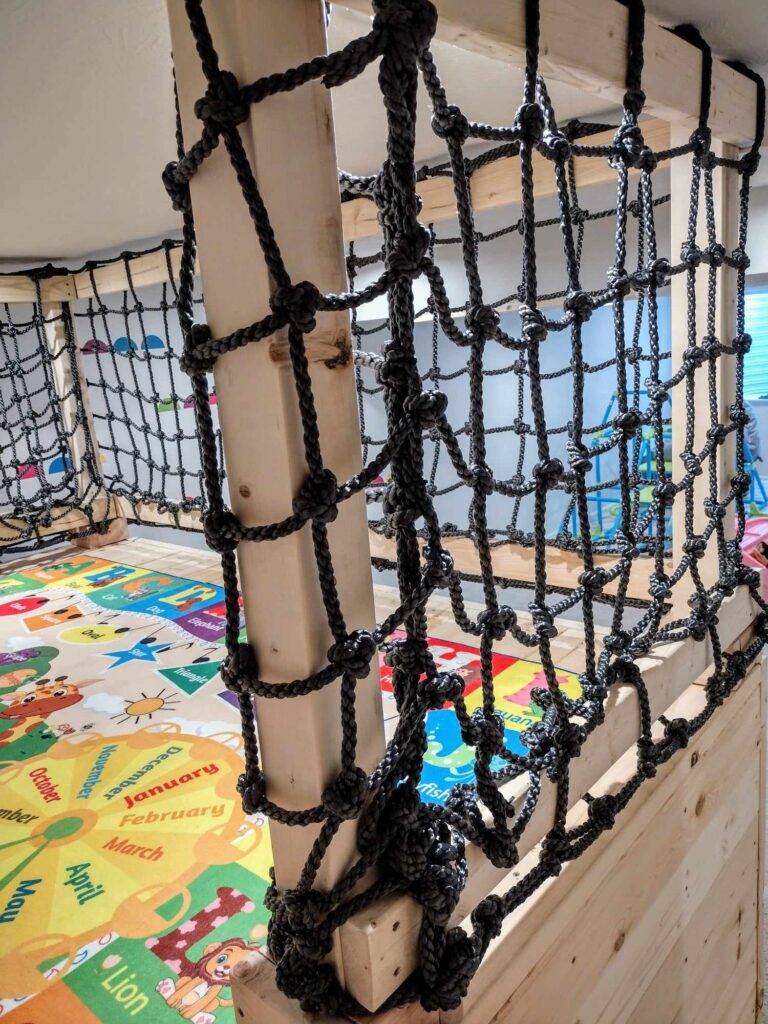
You’ll want to follow the same method on the sides, weaving the boards through the top and bottom, then attach to the posts.
Once the sides are installed, go back and add two additional screws to all the corners.
If you are building our indoor playground platform, you will want to follow-through with the rest of these instructions for a finished look identical to ours that includes the stuffed animal storage.
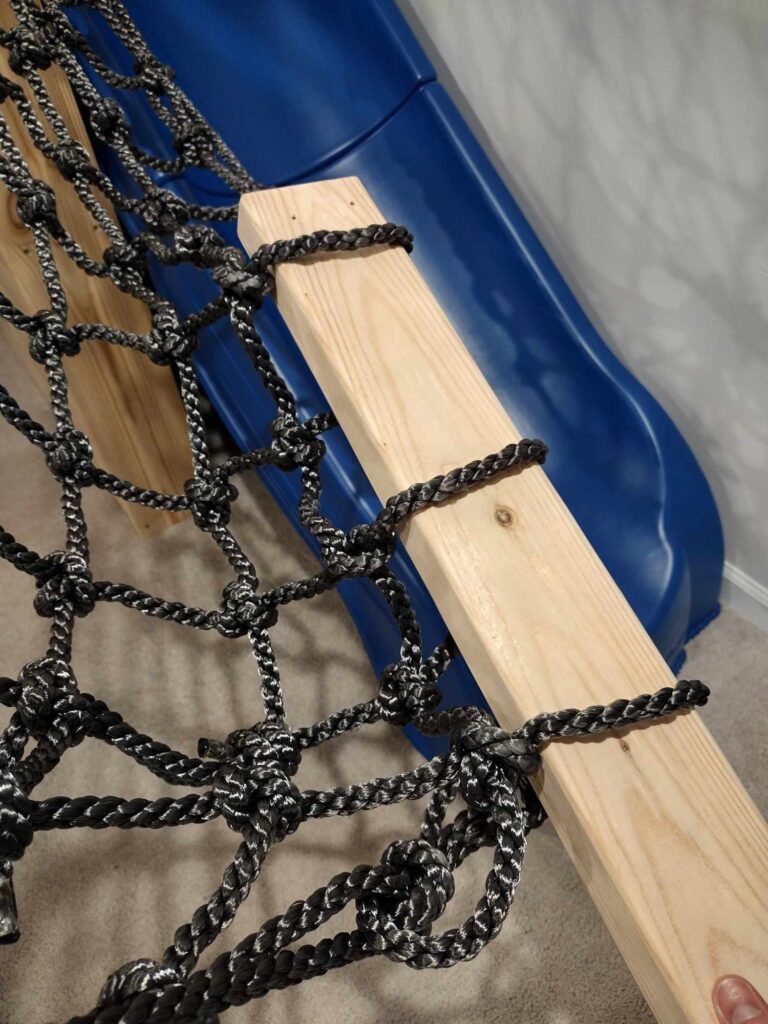
Wrap the extra netting around the last post (on the rock wall side), then weave the top and bottom board through the end of the netting before attaching. This will secure the net in place.
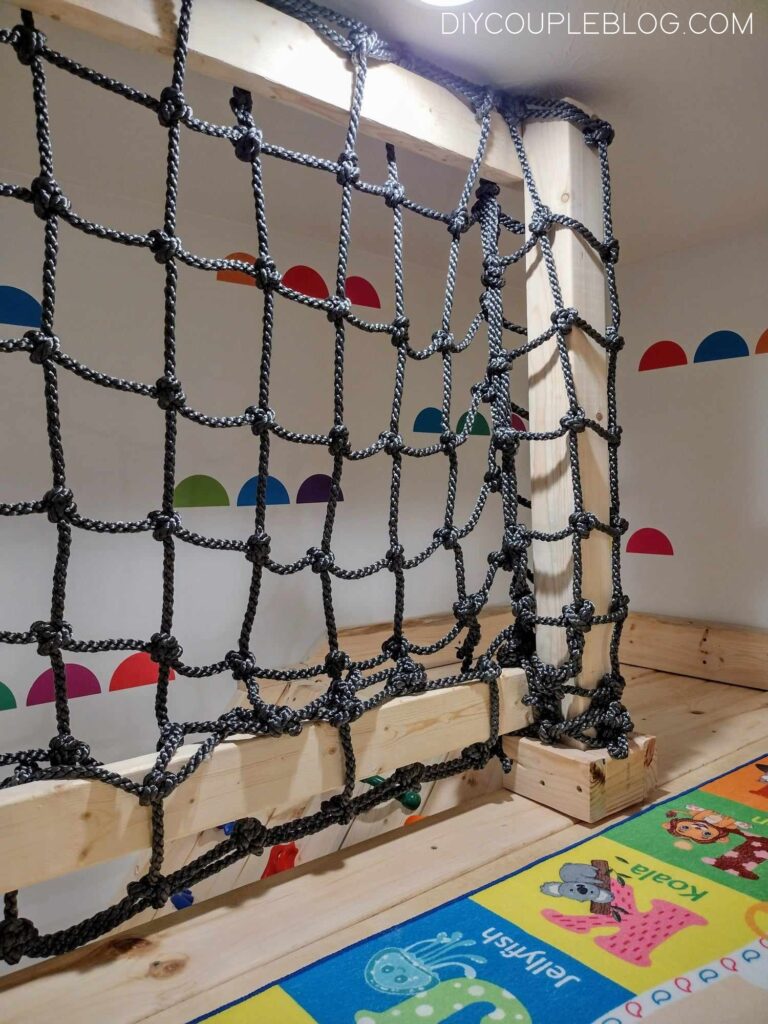
Now on the slide side of the platform, there will be enough netting, if pulled tight, to wrap around both sides of the post. Of course, this will be the pocket in which the stuffed animal or balls will be housed, but first, we must attach two extra top and bottom boards for this inside part (as shown in picture below).
Now move forward with those two additional boards I mentioned for the inside, cut to size.
This time you’ll weave the boards through and secure them on the outside and wrap the extra netting around the post and using the other two pieces of wood you cut, weave them though the same way and attach them on the inside.
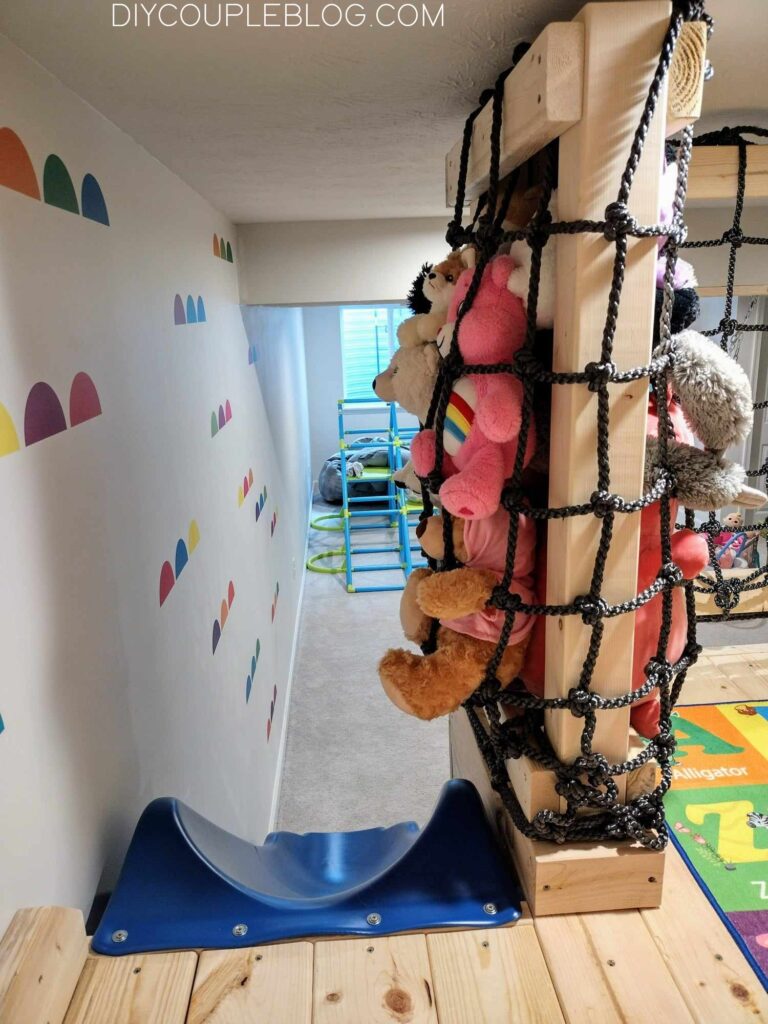
This finally, should allow you to have a small storage section perfect for stuffed animals and two-sided at that!
Click any of the pictures below to be directed!

Shop Our Playroom
Swing & Swinging ladder / swing hooks
Additional Related Posts for Our Indoor Playground:
Build an indoor playground platform
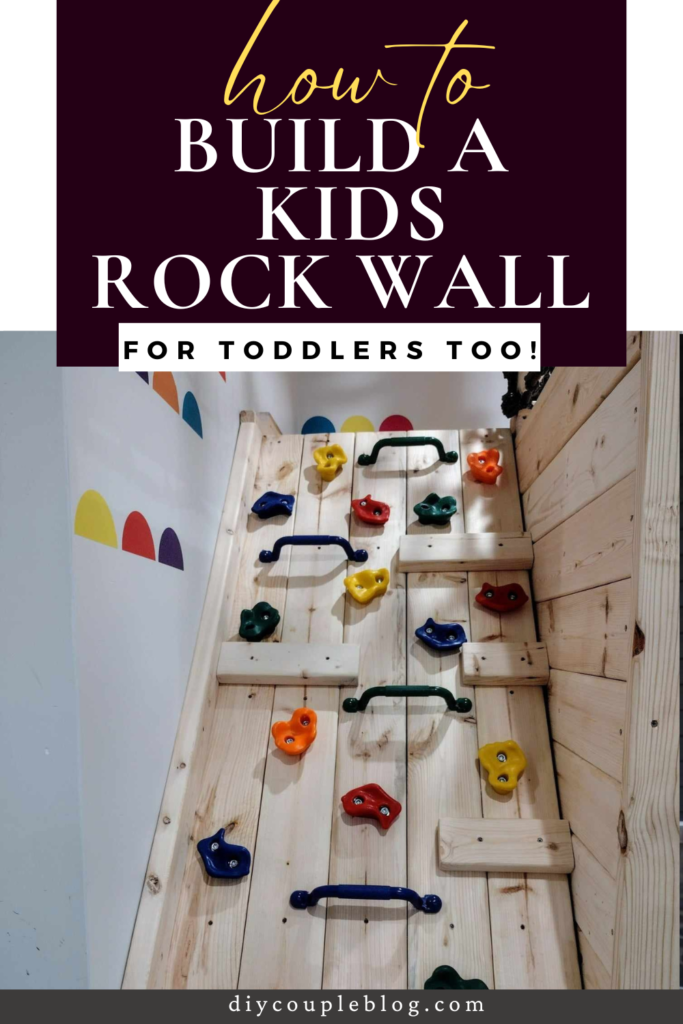
Build a kids rock climbing wall
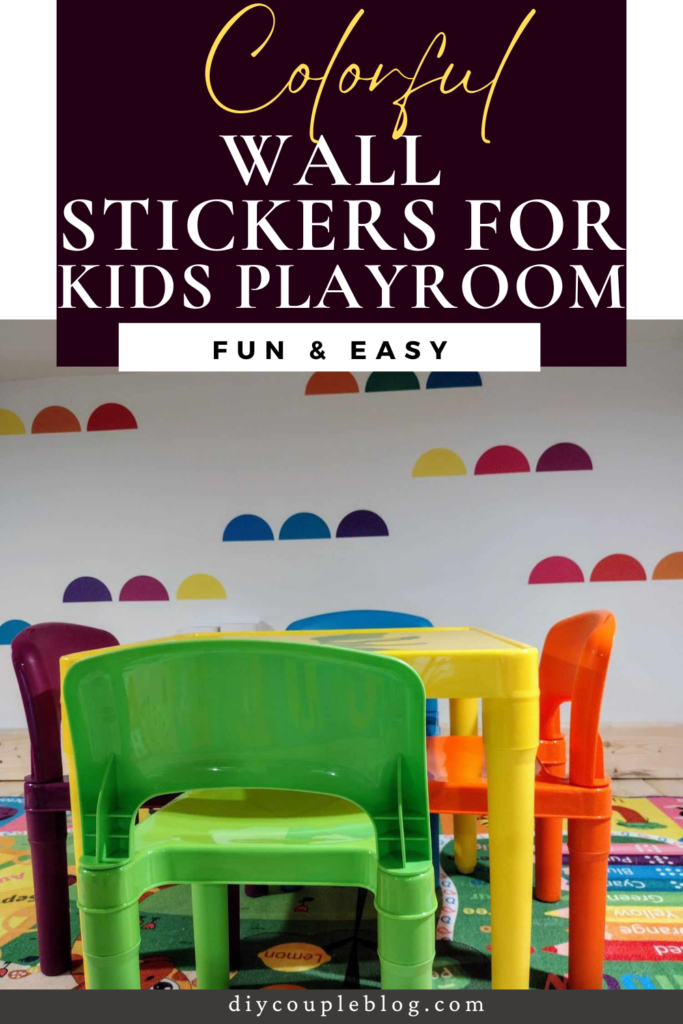
Wall stickers for kids playroom