This post may contain affiliate links, which means we'll receive a commission if you purchase through our links, at no extra cost to you. Read the full disclaimer here.
A Step By Step Tutorial For Making A DIY Mobile which would be a gorgeous addition to any girl’s room with a floral nursery theme! If you’re the crafty type, this would be lovely for your own girl nursery or made as a one-of-a-kind baby shower gift.
I love putting sweet feminine touches on the nursery for our baby girl. However, I don’t like shelling out big bucks on things I think I can DIY on my own. For this reason, I’ve been finding ways to DIY nursery decor to save money. For her room decor, I’ve been incorporating some florals like her closet dividers for clothes organization and her DIY nursery prints. I’m on a roll with diy projects for her room. She also accumulated tons of girly headbands that I ended up displaying as a headband holder on the wall (which was a really fun, easy DIY!) Feel free to check those out for more girl nursery ideas.
Something I really wanted to add to her baby room was a pretty floral mobile for crib. These things can be pricey, selling the same design on Etsy for over $70 or More! I rounded up all the supplies to make it and I’m showing you how you can make your own adorable diy mobile (on-a-budget) too!
Flower Baby Mobiles Supplies:
Hot Glue Gun (Here’s the one I use, it’s seriously amazing & has a detailed tip, Here’s the glue sticks as well)
White threading string with needles (sewing kit) ( I added a link for convenience, however, check your local family dollar…I found mine for $1)
(Two) smaller sized lambs ear wreaths (snag these when they are doing a 50 percent off sale; which is bi-weekly)
Scissors
Flower pick (These are the ones we worked with and the ones I recommend, other ones may fall apart when peices are taken off the head, depends on flower make up). I was able to get them on sale for 50 percent off, wait for a sale or use Michaels coupons to save the most money).
Floral Mobile Instructions
Step 1.
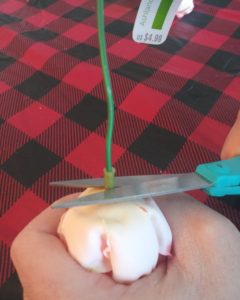
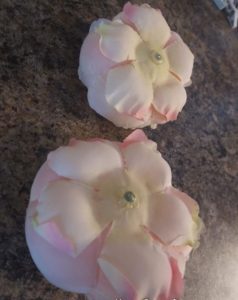
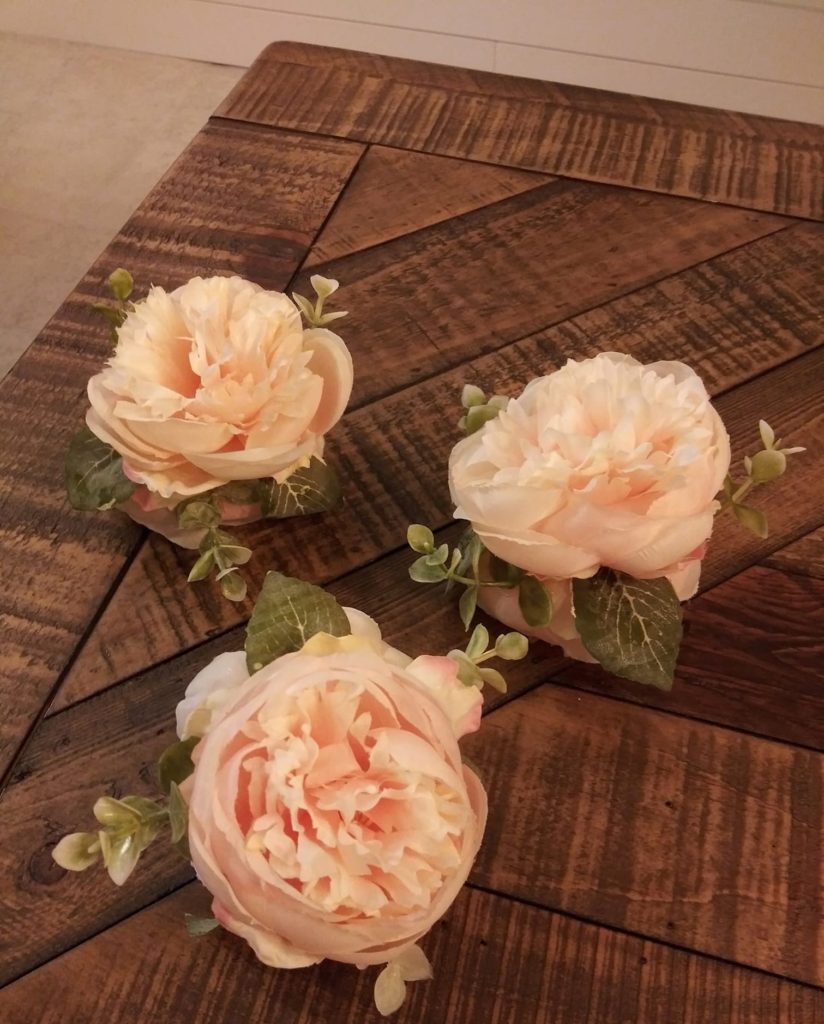
Go ahead and plug in your hot glue gun so it’s ready when you need to reach for it. Turn flower over so you’re looking at the bottom, slide the green part of the flower back away from the flower head and tuck the flower in your hand. Cut the flower stem off as close as you can get to the flower head. Make sure to keep hold on flowers and don’t let go so they do not fall apart. Using your hot glue gun, apply it over the rest of the stem that is left from where you cut most off. Don’t let go of flowers until glue is completely dry and your flower can stay intact. Do the same to a second flower, and glue them on top of one another (allowing them to be a little off centered).

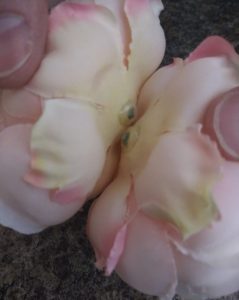
Step 2
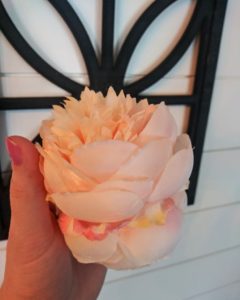
Cut leaves off the stem. Now you can squeeze some hot glue in between the connected flowers and stick your leaves in the glue, where you would like them. We used three of the regular leaves evenly spaced around the flower, then three of the multi leaf stems evenly spaced around the flower also. See pics below for better reference.
They will then look similar to these.
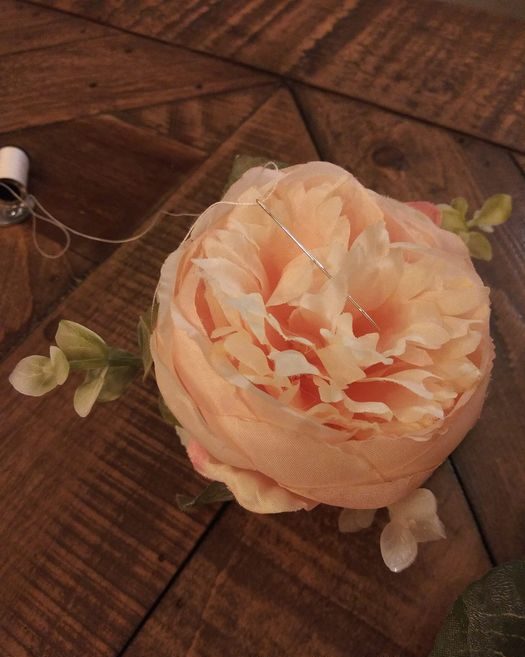
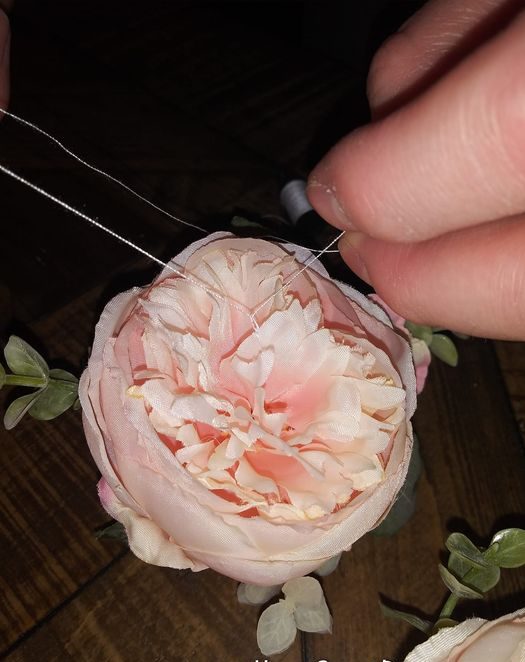
Step 3
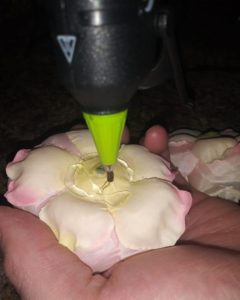
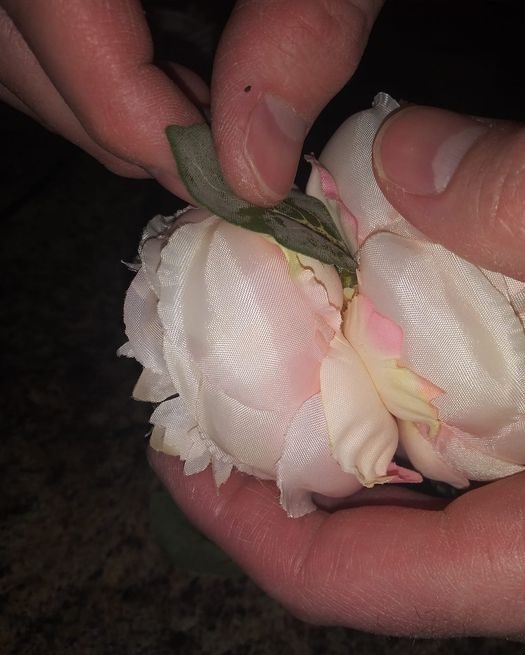
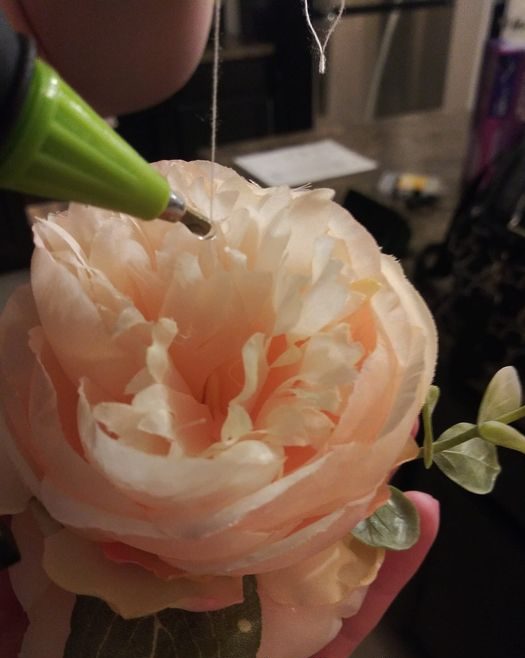
Next, get your white string and your needle and thread it through. Poke your needle through one of the middle petals and tie a knot. We tripled knotted ours to make sure it was plenty tight enough, cut off any excess string and secured the knot with a dab of hot glue.
Step 4
Repeat the above process of step three^ for threading through and tying all the remaining flowers. Set aside with done.
Step 5
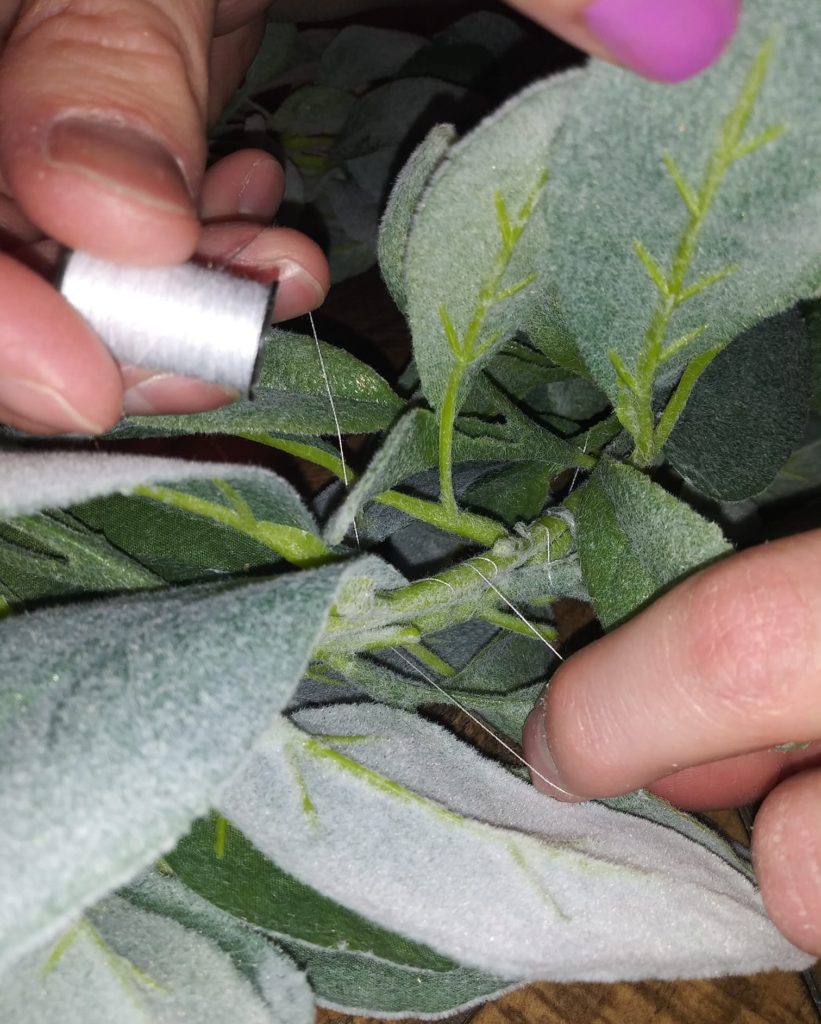
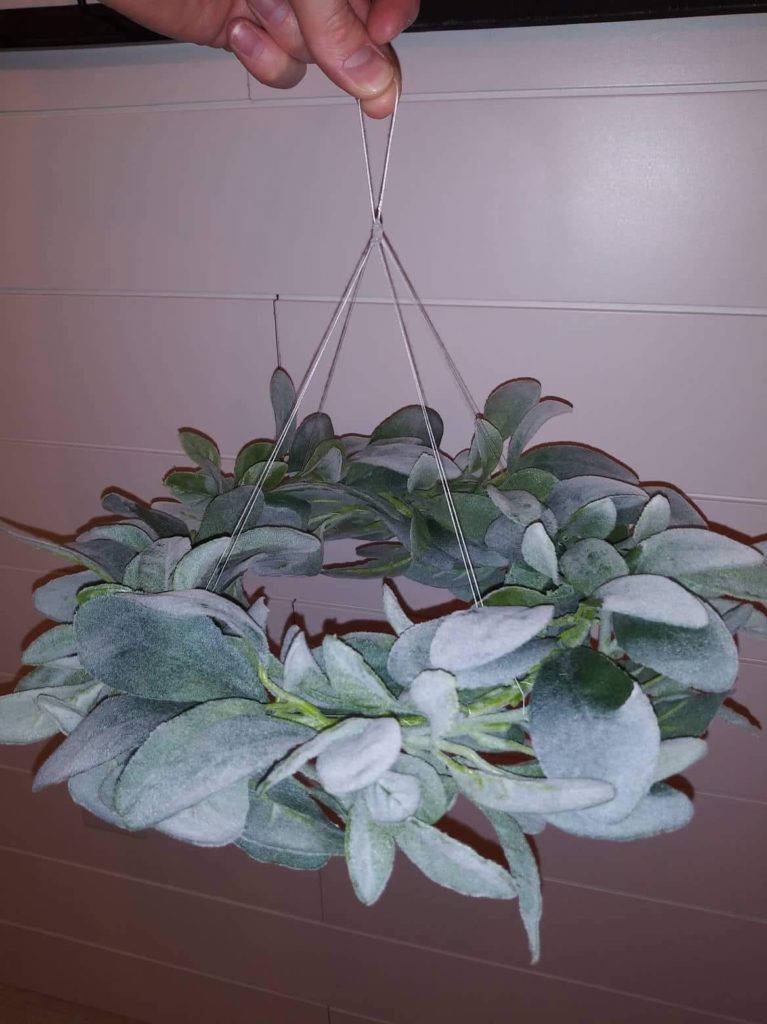
Now get out your two lambs ear wreaths. Lay one face down on a table and lay the other on top. We started a knot on one wreath then tied them together, wrapping it snug with about 4 or 5 times around. This process is pretty tedious, working your thread through all the lambs ear leaves.
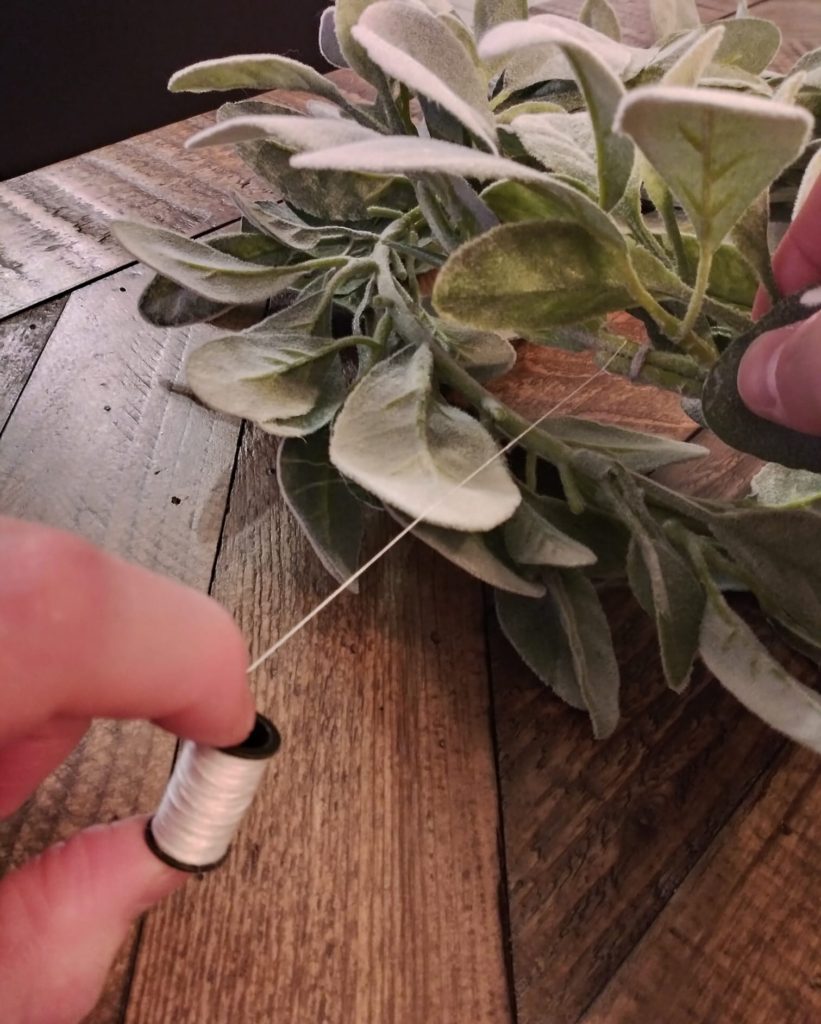
After wrapped, make sure not to cut the string. Loop your spool under a previous wrap to secure it.
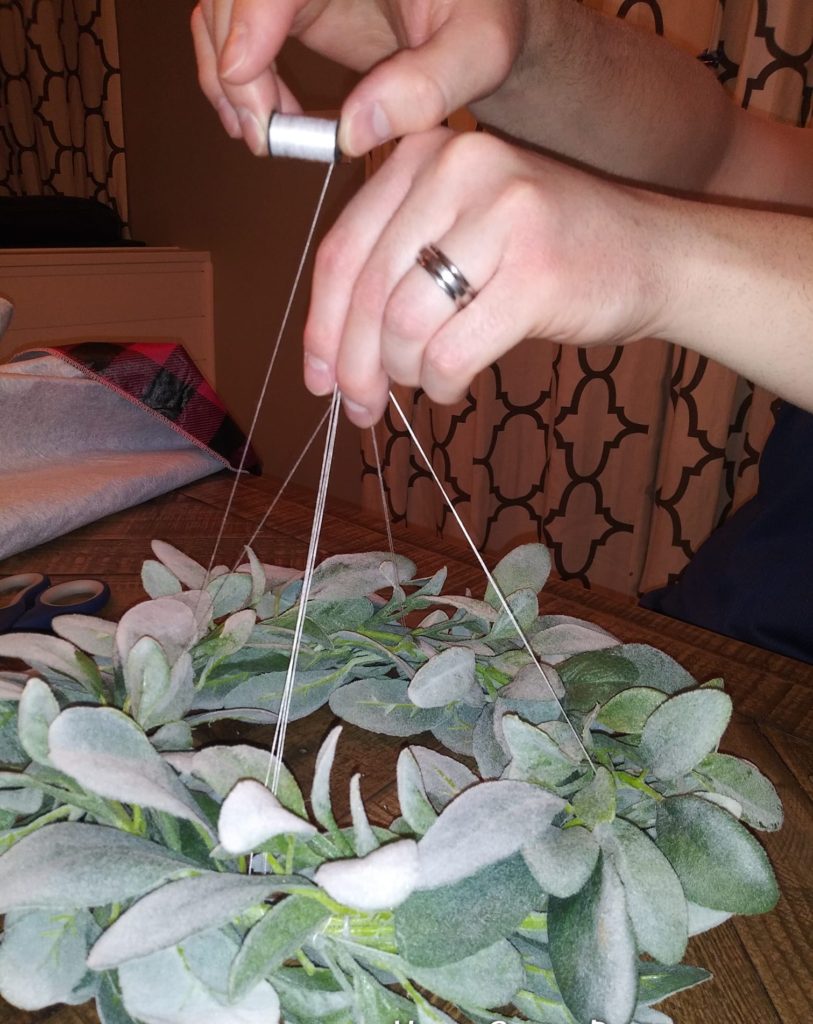
Step 6
Once you’ve done that, take the string upwards and form an upside down V shape about 7 inches high. Loop the opposite side straight across from the side you just worked with.
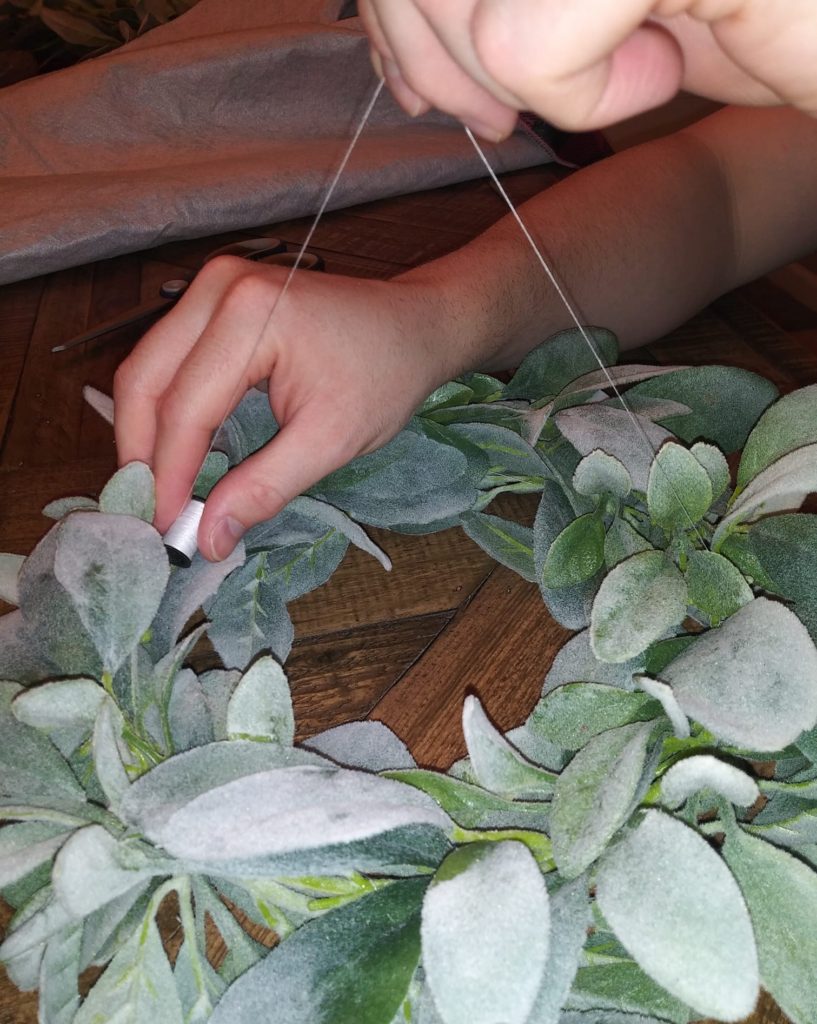
Step 7
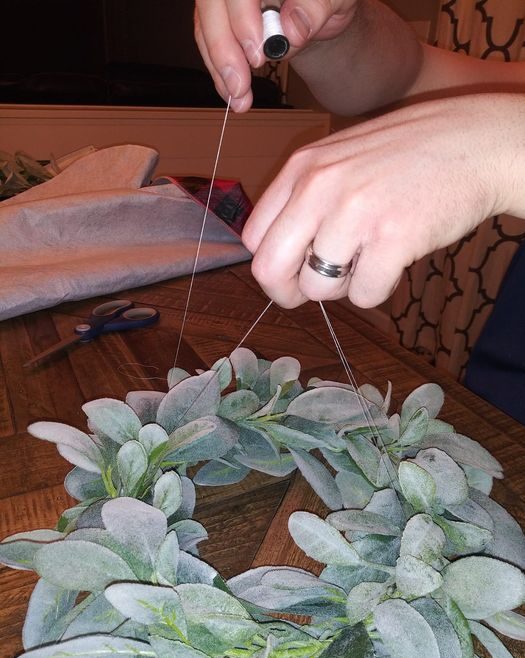
Then Loop it back across, to the previous side so you’ve doubled your string. Now, bring the string back up to the center. Make sure you hold from the top and don’t let go. Take the string 90 degrees to the right, loop around and come back up to the middle.(This process is much easier if you have two people).
Step 8
You will repeat Step 7 above^ to the opposite side of this one as well. Once again, loop around and bring back up to the top.
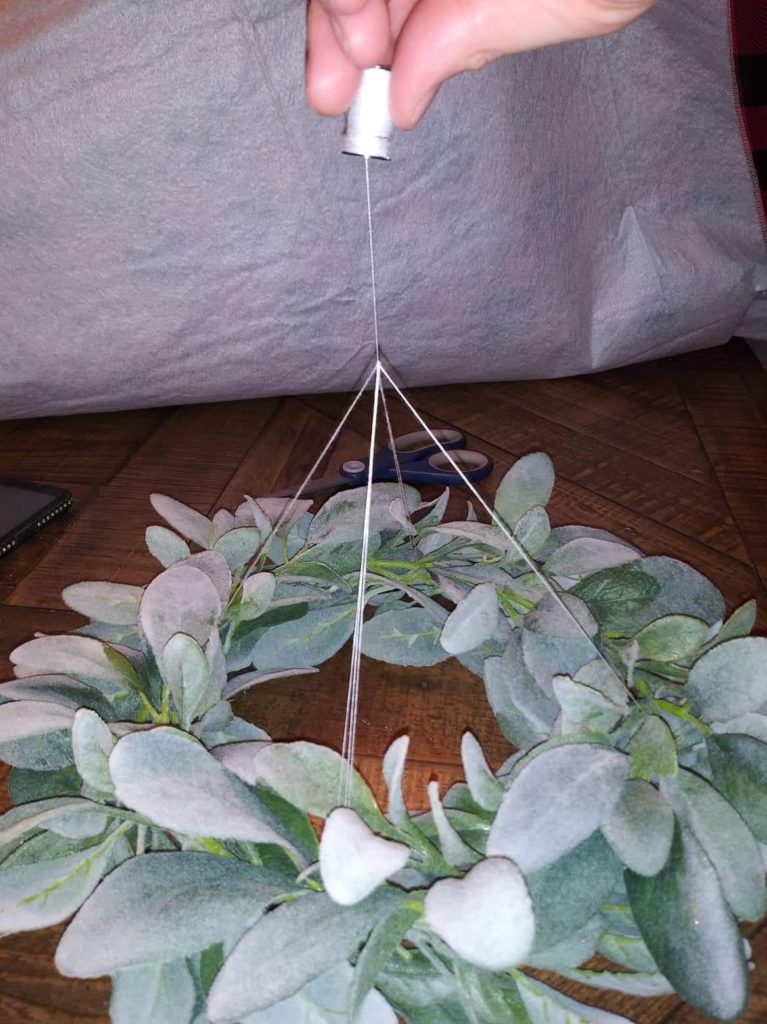
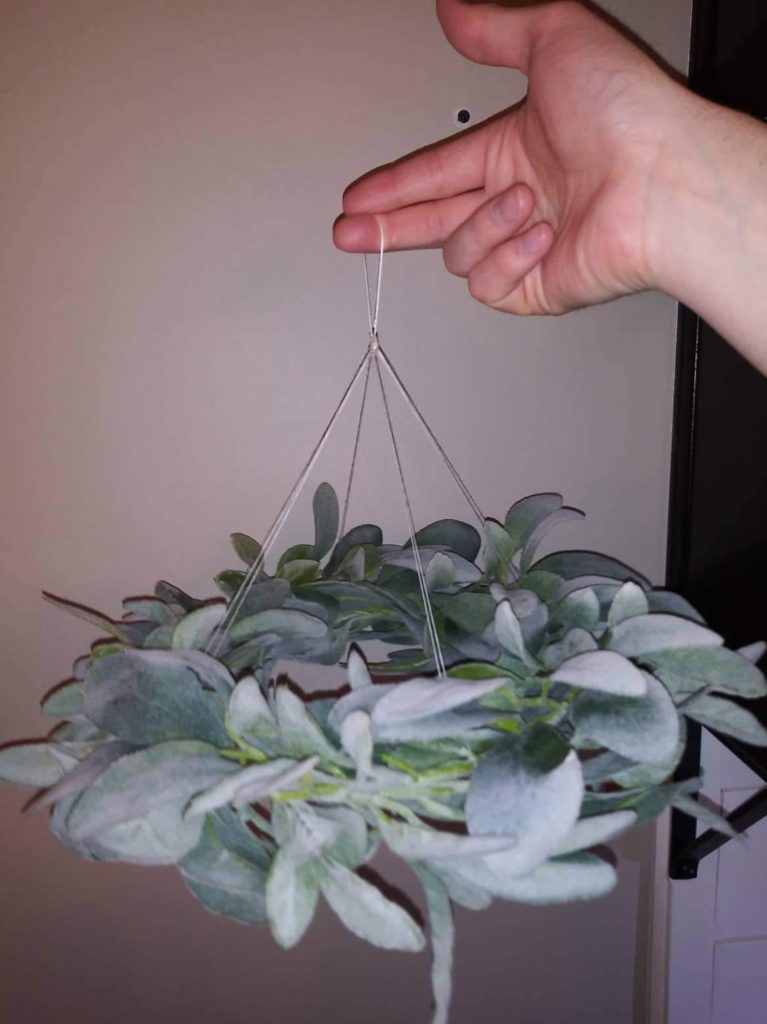
Step 9
Weave your roll under each of the four strings your holding at the top while still keeping a good hold on it so it doesn’t fall. It should now look like this.
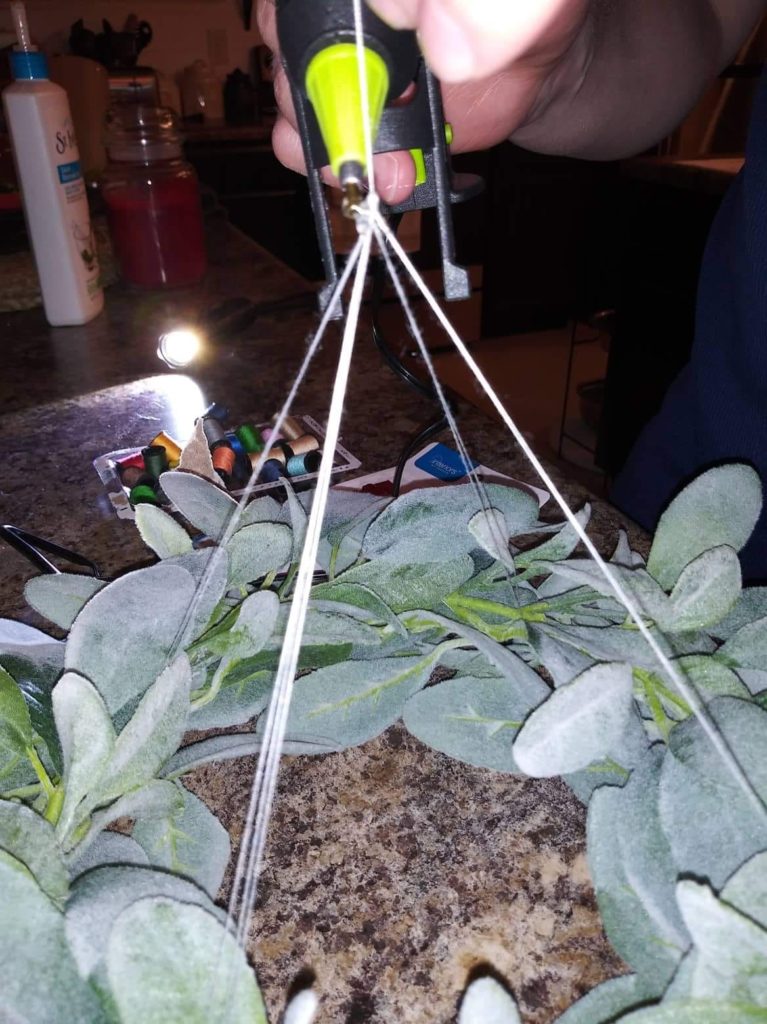
Step 10
While keeping the strings secure and holding them upright, put a dab of glue at the knot. Once it dries, wrap your spool three times around the knot you just glued to make your loop to be able to hang it (approx 1.5 to 2 inches tall; refer to photo below). While still holding it up, put hot glue on the bottom and hold until it dries.
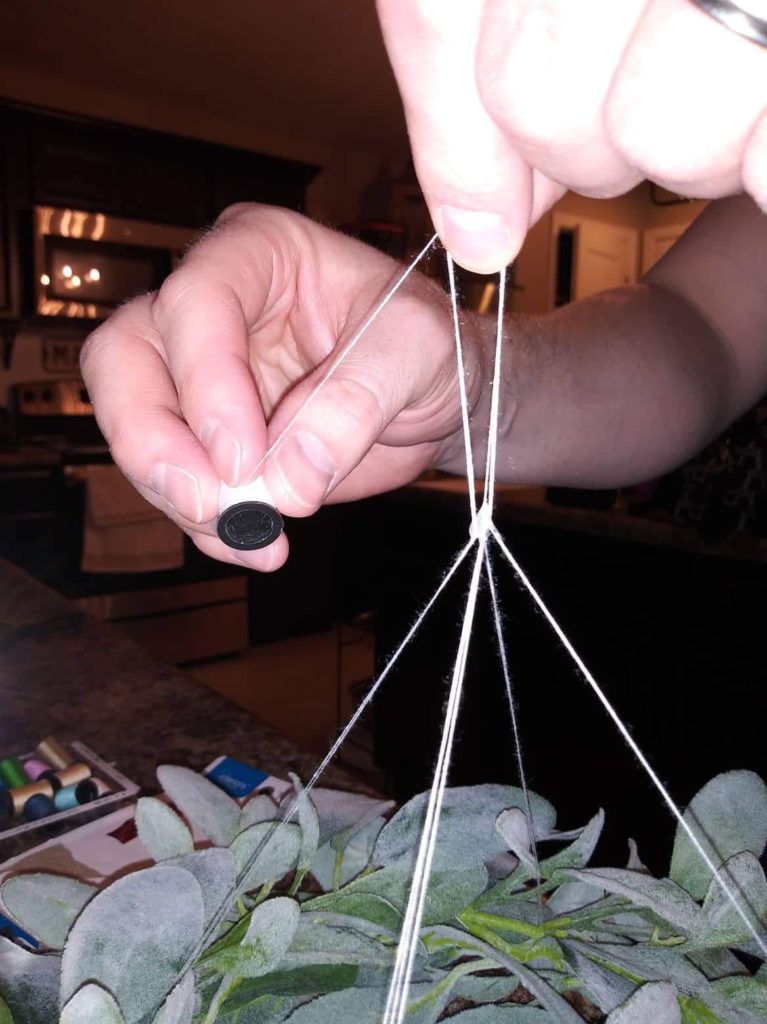

Step 11
At this point, you can go ahead and tie it in a knot. You can also add another dab of glue to add extra support. Once finished, It will look like this.
Step 12
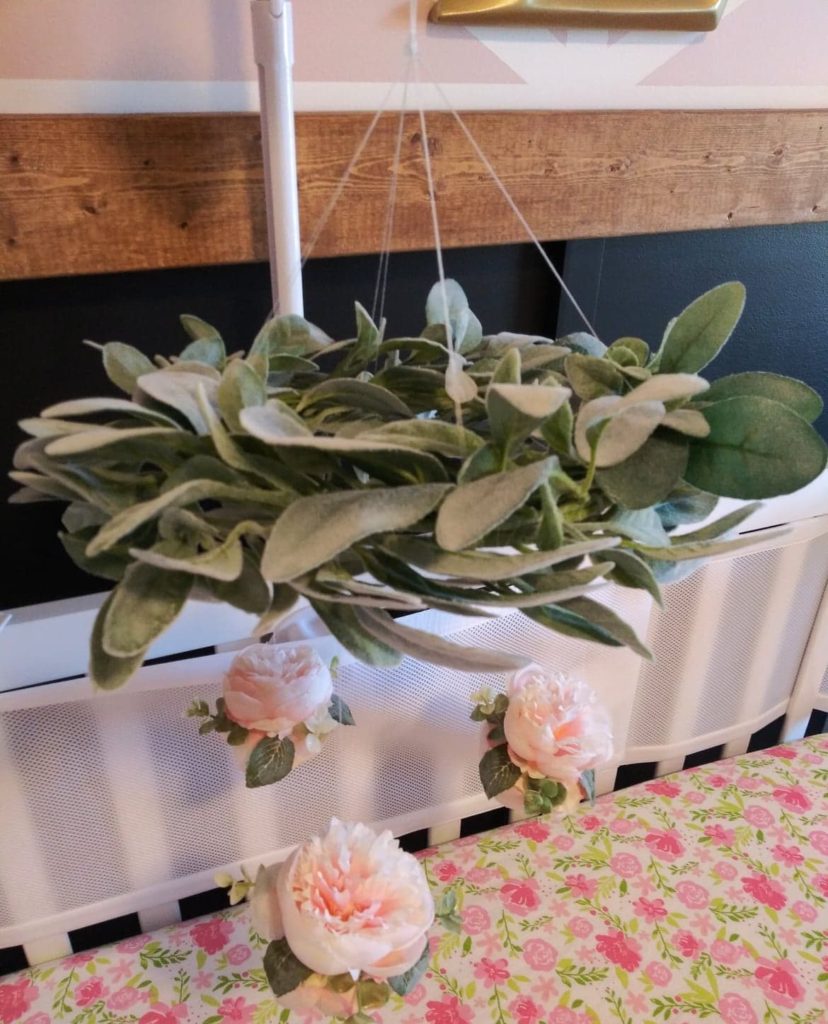
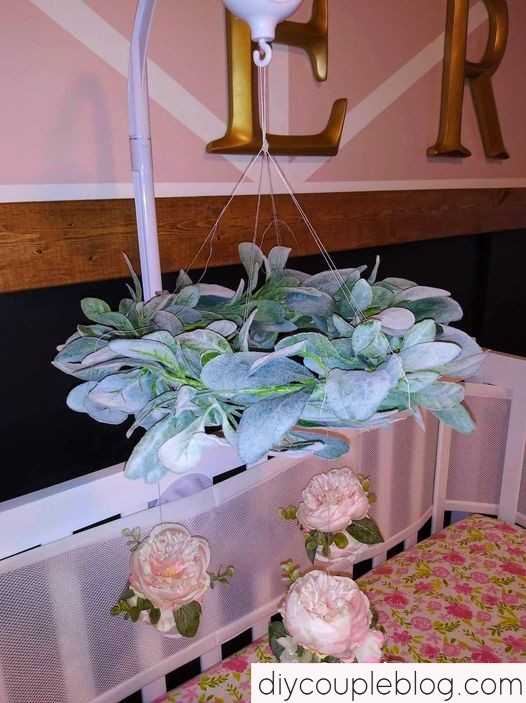
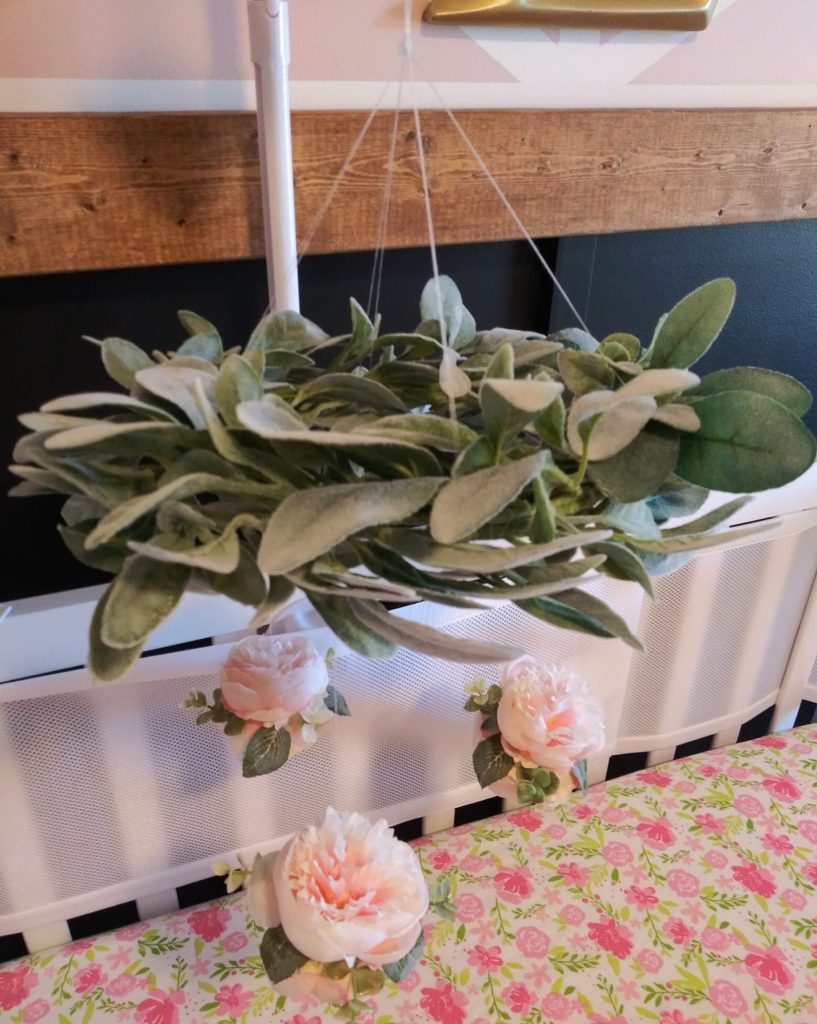
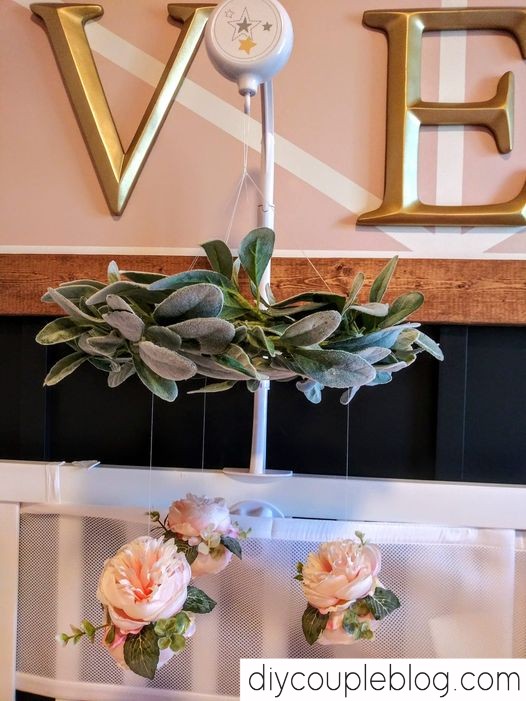
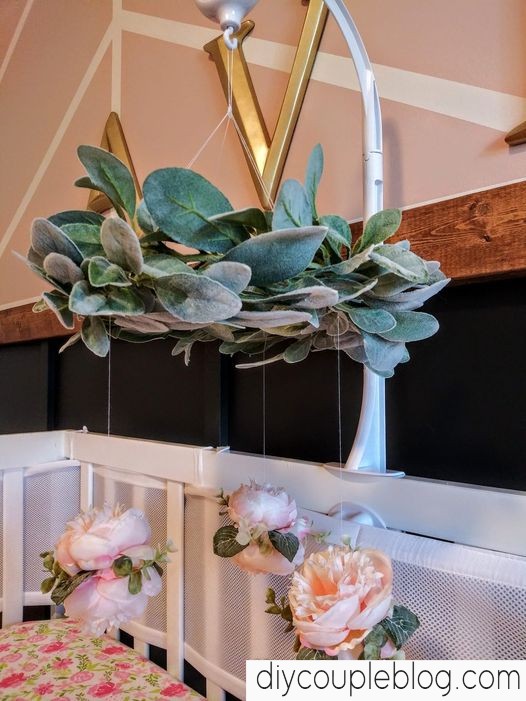
Go ahead and hang your wreath somewhere by the string (loop we just made at the top) where you will now be able to work with hanging your flowers from it. We went ahead and hung ours from our mobile hook that attached to the crib. This will give you a good idea how low the flowers can go as well. You also have other options for hanging, such as a hook from the ceiling in which your flowers and strings can hang much lower.
Side Note: I already had this mobile crib arm that attaches to the side of the crib from my son’s mobile that came in a set (elephant theme). You can find just the arm to purchase without purchasing the set, if that’s how you would like to hang it. Shop them here.
Because I used his, it allowed me to swap out his hanging elephants for this diy floral crib mobile-and still allow it to play music and spin.
Step 13
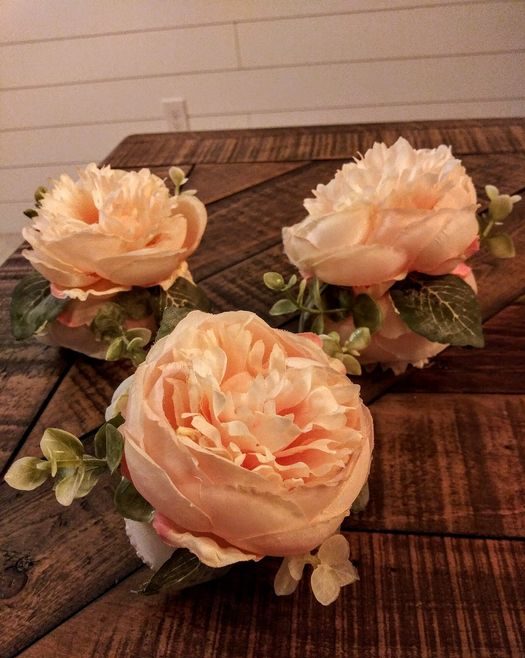
Tie on your flowers at the desired length. Space them out evenly when adding them around your wreaths. We went with three flowers sets and a triangular look as pictured.
Step 14
When your done tying your knots to the wreath base, you can now hot glue your knots and cut off the extra string.
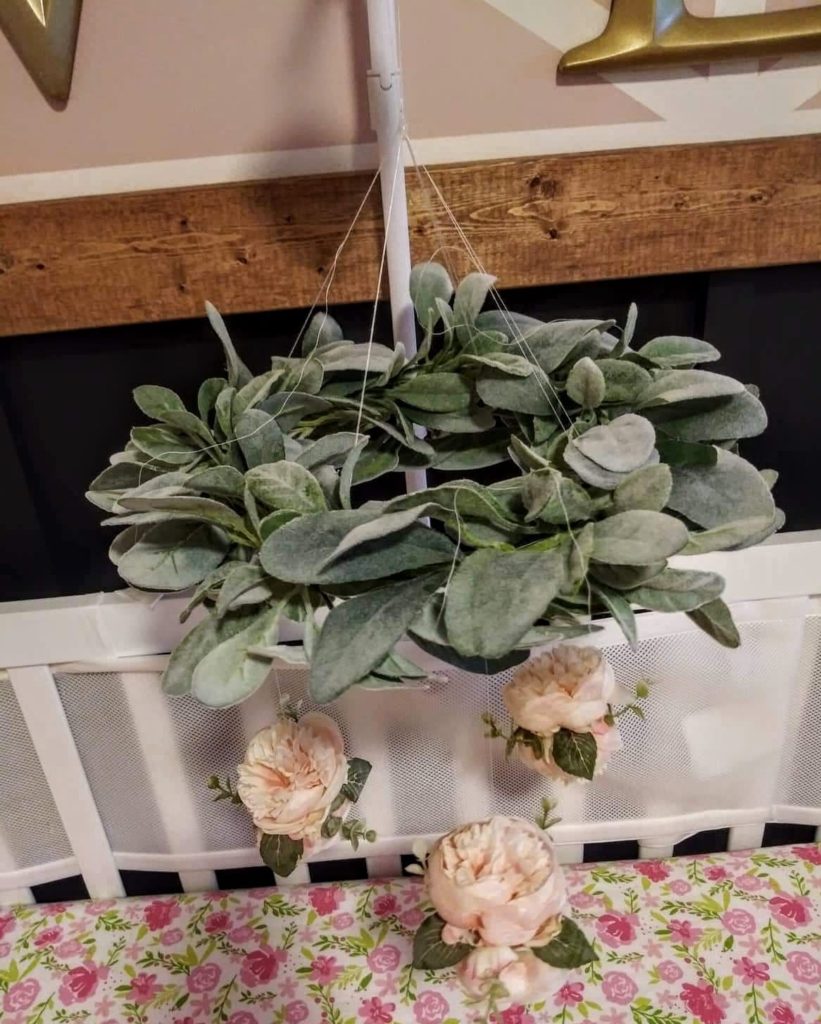
This DIY baby mobile is Done! It’s one of my most favorite pieces of décor in her room! The sage color lambs ear and pretty pink peony flowers are a gorgeous combo! Since I chose to hang my flower mobile low, it won’t be there too long, once she starts reaching and moving about. It’s so special though, because we made it for her.

The herringbone wall with board and batten underneath (behind the crib) was another DIY, you can see more of it and get the full instructions in the provided link.
Shop Related Products