This post may contain affiliate links, which means we'll receive a commission if you purchase through our links, at no extra cost to you. Read the full disclaimer here: https://diycoupleblog.com/disclaimer/
Hey guys! Our little babe is set to come in March and we’ve hem-hauled around long enough and finally made the trip to Lowes to start on them nursery walls! We decided to go for a board and batten accent wall. While digging for ideas through Pinterest I landed on this one in hopes to make it our own style. A style a little more fit for a baby girl. Oh, how much I love pinning ideas and seeing them come to life!
I was such a procrastinator on my first pregnancy. We kind of just slapped a color on the wall. I’m so excited to decorate a girl’s room this time around though! We’ve been keeping busy going through our little boys newborn clothing and setting aside baby items that would be gender neutral that she can get some use out of while getting together a list of what we still need to buy.
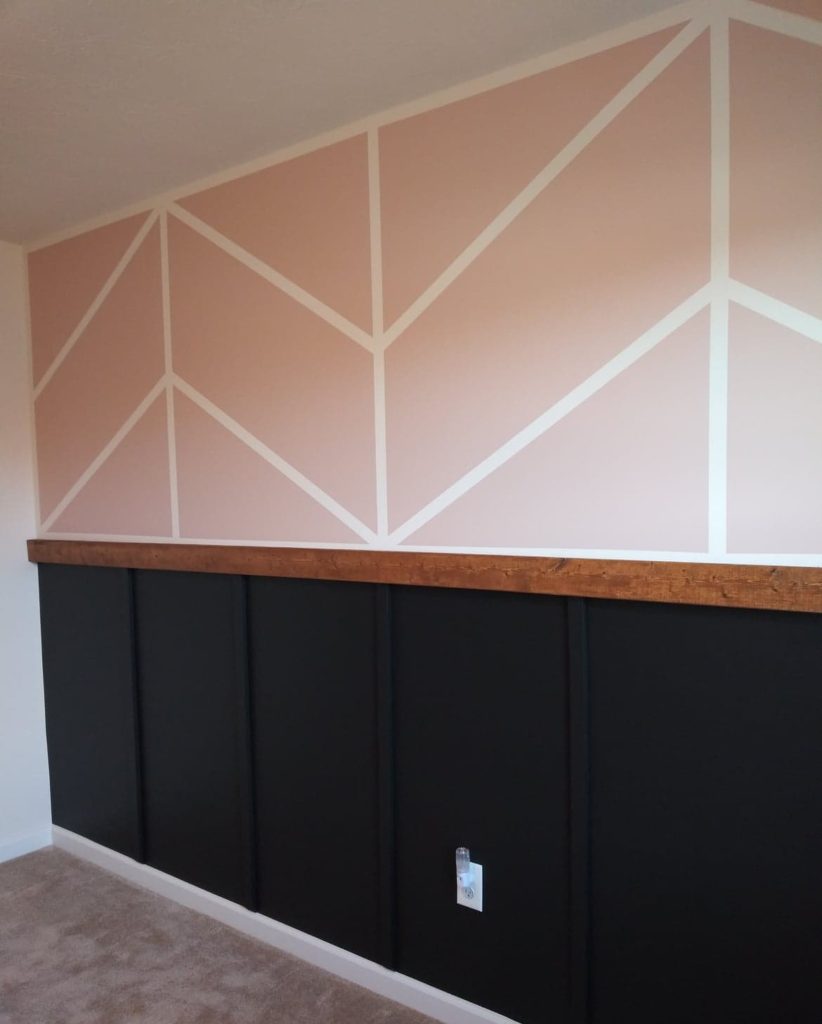
With being on a budget, pushed for time to get things done, plus tons of other things on the list to buy before this little girl comes into the world, we agreed to just do a herringbone accent wall to just one wall versus painting the whole room, but I still wanted it to look extra special for an oh’ so loved already little girl! So as far as nursery plans go, here’s what we’ve done to her room and the steps to achieve this easy diy accent wall.
SUPPLIES USED FOR HERINGBONE PAINTED WALL
Frog tape (the only one I recommend to avoid bleed through)
Peice of Wood For Middle of the Wall (Make sure you get the right size in the length of your wall)
Primed Pine Board (boards for board and batten) (we used of 2.5 boards on the wall)
Nail Gun (Here’s the ones we use all the time!)
Miter Saw (click here to see the one we use for our projects)
Paint Colors of Choice
>>Our fave Paint Supplies, We use them quite a bit! (If you need to buy & don’t have any yet)<<
Paint Roller(click here to see the ones we use)
Roller Covers (click here to see the ones we use)
Mini Paint tray (used to paint the boards black)
Mini Paint Roller (used to paint black boards)
Mini Roller Covers (used to paint black boards)
DIY Herringbone Wall Paint: Taping Off Our Design
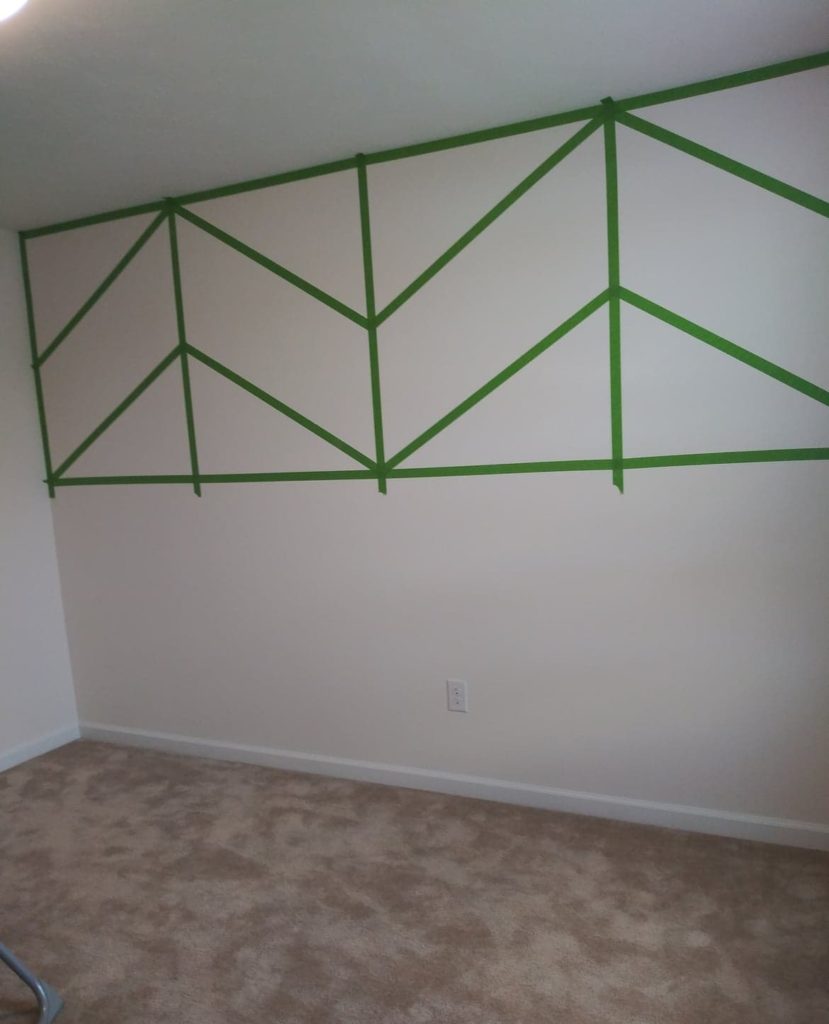
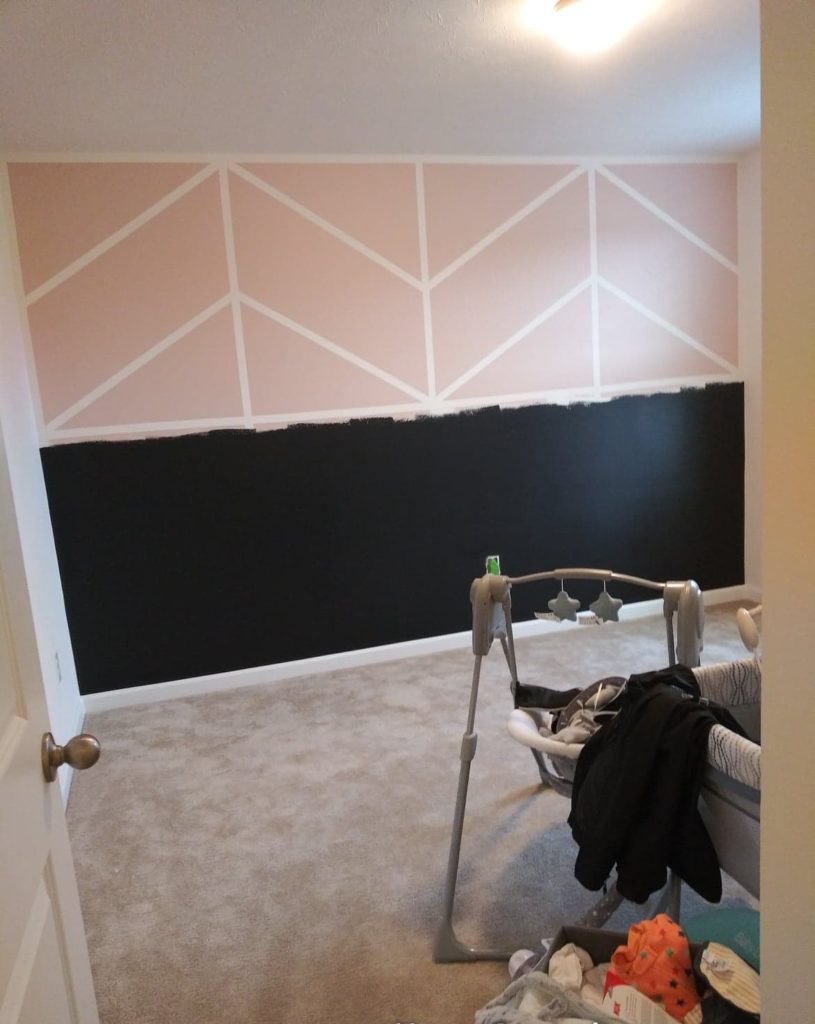
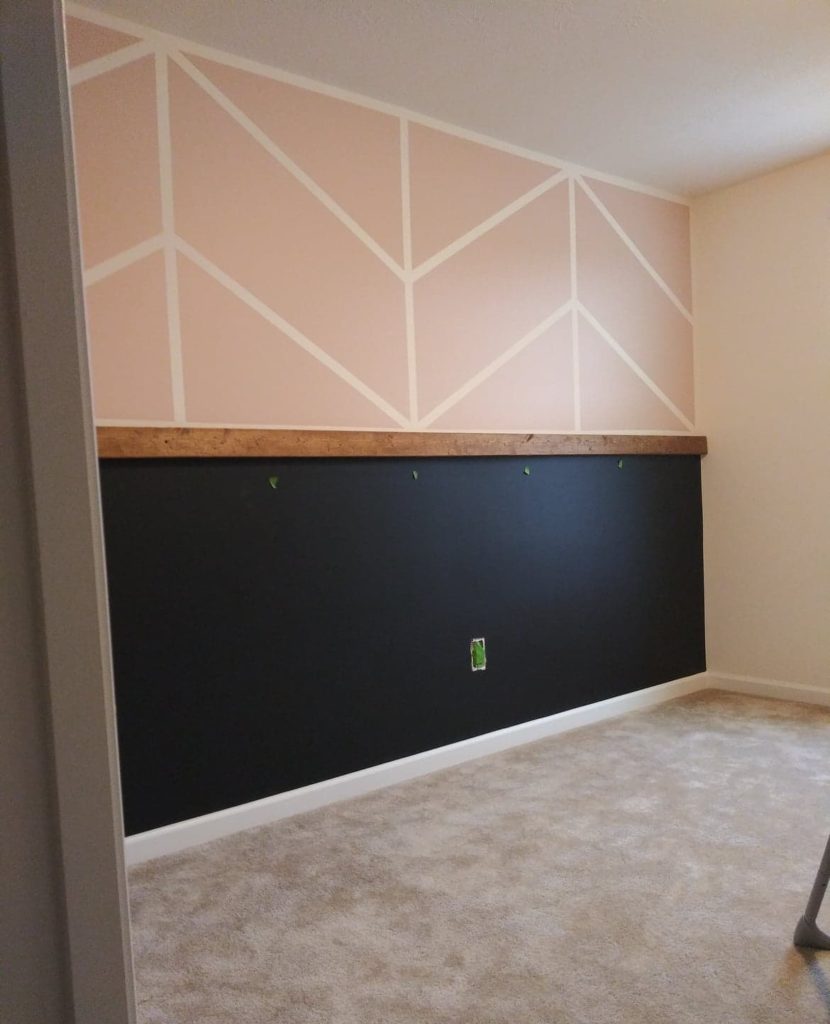
This room is hardly ever used besides for storage, so we have yet to do anything with it. The good news is we’re starting off with a blank slate. A flat white color the builders painted all our interior walls prior to us moving in. It’s amazing what a little painter’s tape can do. The Herringbone pattern wall that Inspired us used boards for her top part of the wall to create what you might call a herringbone or even “chevron look”, this is where we tweaked it and grabbed our handy painter’s tape to save a little money off the the top for this project.
We taped off our wall design with Frog tape.
**If you want to have a different color than the current wall color for your tape lines, you will need to paint the wall that color prior to taping. After the base coat is up, you are going to tape out your herringbone accent wall design.**
You ‘ll first want to figure out the measurements based off your wall and your spacing of the look you want. Once we figured this, We started making the lines going downward first and then framing the border of the wall with the tape and then from there you can connect them.
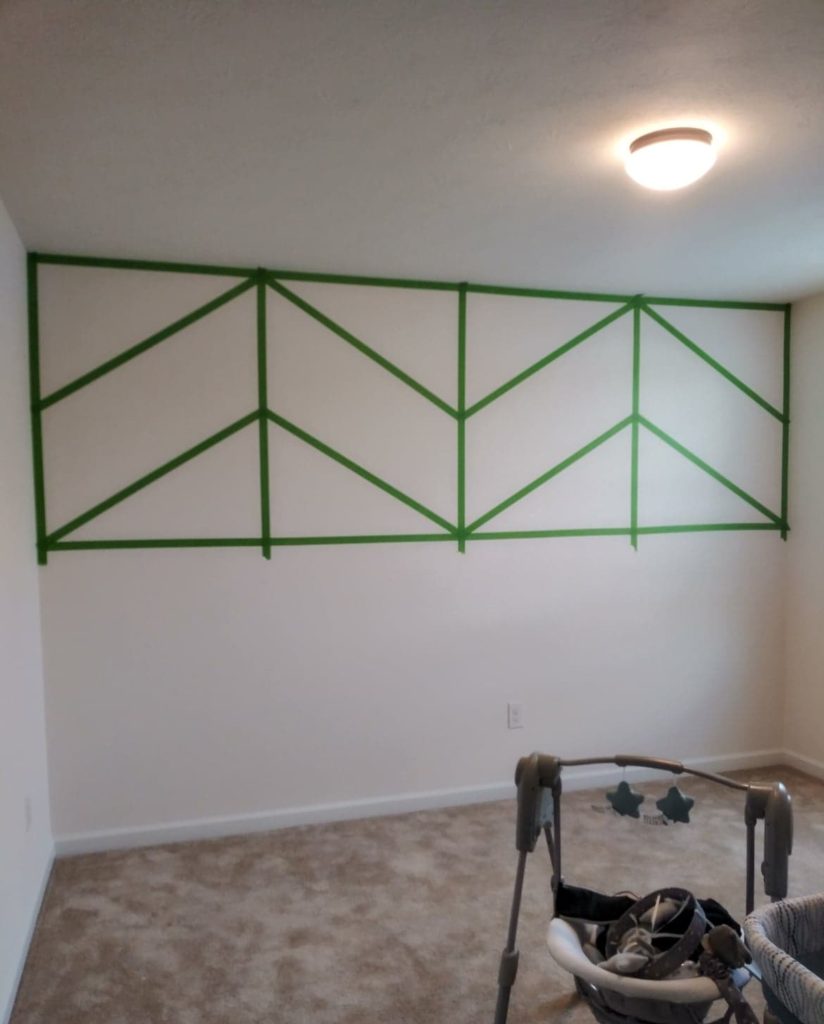
Tip: Take the roll of painters tape and firmly press your taped lines while sliding it down the wall, making sure to hit all the edges.
The frog tape lines will turn out so crisp & great if you follow that tip and buy the Green Frog painters tape that won’t bleed through (stick with the one I recommended!)
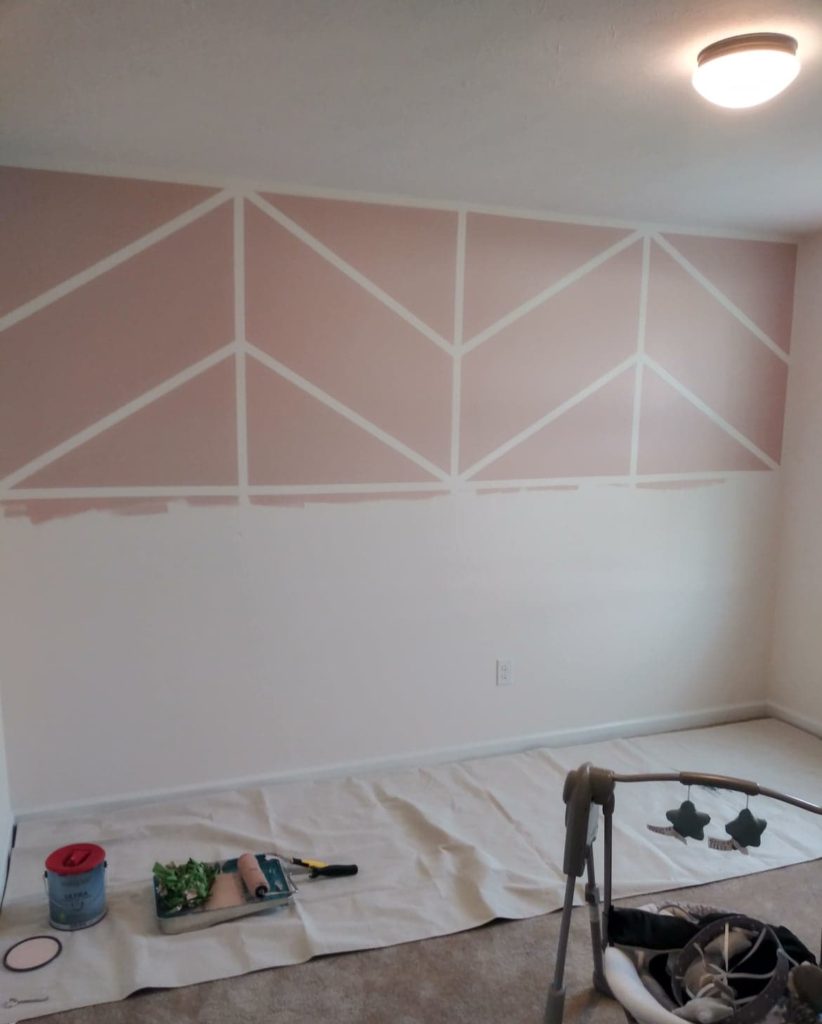
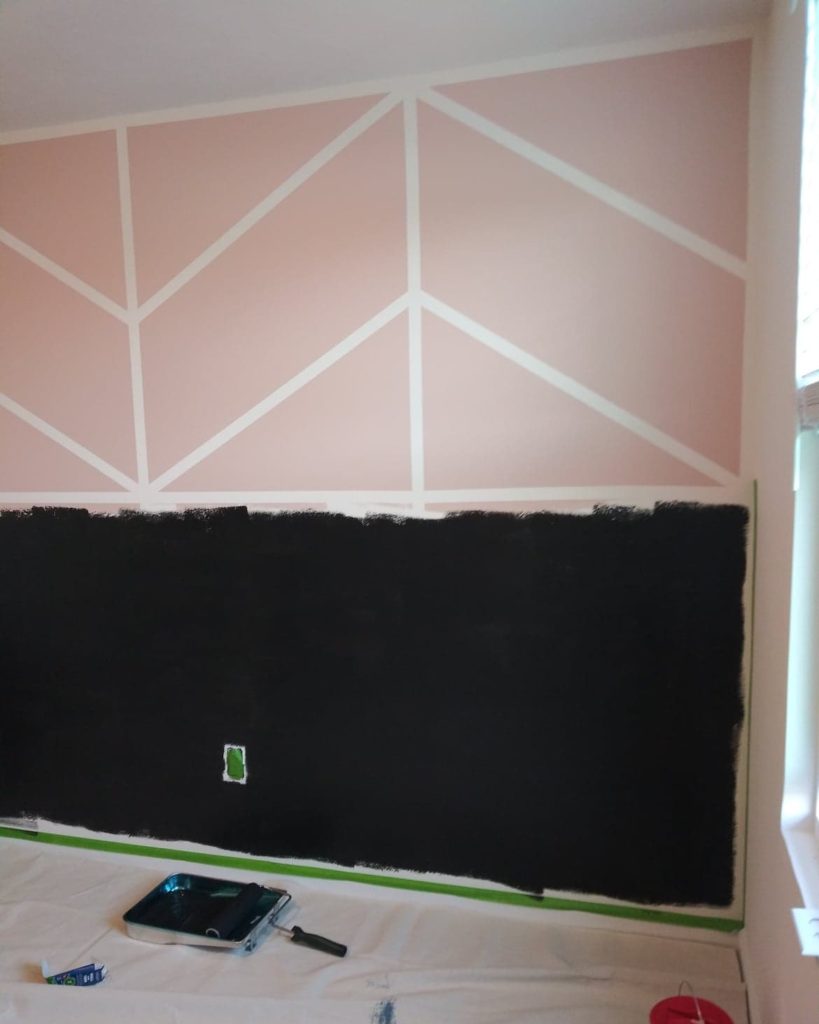
Now that the wall is taped off you are ready to pick up the paint roller and get to painting.
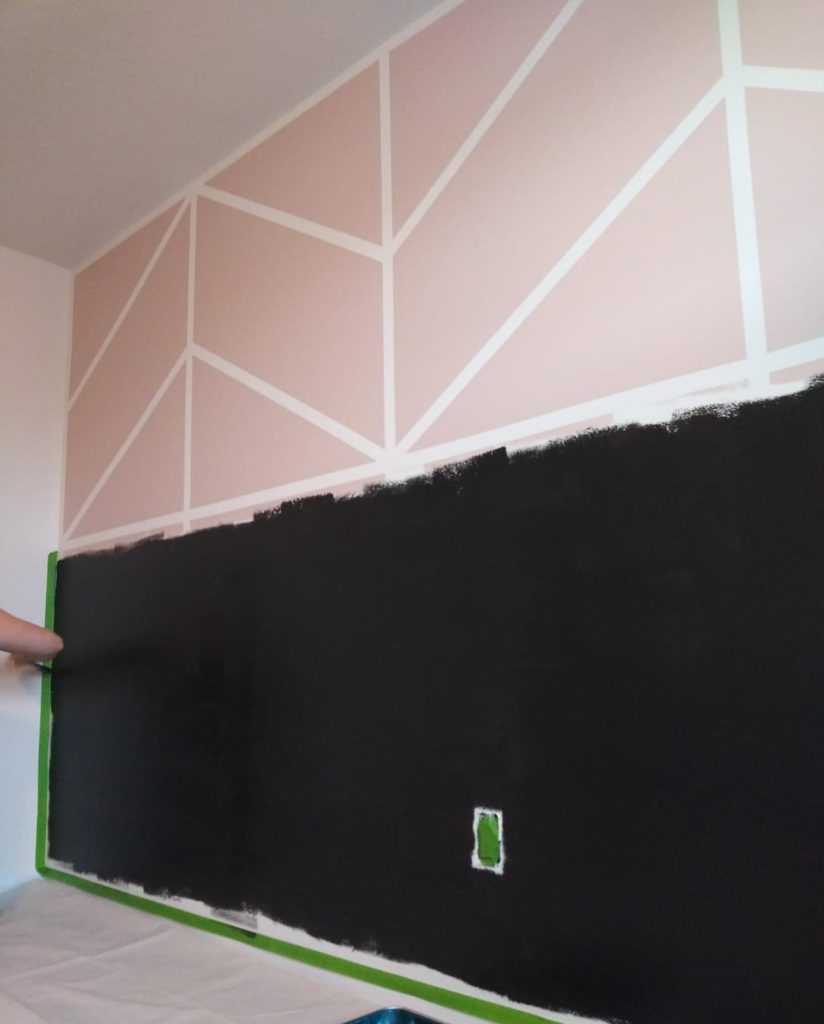
Tip: When we finished with the second coat of paint (before fully dry) we went ahead and peeled off the tape at an angle towards the area that was painted, this helps give you that nice line without peeling up any paint. Peel the tape off the same way you put it on starting with the last piece and finishing with the first peice to make it easier.
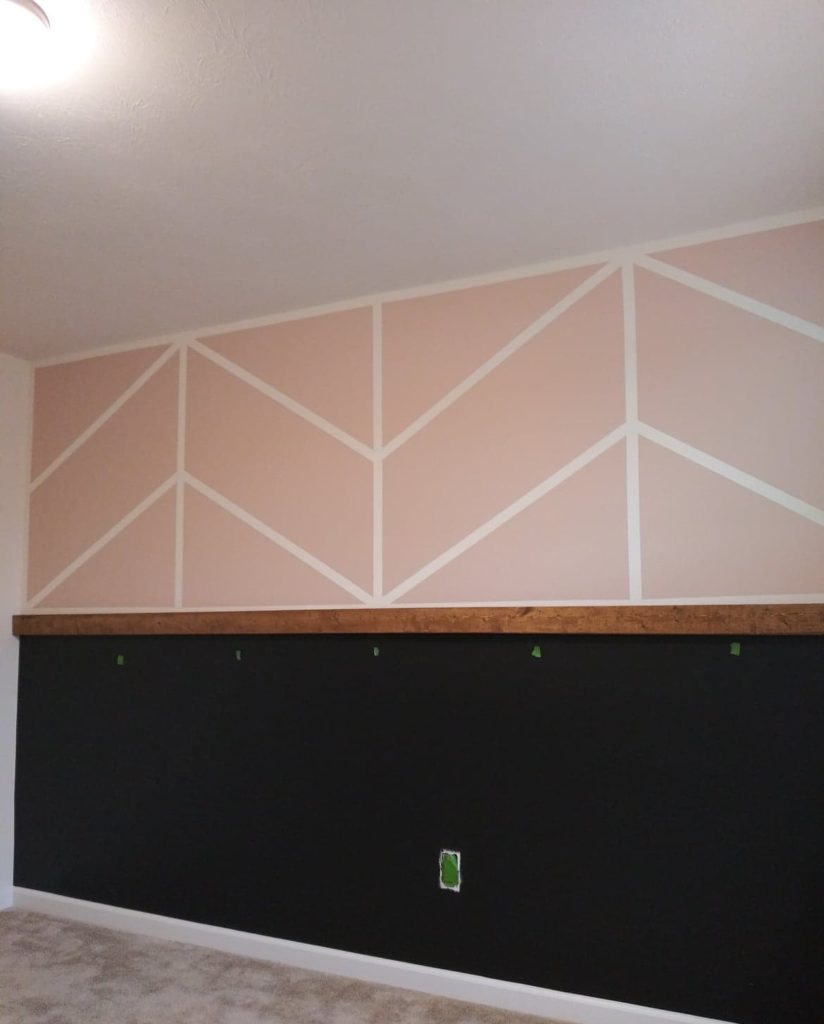
Nursery Paint Concerns: Choosing A Color For Herringbone Accent Wall Paint
I didn’t want the room too pink and definitely not Pepto-Bismol for a color either. I decided on a blush pink paint. When feeling woozy looking at a bunch of pink paint swatches I came across an article with some of the best pink paint for nursery. I picked a color off the list and ran with it, before heading to my local home improvement store (Lowes) I did one last search to make sure it’s the pink I wanted. I always find it helpful if you can find a real image of the color although lighting and other circumstances can play a factor. That’s when I found a cute office where the blush pink paint was used on the door. The paint color is called Pink Shadow by Sherwin Williams. We chose it in Eggshell for our wall.
I am thrilled with how the paint color turned out!

Black Board and Batten Wall Color
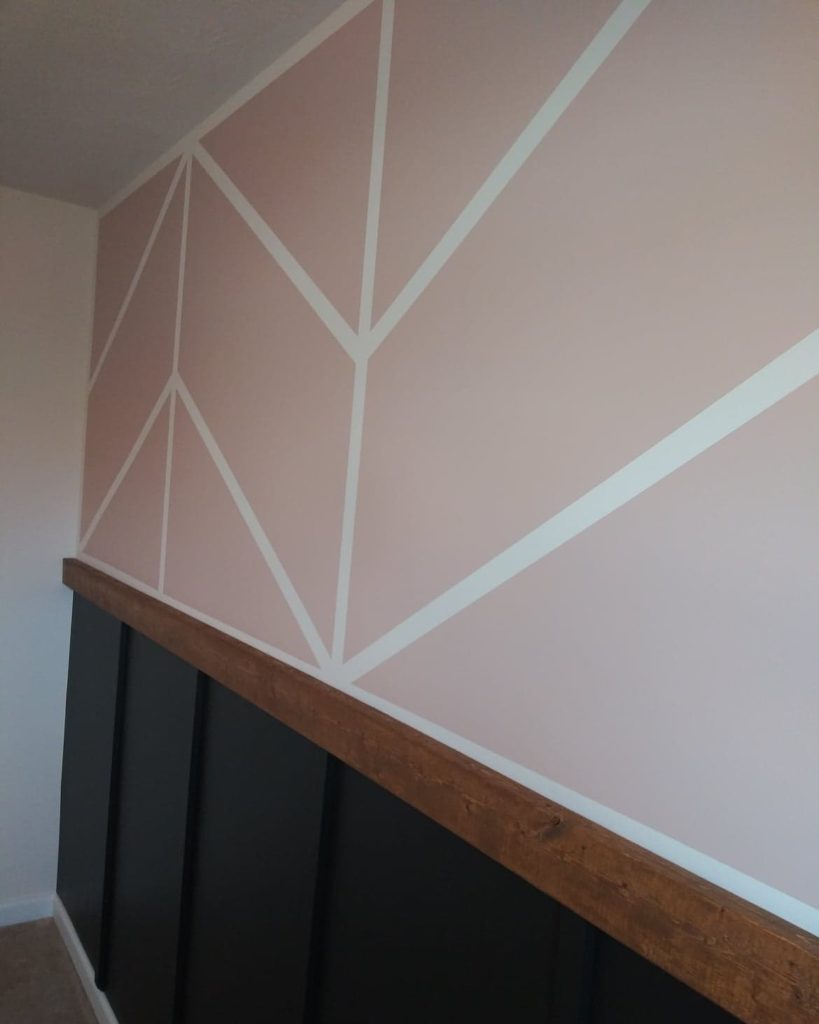
For the black, we went with the paint color Tricorn Black by Sherwin Williams (also in Eggshell sheen) which is a pretty popular color. I’m swooning over how dramatic it makes the room feel and really pops against the blush pink color on the top half.
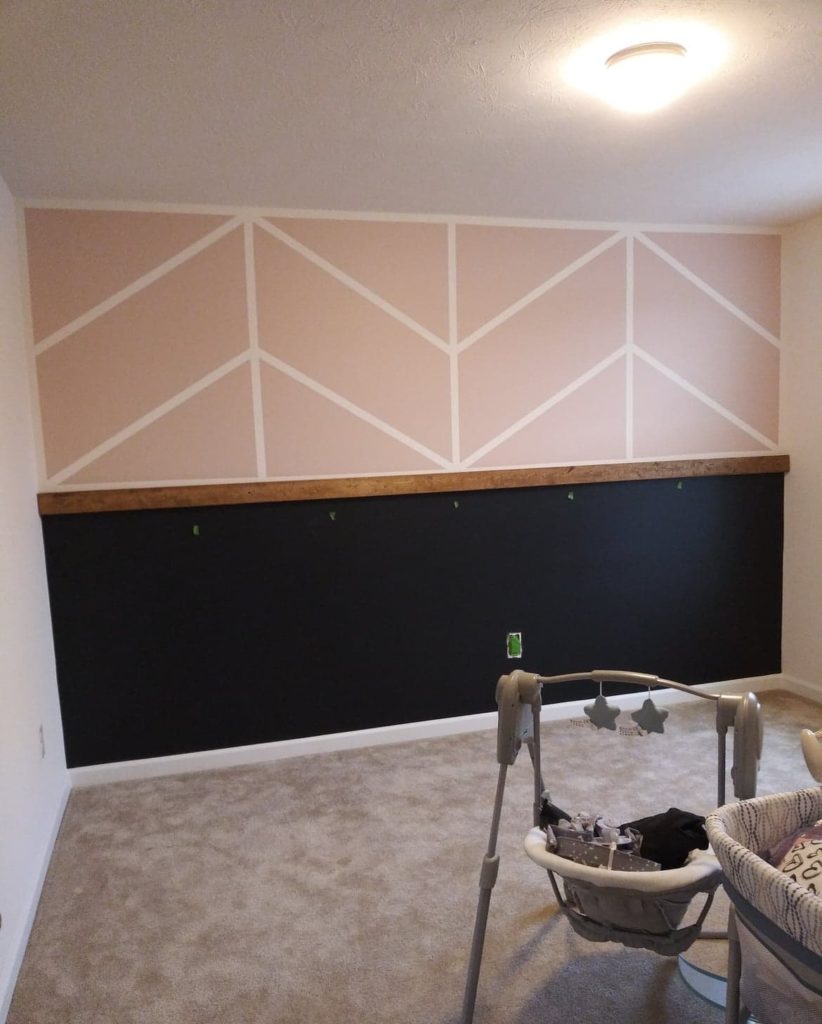
DIY ACCENT WALL: Attaching Our Middle Board
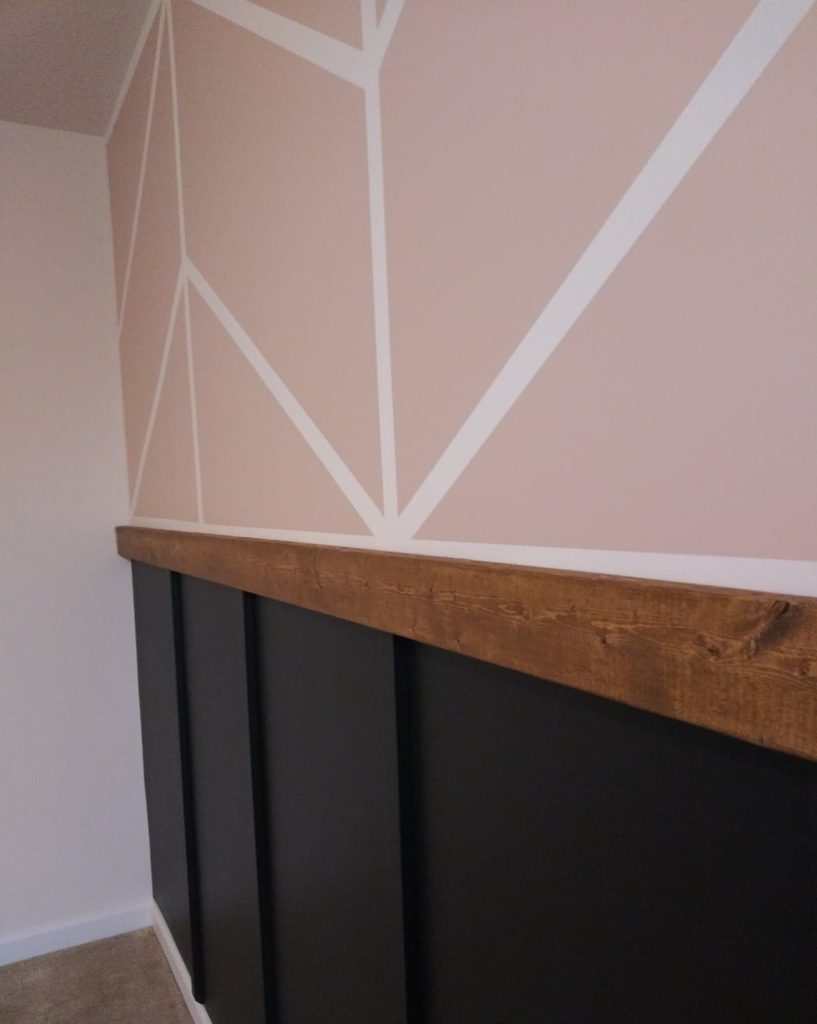
After the painting was completed, we used a stud finder to identify the stud locations in the wall so we knew where to attach our wood board in the middle of the wall so that it hung securely. We stained the board using a staining pad and screwed it to the wall to our marked studs (make sure board is level before any screwing).
Tip: Pre-drill two holes in the wood at the farthest point on each end (where your studs are) and use black 2.5 inch Drywall screws to attach it to the wall to give more of a hidden look.
Board and Batten Bedroom Idea
If you have checked out my other post, you will see that I do love a board and batten full wall and we’re no strangers to the grid wall design (since we’ve done two in the living room) but this time around we went with a different design and only a partial wall to create this fun DIY board and batten wall in which the boards go vertical only.
ACCENT WALL DIY
Board and Batten Half Wall: Installing The Bottom Boards
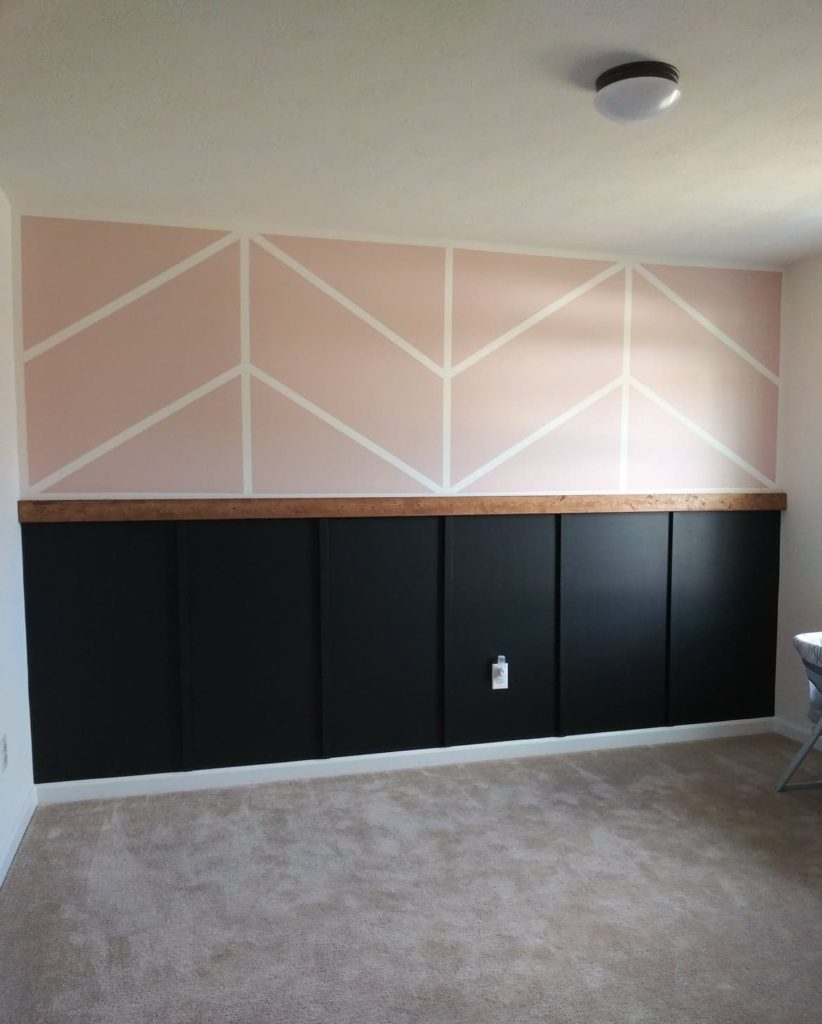
To begin this part, you will need to figure out how you want your design with the spacing of the boards. We chose to cut some costs and spaced ours out (using less material) so that we could get 5 pieces out of three boards, using the leftover pieces for another planned project down the road. Measure from the middle wall board down your baseboard to see what the size of your cuts need to be. We used a miter saw (this one) to make all our cuts on our batten boards (and for cutting an angle on the bottom which I talk about below)
Tip: You will want to measure each spot your planning on putting a board, for however many boards you choose (not just for your first board). Our pieces varied by .25 inch due to the slight warp in the board, it wasn’t safe to assume all boards should be cut the same length.
Once all the cutting was out of the way, the wood pieces got painted with the Tricorn Black, then once dry, we attached our boards using a nail gun. (This is our favorite Brad Nailer. For this one, you don’t need an air compressor and it’s cordless!) At this point all that is left to do is patch and paint any nail holes.
TIP: To fill and patch our holes, we used the same crayon that we used on our Shiplap Backsplash and our Shiplap our kitchen Island. It’s the best product we’ve tried! Here’s how we did it:
Before applying the nail hole filler, use either a paper towel or an old rag and dampen with Mineral Spirits, wipe around the hole you plan on filling and the putty stick. Then go ahead and fill your hole. Then use the rag that had the mineral spirits on it and wipe over the hole to get a clean polished look.
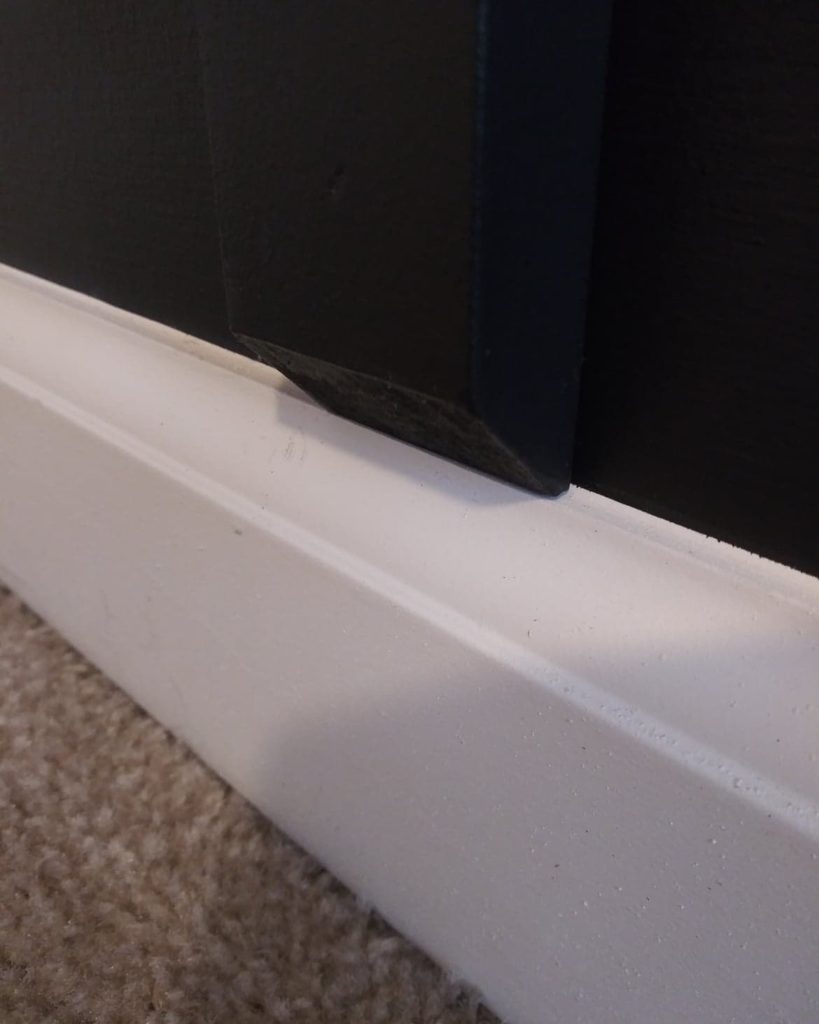
I should note too, we chose to put an angle cut on the bottom where the board would meet up to our baseboard. It looked way better in our opinion. We did a 45 degree cut, but only cutting half of the corner off.
Here is a picture to better show you.
The last step is simply to clean up! Now you get to enjoy your new board and batten accent wall and decorating your new space which is what I’ll be doing next for this nursery!
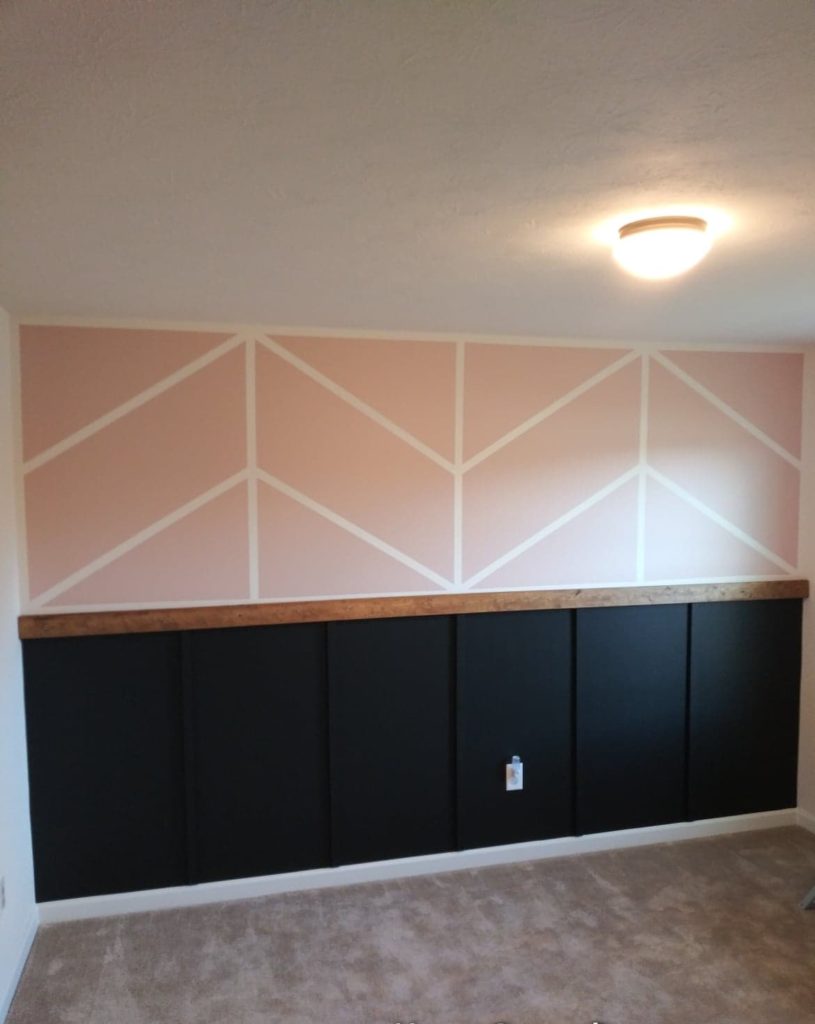
The Final Results
The pictures really don’t even do this wall justice and I got some wonky lighting since this room is facing the back of the house but here are some finals of the nursery accent wall.
![]()
DON’T FORGET TO SAVE THIS ACCENT WALL DIY TO YOUR FAVORITE PINTEREST BOARD SO YOU CAN COME BACK TO IT LATER!

IF YOU ENJOYED THIS……
HOP OVER TO SEE OUR LIVING ROOM BOARD AND BATTEN WALL POST!