This post may contain affiliate links, which means we'll receive a commission if you purchase through our links, at no extra cost to you. Read the full disclaimer here: https://diycoupleblog.com/disclaimer/
A detailed guide to take you through the steps of how to build DIY pantry shelving that is both sturdy and really pretty too!
If you’re looking for really unique pantry shelving ideas then you’re in the right place. These wood shelves could work in a closet as well. Keep reading to see how we transformed our pantry by building some farmhouse beaded wood shelves and getting rid of that basic builder grade wire shelving.


Our small builder grade pantry had ugly wire shelving that we wanted to replace so we decided to build these DIY pantry shelves with wood to make them so much more functional, and they look a ton nicer too. It was well worth the upgrade. Now let’s get started building. Okay, I’m getting ahead of myself.
The first step to this pantry makeover is clearing everything out of the pantry. Ours really lacked organization. Our system involved throwing things in the bins wherever there was a landing space since smaller things will just fall through the wire shelves.
Before I get into the big pantry makeover; removing and building the shelves, here is a little look at what we’re working with. It’s always satisfying to take a good look at where you started on a project so you can fully appreciate the finished part.

You may notice we also removed the door. Not only did it make it easier to work in this small space, but it also got a makeover as well. We ended up painting the door Sherwin Williams On the Rocks.
Once the pantry closet was empty, we got started removing those builder grade wire shelves.
Tips For How To Remove Wire Shelving
I thought it might be helpful to share some tips on how to remove wire shelves and what worked for us so that it might cause minimal damage when making over your pantry and taking on this task. If you do not have wire shelves then you can skip this part, of course.
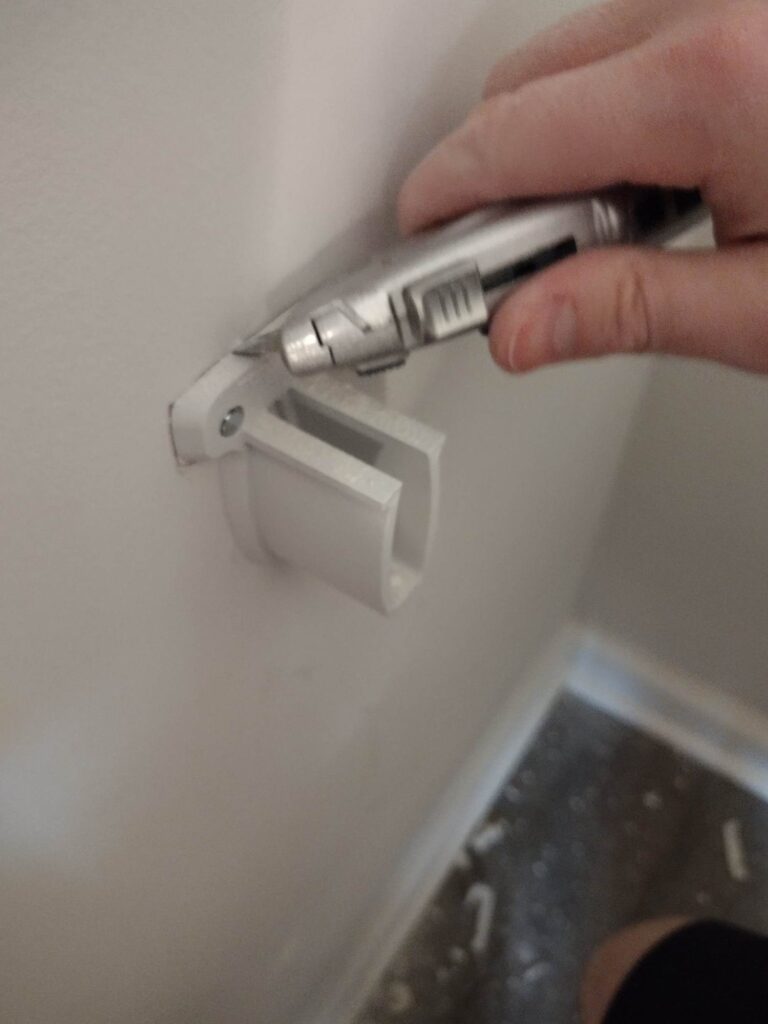
When removing the wire shelving, just be careful so that you can minimize the drywall repair and possibly just cover up the small damage left from tearing them out. We used a razor knife to score the outline around the bracket and pry upwards with a flathead screwdriver, so the drywall didn’t rip severely.
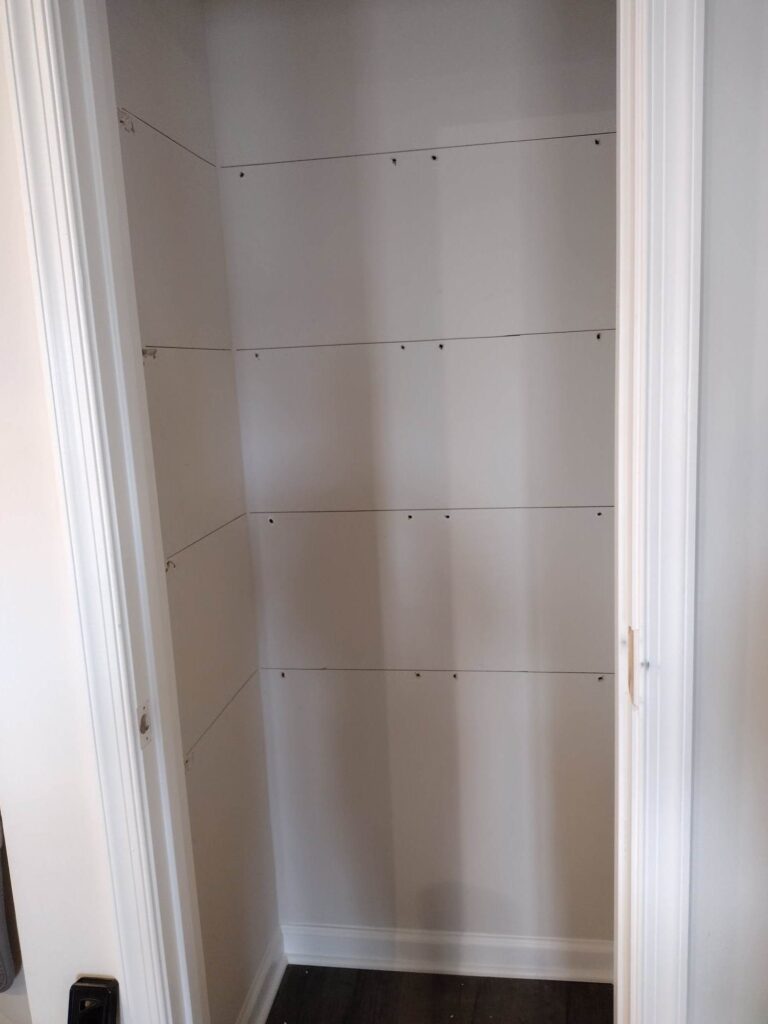
We quickly cleaned up the mess and now the ugly wire shelves are gone! Say hello to our pantry blank slate. This area was a little hard to photograph.
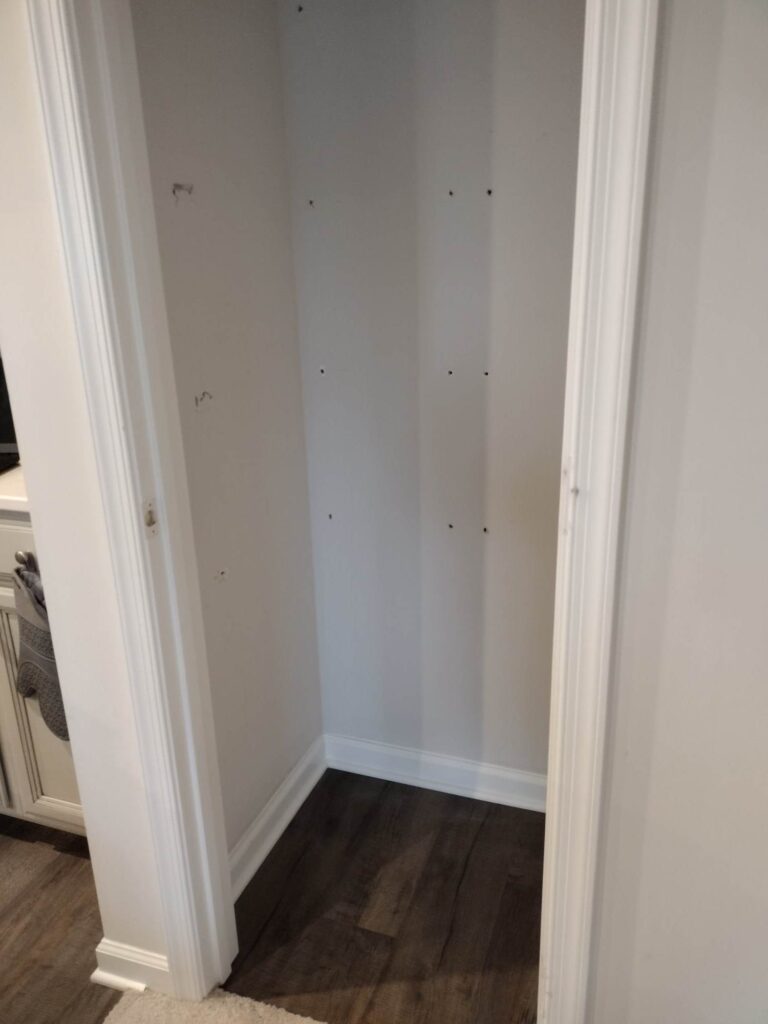
Now it’s time to configure your design. Since we are trying to do minimal patch work, we chose to leave the shelves in their existing placement so we can just cover up any imperfections of the drywall with our frame and keep moving right along with our pantry remodel. I will say If you are trying to extend your shelving by making it bigger be sure not to bring your frame out so far that you cannot get your shelves in.

I think we are now ready for how to build pantry shelves. Farmhouse style.
Tools Required:
Razor Knife & flathead screwdriver (if removing wire shelves)
Caulk Gun
Marker
Materials:
2.5 inch screws (OR Toggle Bolts if no studs in wall)
5/32 drill bit & 1/8 inch drill bit (this set includes both sizes)
Caulk
White Paint (& paint kit if you don’t already have one)
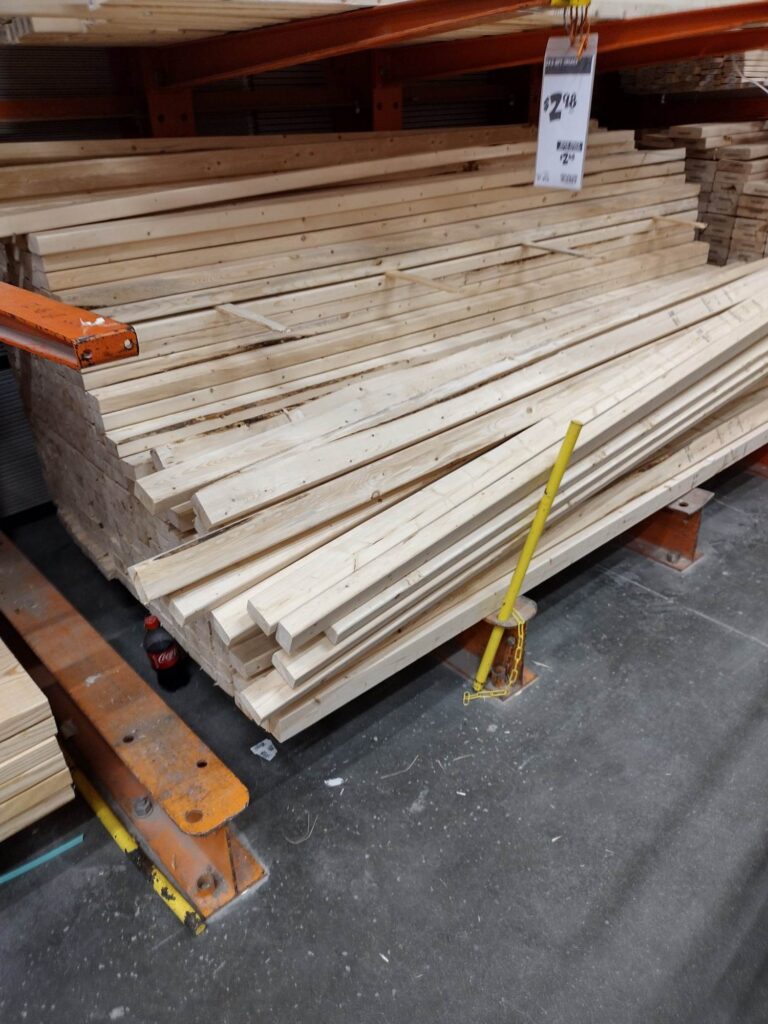
1x8x8 wood board OR 1x8x6 (either would work)
DIY Pantry Shelving
Now we’re sharing all the steps to build our DIY pantry shelving. We built four shelves total, but definitely keep in mind that the measurements and the supplies you’ll need will be custom to your pantry space so just be sure to adjust accordingly.
Installing Shelf Frame
To get started, hold the level up and mark where your shelves are going to be to make it easy on yourself.
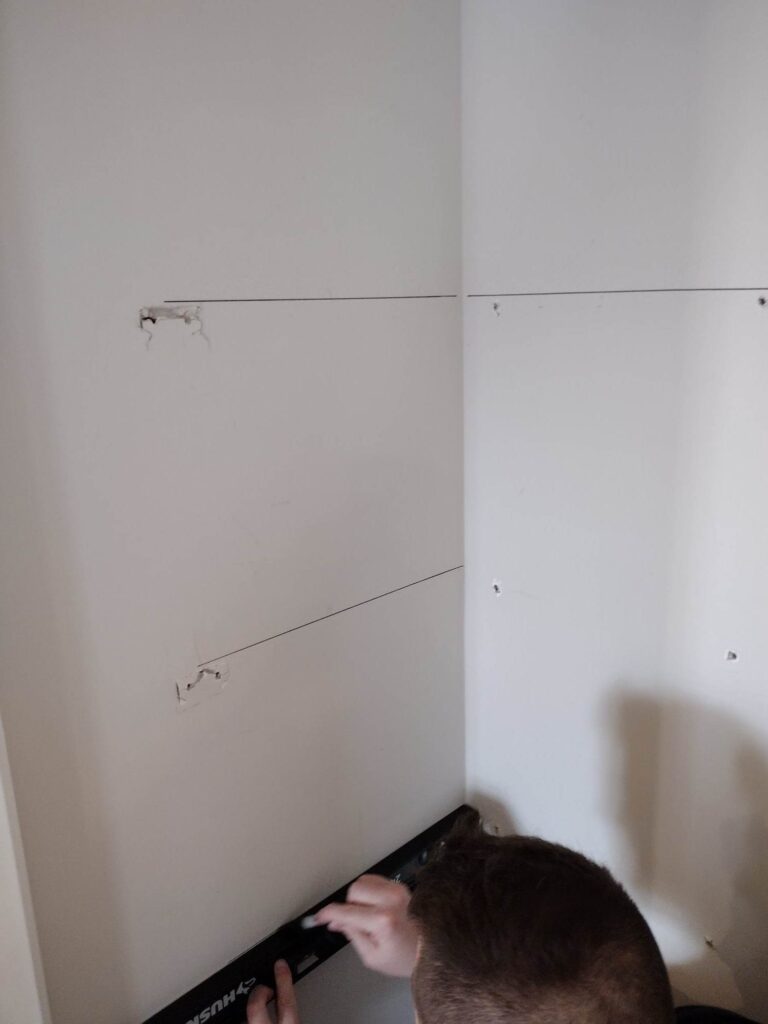
Next step is to find where the studs are located in the wall and mark them.
Just a side note in case you run into the same issue. There were no studs behind our pantry walls. Ugh, this was a little frustrating but toggle bolts for the win!

Next up for your pantry shelving DIY, measure the length and width of the size shelves you need and go head and cut all your pieces (your front and back boards will go wall to wall, your sides will be the width minus the thickness of the 2×3 boards).
If you have studs, now attach your frame following your guide where you have marked the wall. Also, pilot holes will make it much easier.
If you do not have studs, be sure to follow your toggle bolt instructions given. (Note: If you are using toggle bolts make sure you don’t drill the toggle size through your wood, you’ll have two separate sizes here, one size for your wood and one size for your toggle through the wall).
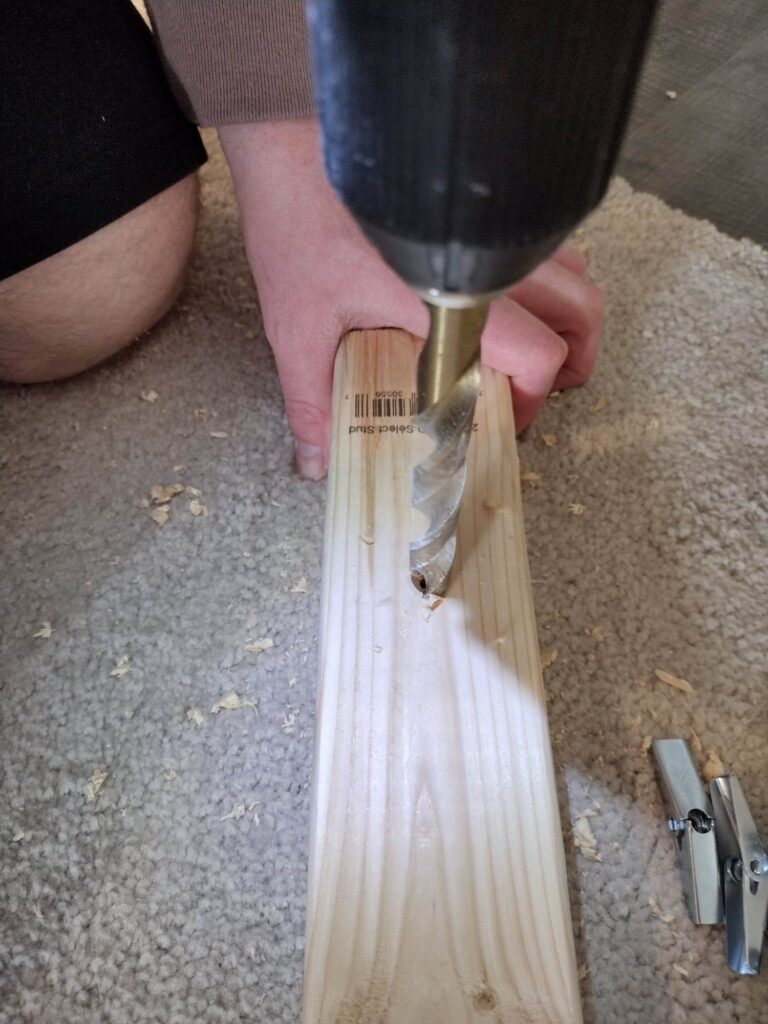
We did a counter bore hole in our 2×3 board for the toggle bolt.
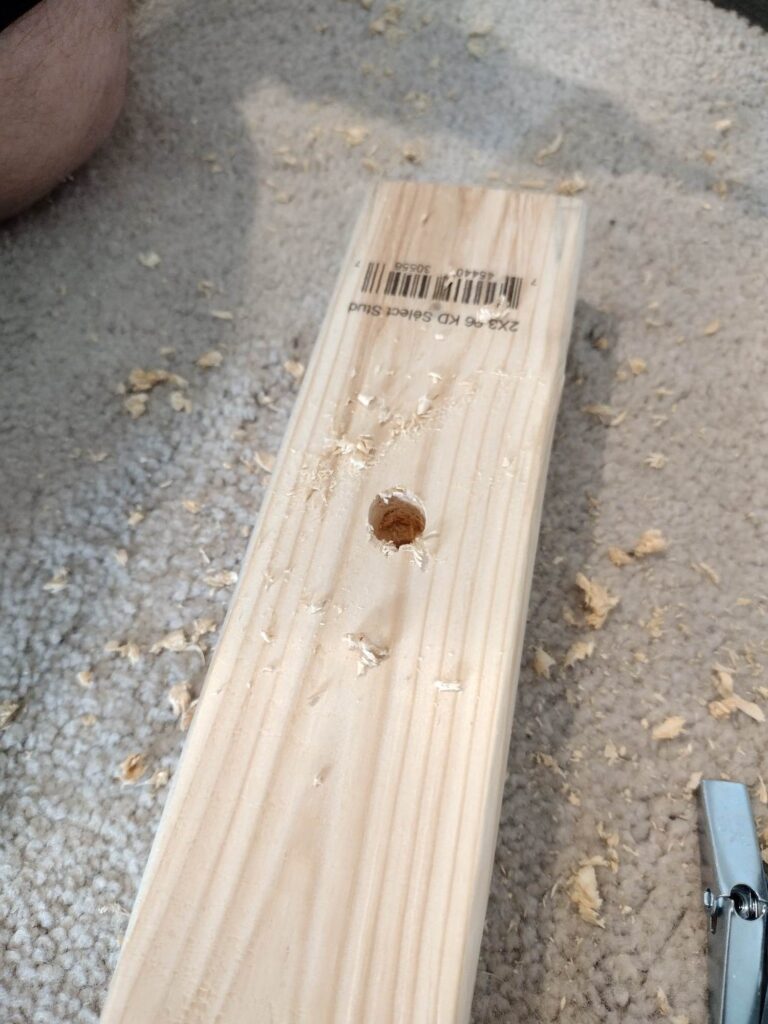
Attach your boards with 2.5″ inch long screws or toggle bolts if no studs are present.
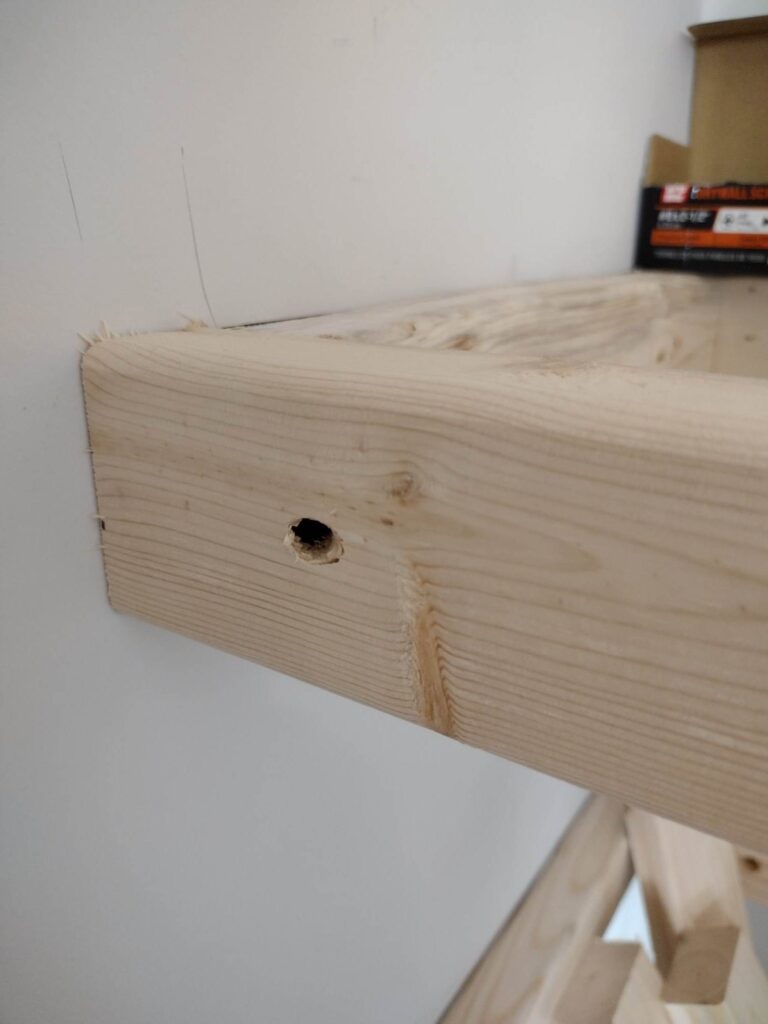
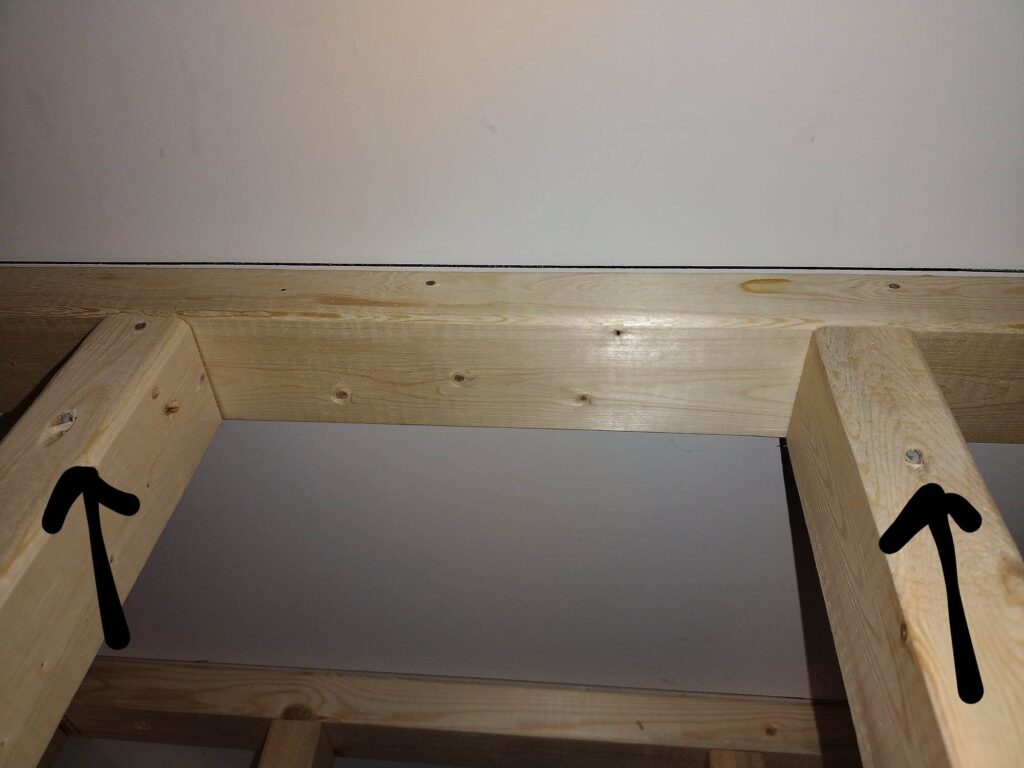
After you get the back and side boards on, attach the front board. Using 5/32 drill bit, drill an angled pilot hole in the center of the front face of your wood in the same direction as the screw showing you from the picture.

Sink the screw at least 1/4 inches into the wood.
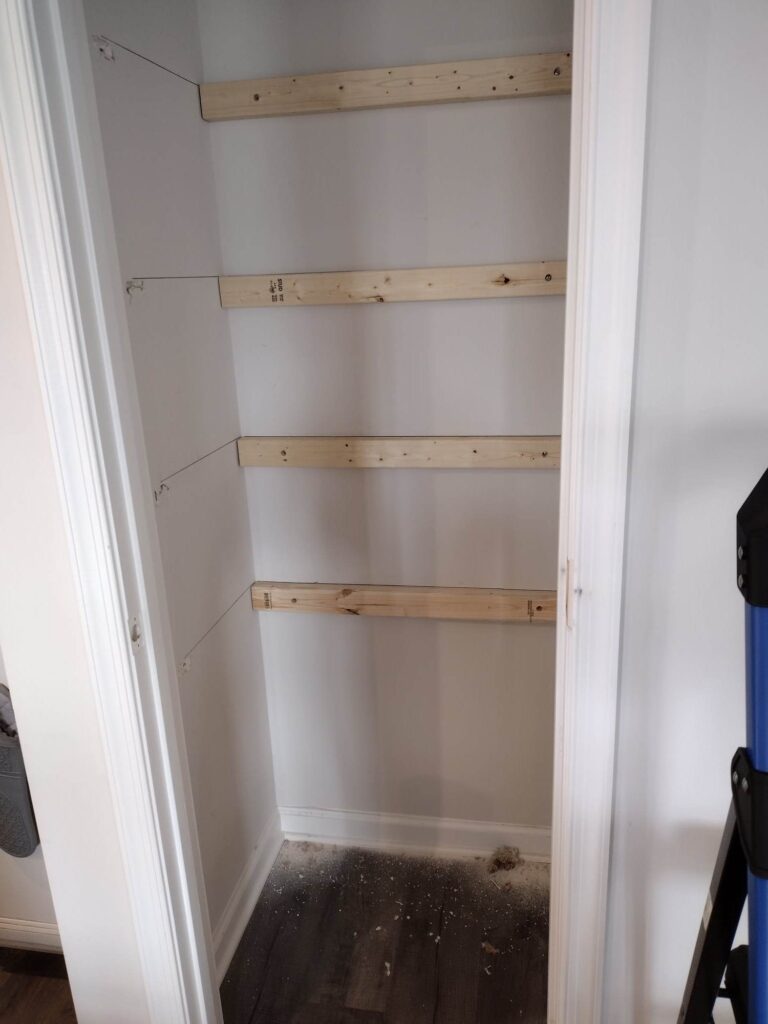
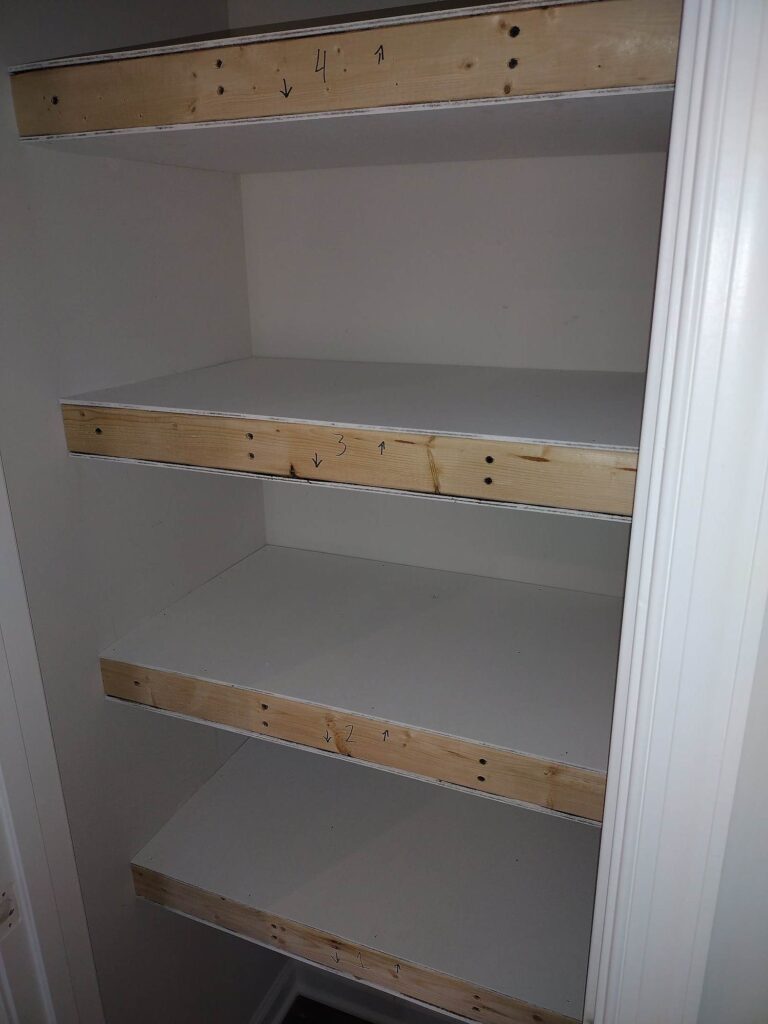
Now your shelves should look like this.

You’re going to cut eight more boards on the miter saw, which will be your middle supports for your shelves.
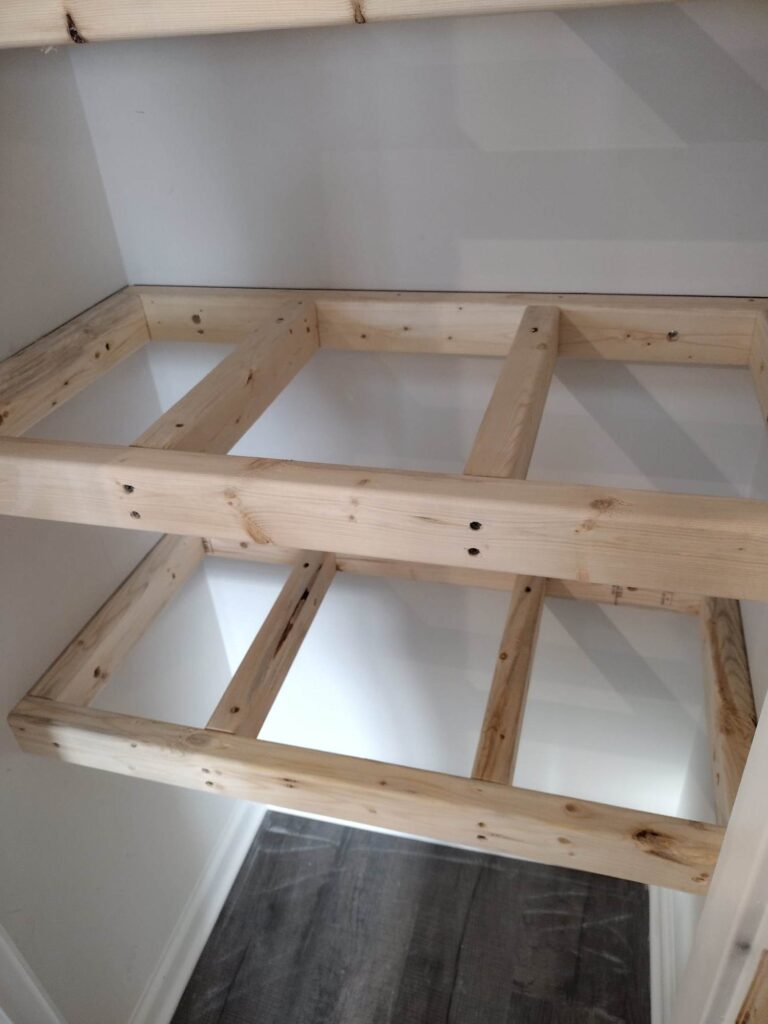
We screwed two 2.5 inch screws into the front of each support and one at an angle from the top side to keep boards straight. You’ll have to forgive my terrible markup but here is a close up of how we attached it.

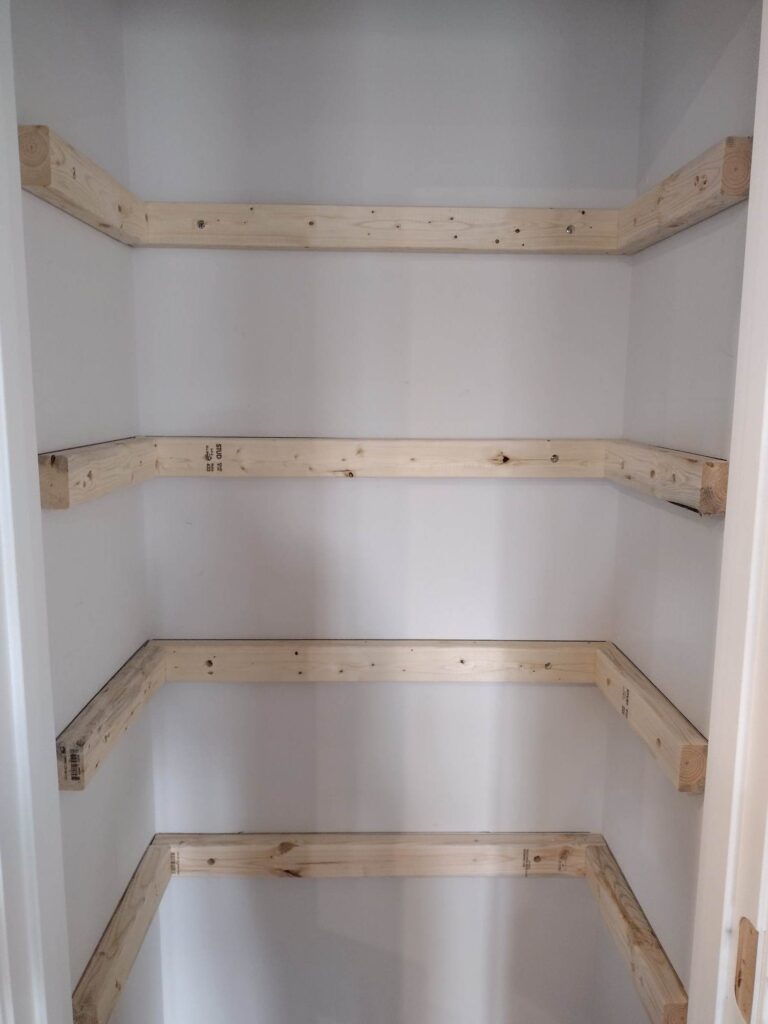
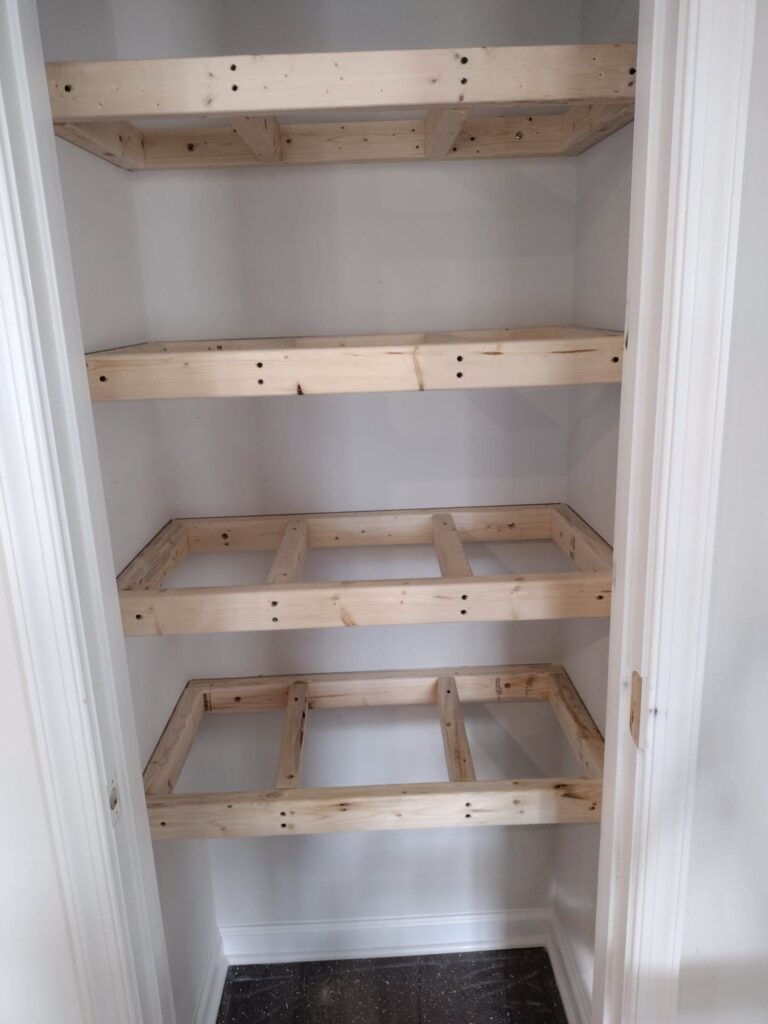
Shelving frame is all complete. We did use our orbital sander to clean up any splitting wood and burs seen but that is optional.
Cut Your Pantry Shelving DIY To Size
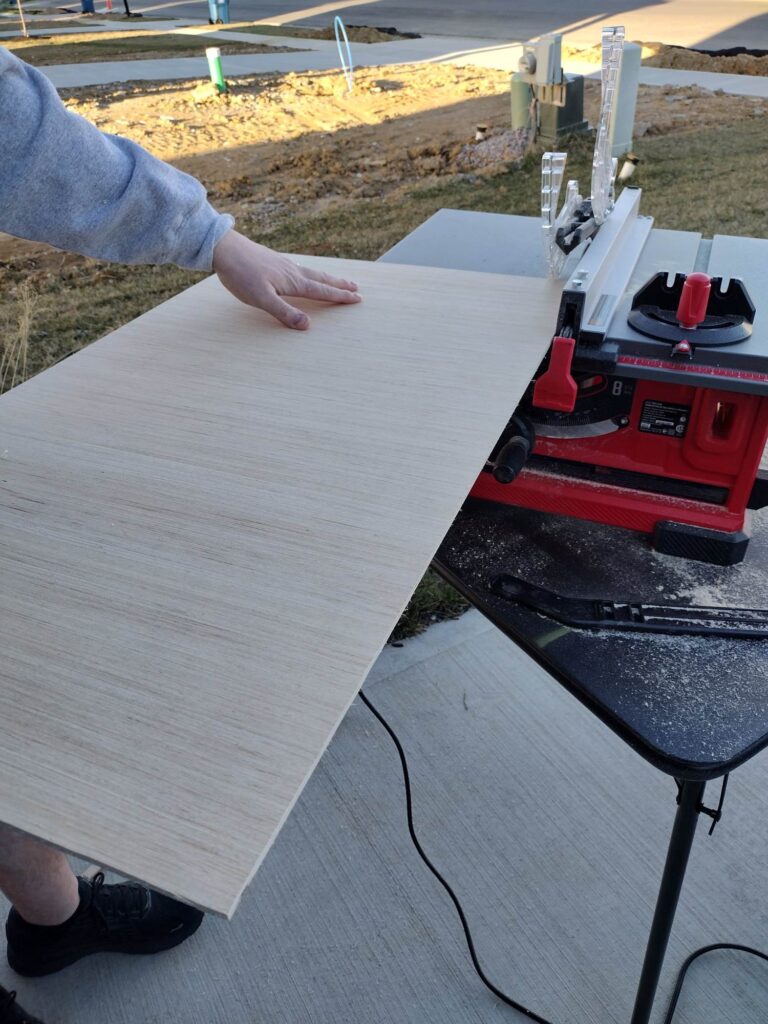
For the shelving we chose to go with a sheet of plywood which we had Lowes cut down into several pieces while there (mainly in order to fit it in the car). Now you’re ready to measure and cut a top and bottom piece to the appropriate sizing to cover your frame that you will soon call shelves.

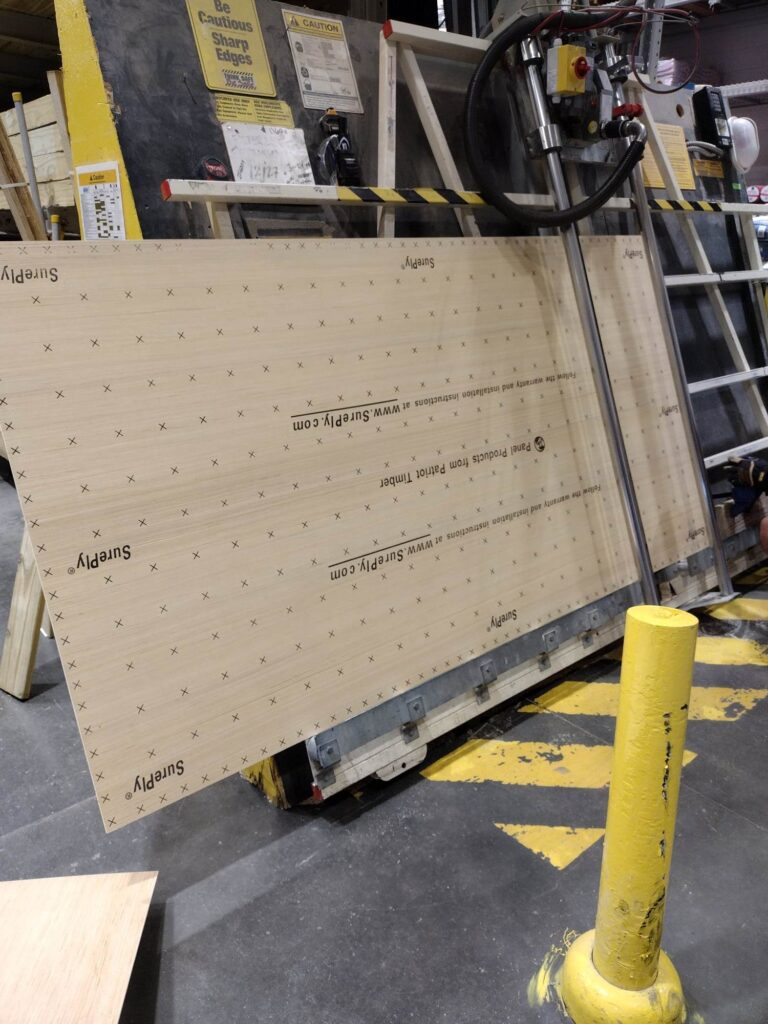
We got more precise measurements and cut and fit each shelf accordingly since walls can sometimes settle or be off. Don’t stress to much on this as you can caulk a nice finish between the wall and shelf if you have any tiny gaps.
Paint & Attach DIY Wood Pantry Shelves
Go ahead and paint your shelves. We went with an affordable flat white paint. You don’t really need to paint the bottom and the sides of each shelf as they will not be visible. The back part and the sides will go against the wall of course and the bottom will be on top (or underneath) the frame. You will want to do the fronts, however. You also have the option to polyurethane them if you choose to do so for extra spill protection. Give the paint plenty of time to dry before you will be ready to install them.
For this part you will want to work with a wood glue or a construction adhesive to give it some extra strength (we had some leftover from our DIY bathroom mirror frame).
Put a bead of adhesive all the way around the frame, then nail the shelf down to the frame. Start with the bottoms so that way no glue drips on your shelves.
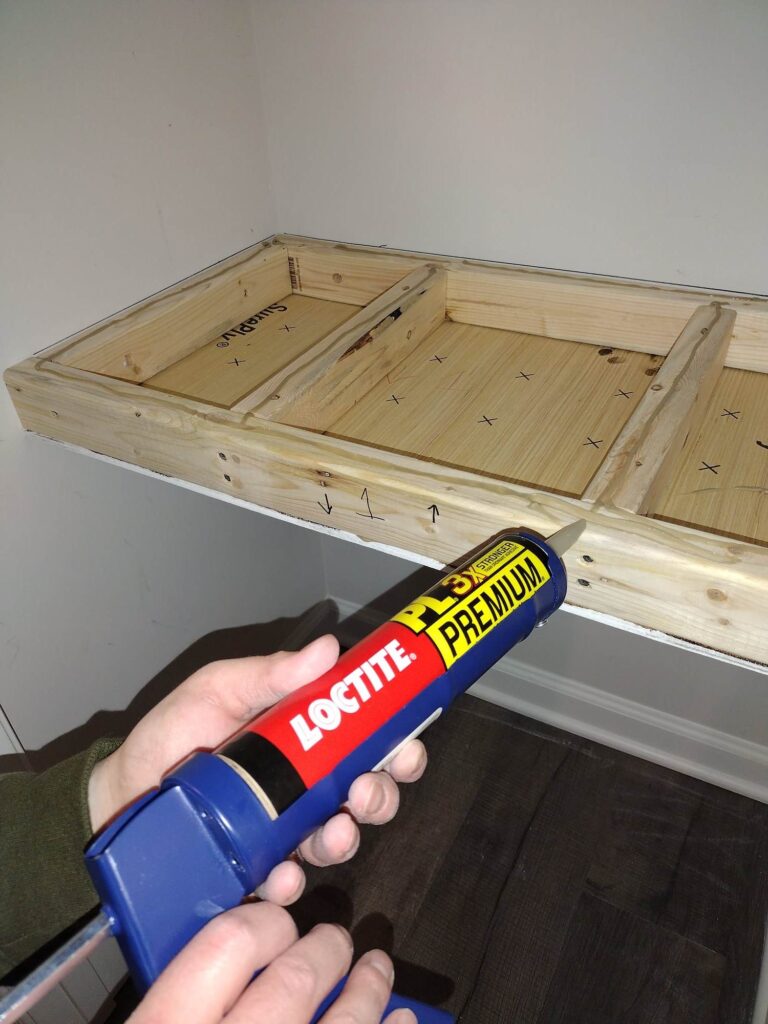

Then came the tops of the shelves as seen here. Repeat the same steps with the tops as you did the bottoms. First apply your adhesive on the frame and pressing shelf down, nail it to the frame.
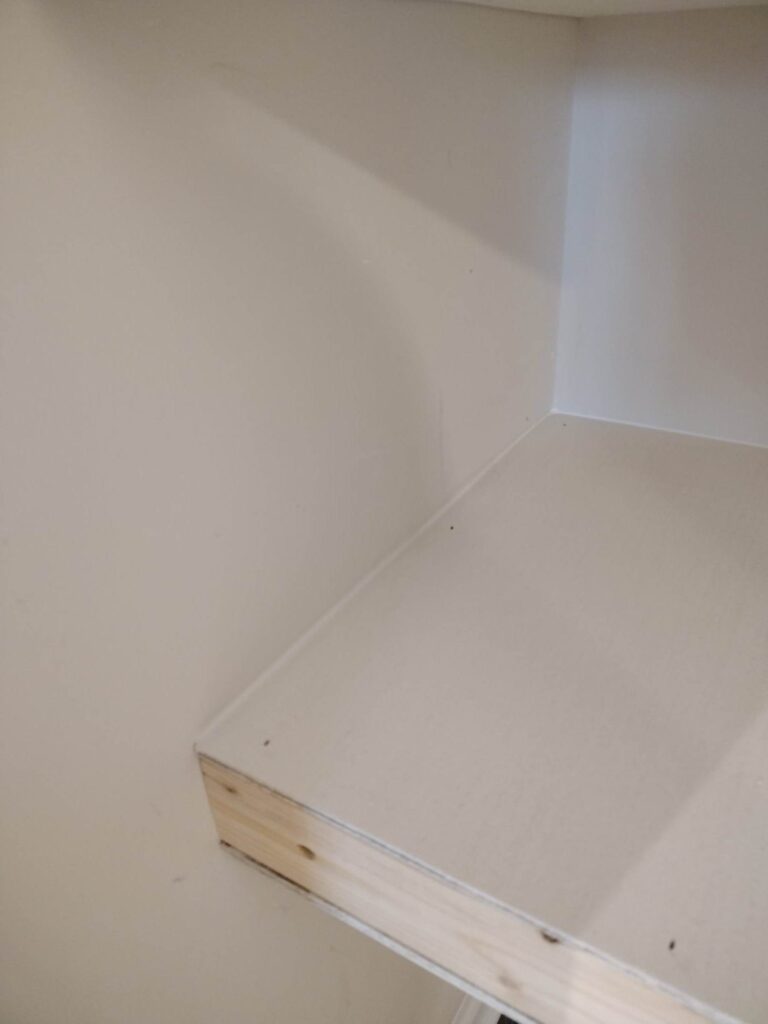
Here you can see how much the caulk makes a difference although you’ll preferably want to do it all at the end so you can caulk between your front shelf faces too.
Pantry Shelves DIY Finishing Front Trim
We had a 1x8x8 laying around in the garage we were able to use but depending on the width of your shelf you could probably use a 1x8x6 and still have plenty of the board left. Make sure to measure the width of your shelf faces to configure what size board you will need. (You can figure this out by taking your width times two and that will be your overall length of the board you will need). One board should get you four shelf faces.
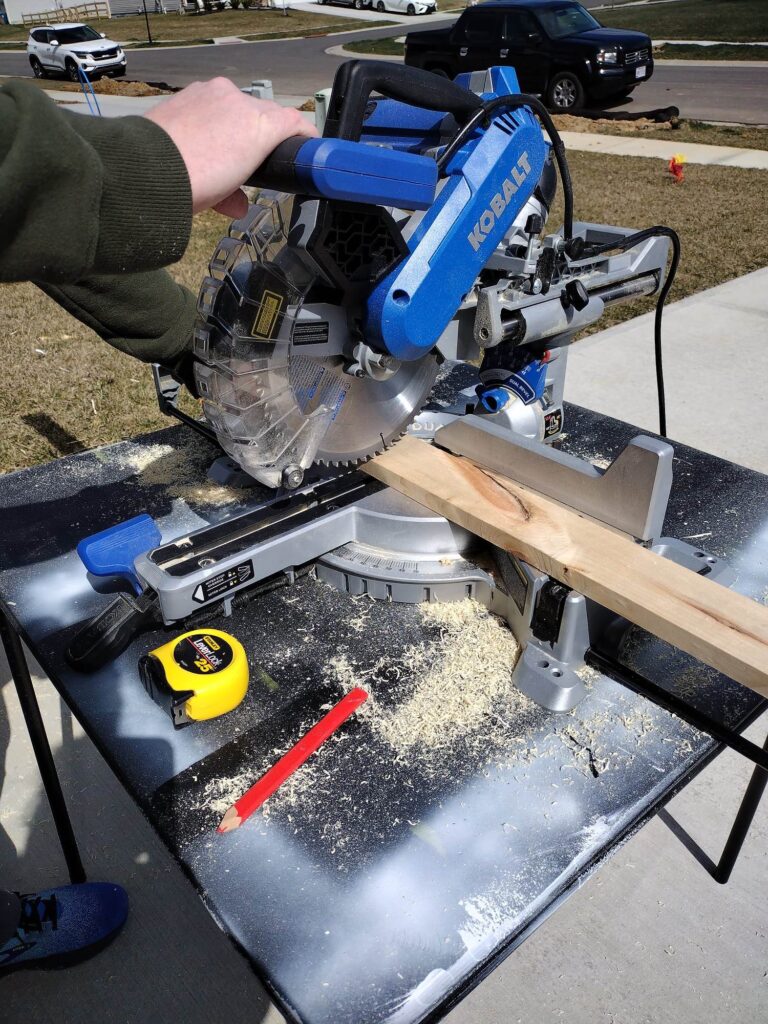
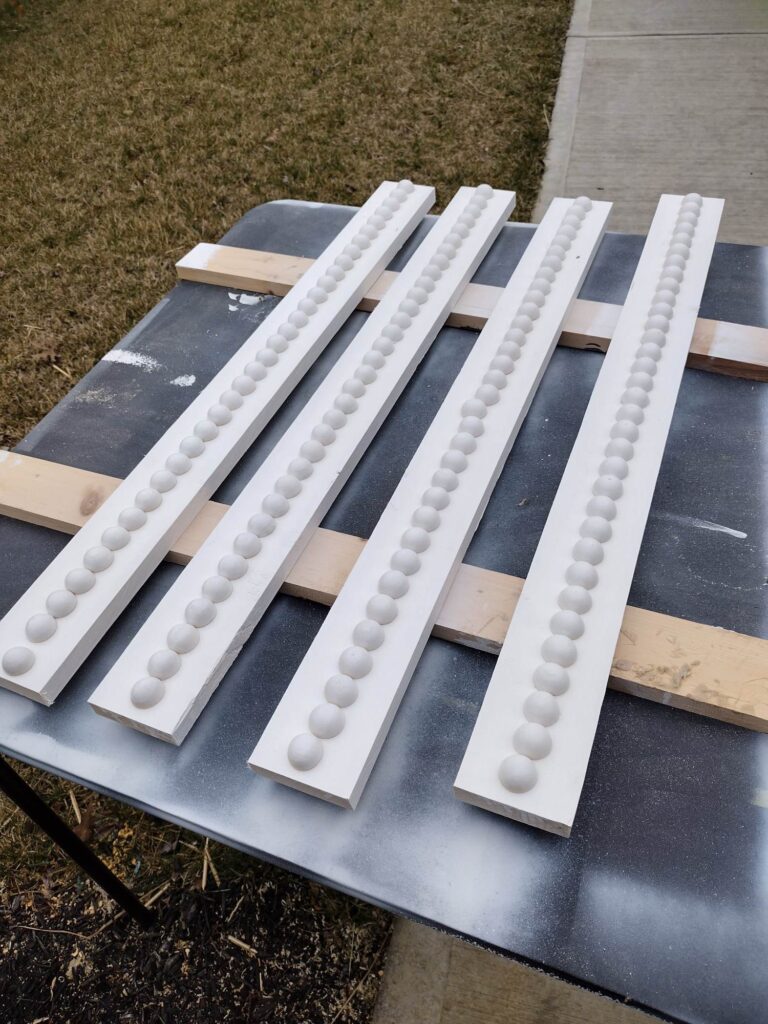
Go ahead with your board, rip it into two pieces that are three inches wide (be sure to measure the thickness of your shelf to verify this works for you) by however long your shelf is cutting that length with your miter saw.

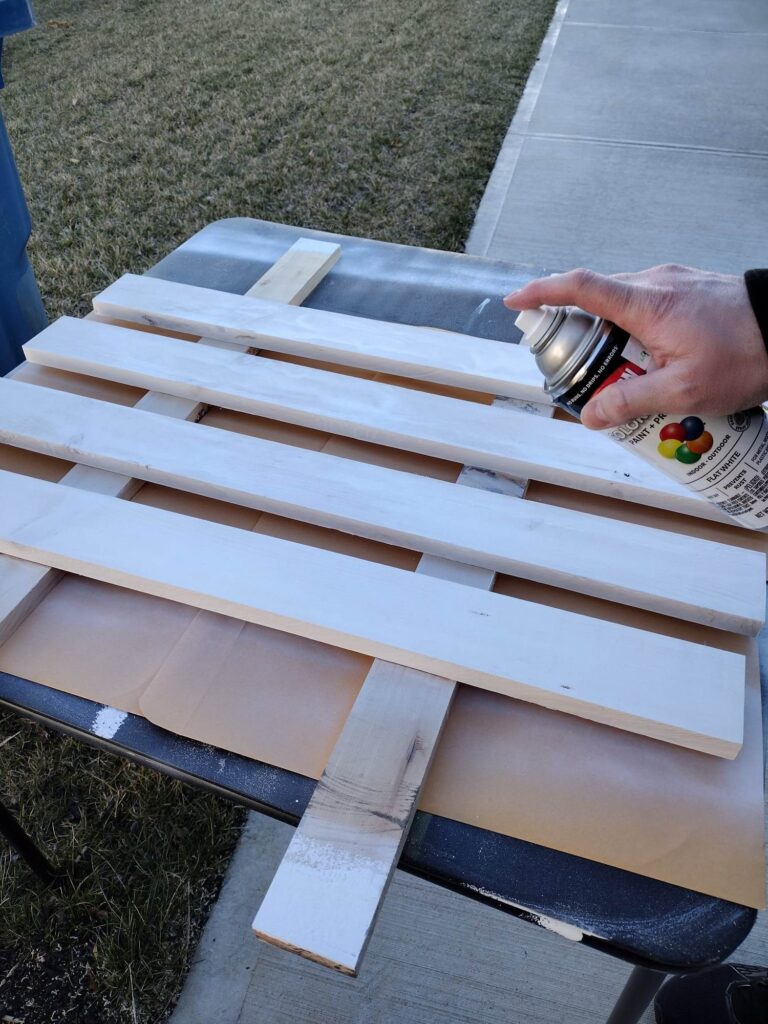
Paint the fronts and the sides of your boards. To make this part quick an easy we used our white spray paint and gave a couple coats since we just went with the white.
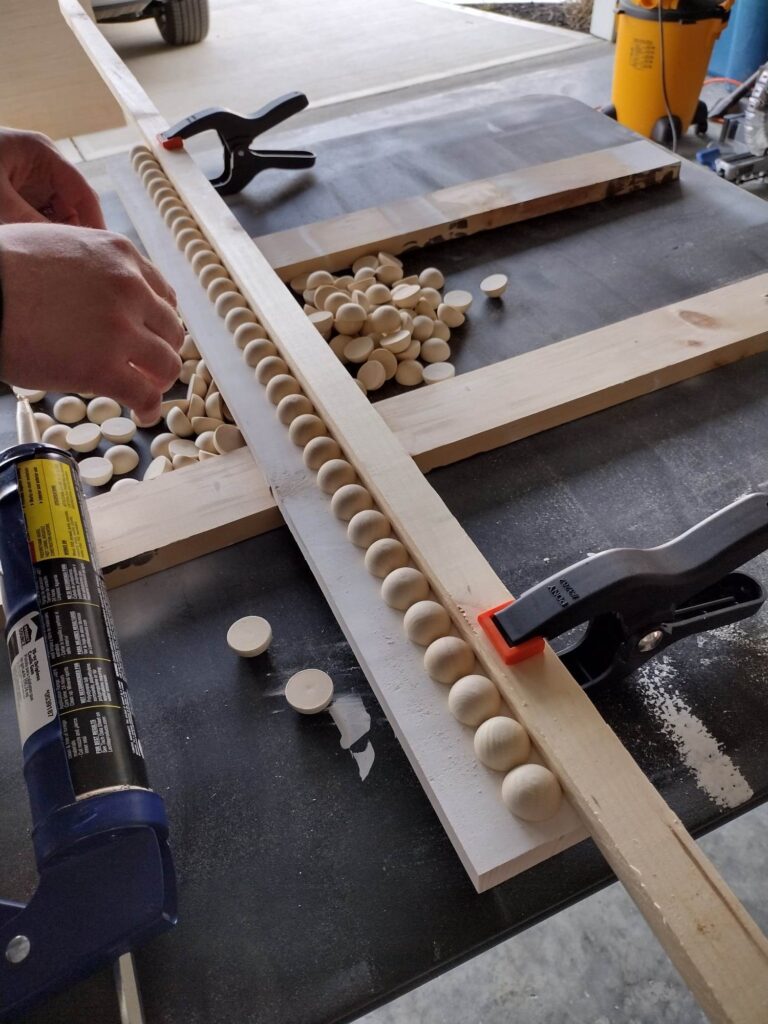
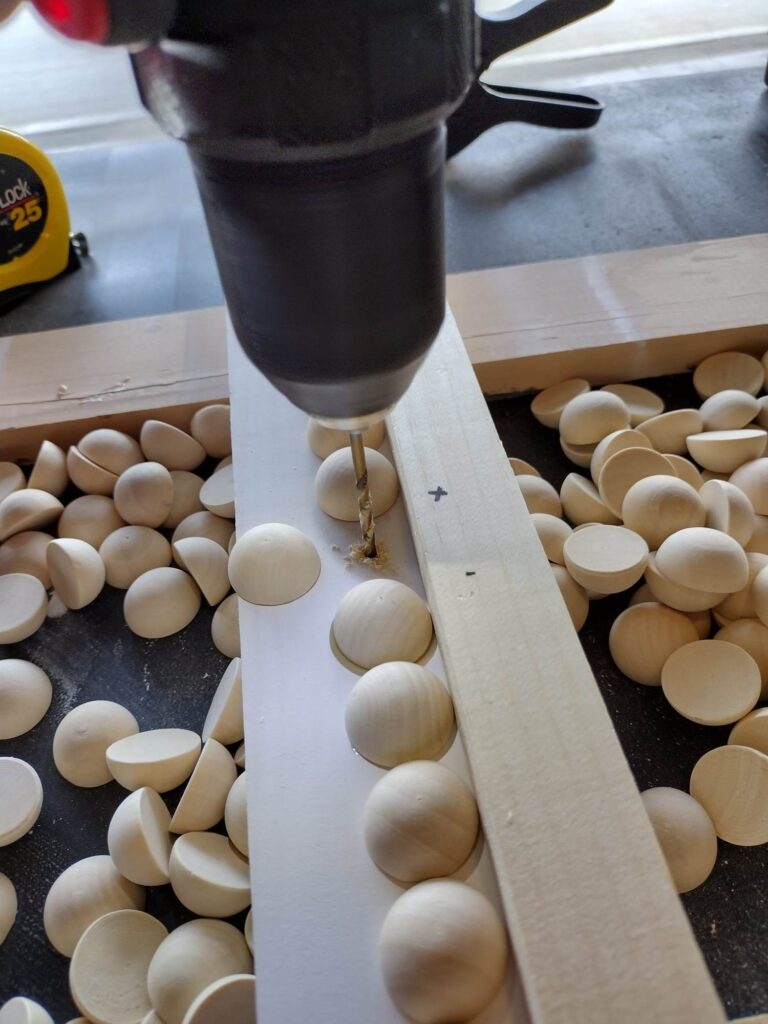
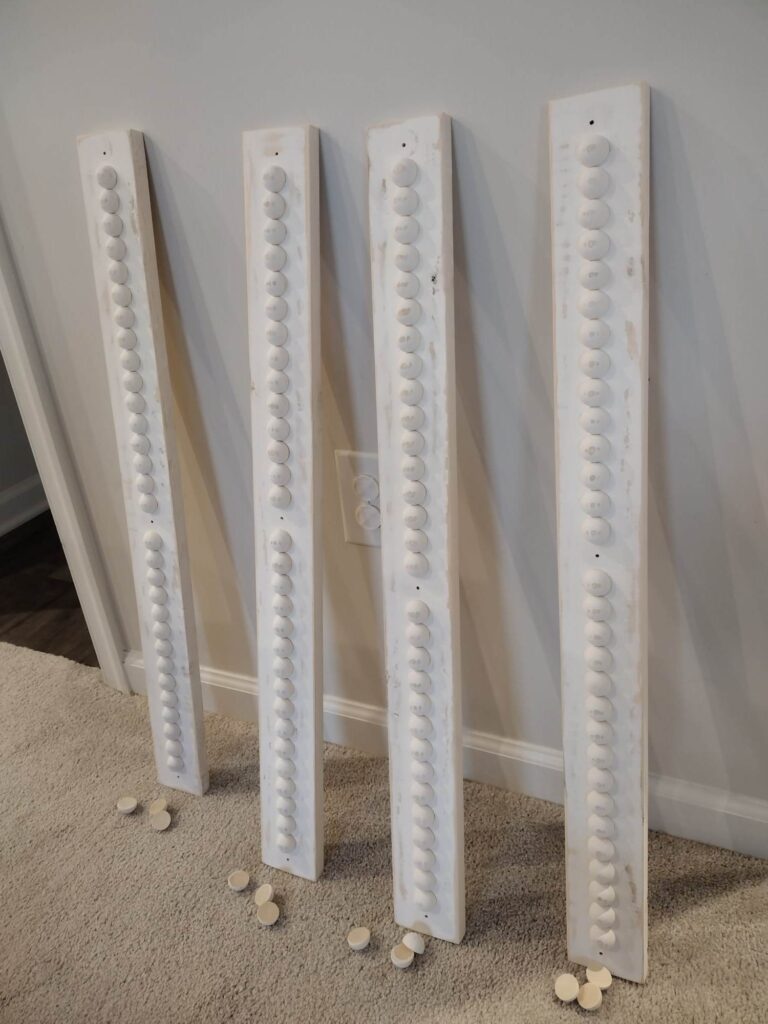
Lastly, before attaching, were adding the beads. Before using any adhesive, you’ll first need to clamp a one inch piece of trim (we just used the cut off piece from our 1×8) from the top and line up your beads along the front of the board to see how many you will need. Start gluing the beads on one at a time across the front.

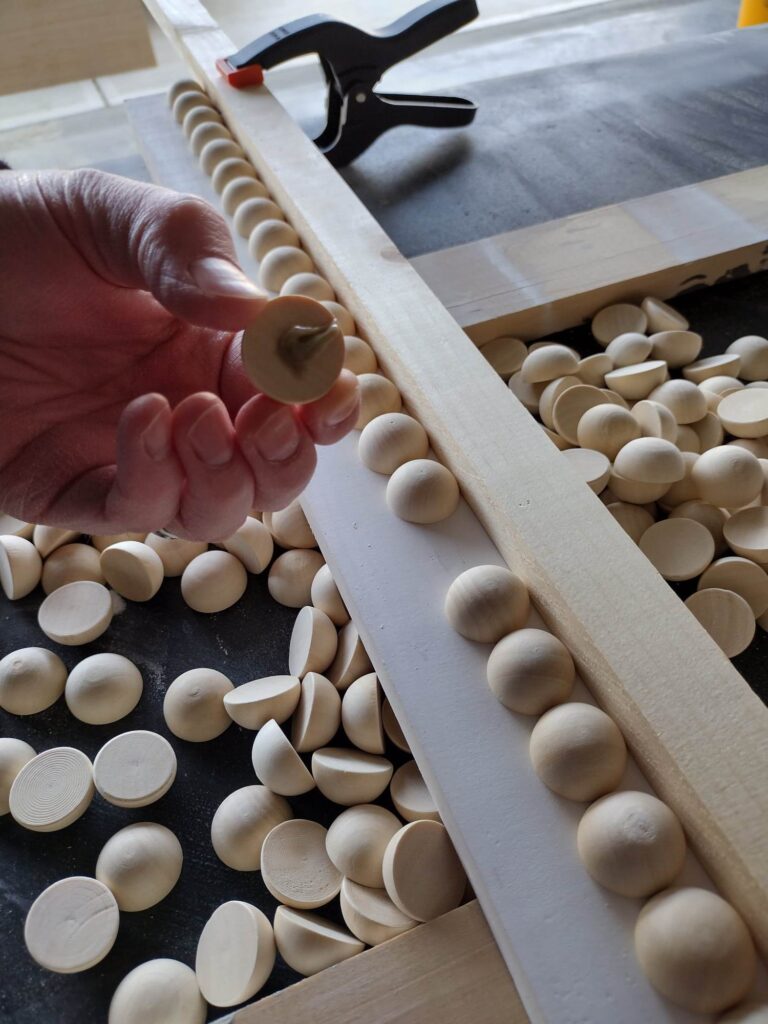
Refrain from gluing one bead from each end and middle; remove them to the side so you can drill a hole in the center of where the bead lays with an 1/8 inch drill bit. This drilled hole is where you are going to attach the board to the front of your shelves then you will glue the bead on top to hide the screw. (TIP: Try to pick a spot under a bead that gets as close to the side as you can where you’ll still be able to drill since the doorway makes it hard to completely fit a drill all the way to the wall, otherwise you will have to do your best drilling the sides at an angle). Continue gluing all of them on except the ones where you drilled a hole (you will only need a dot of glue).
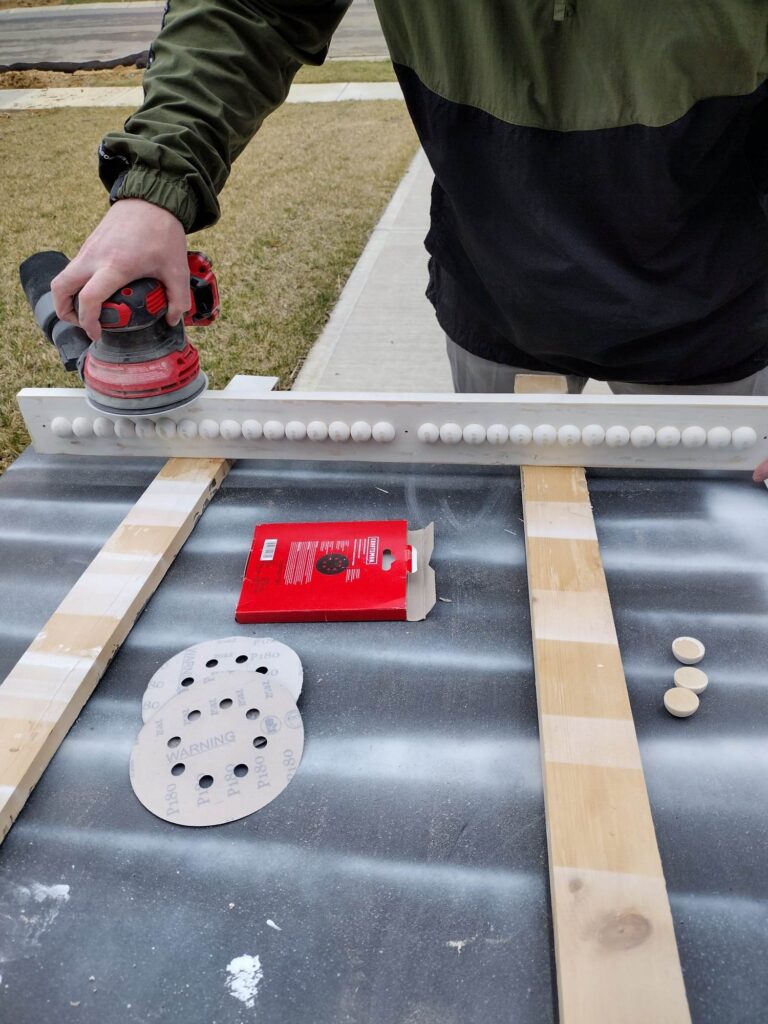
Once those cure, go ahead and paint the whole piece with the white spray paint now that the beads are on.
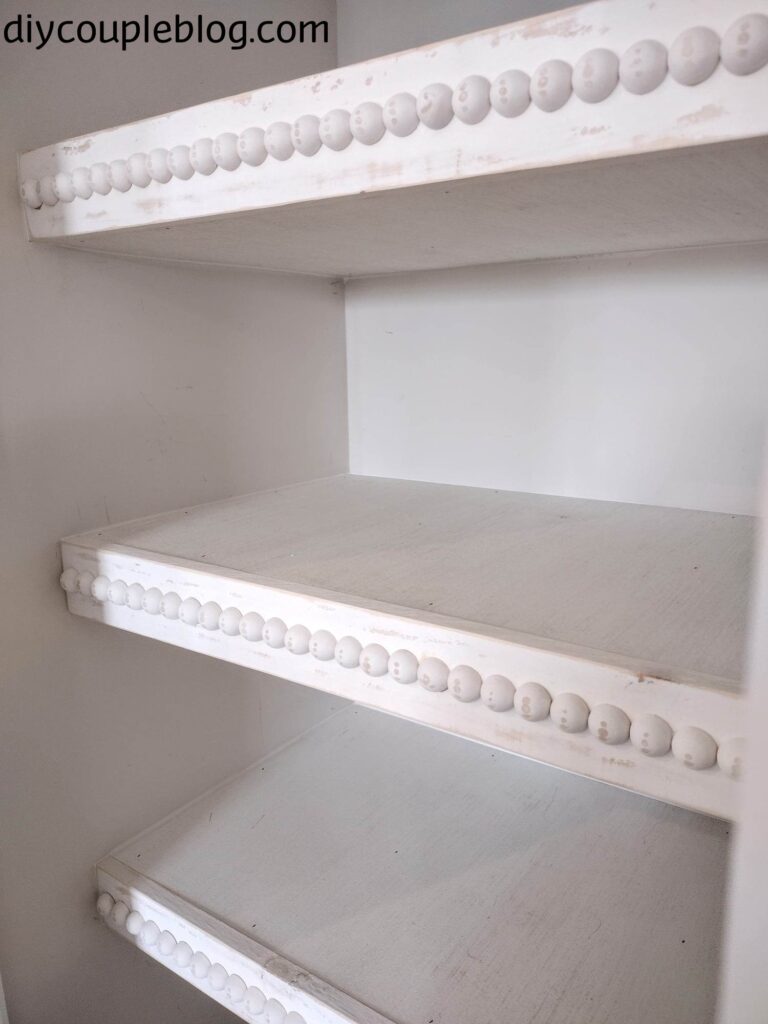
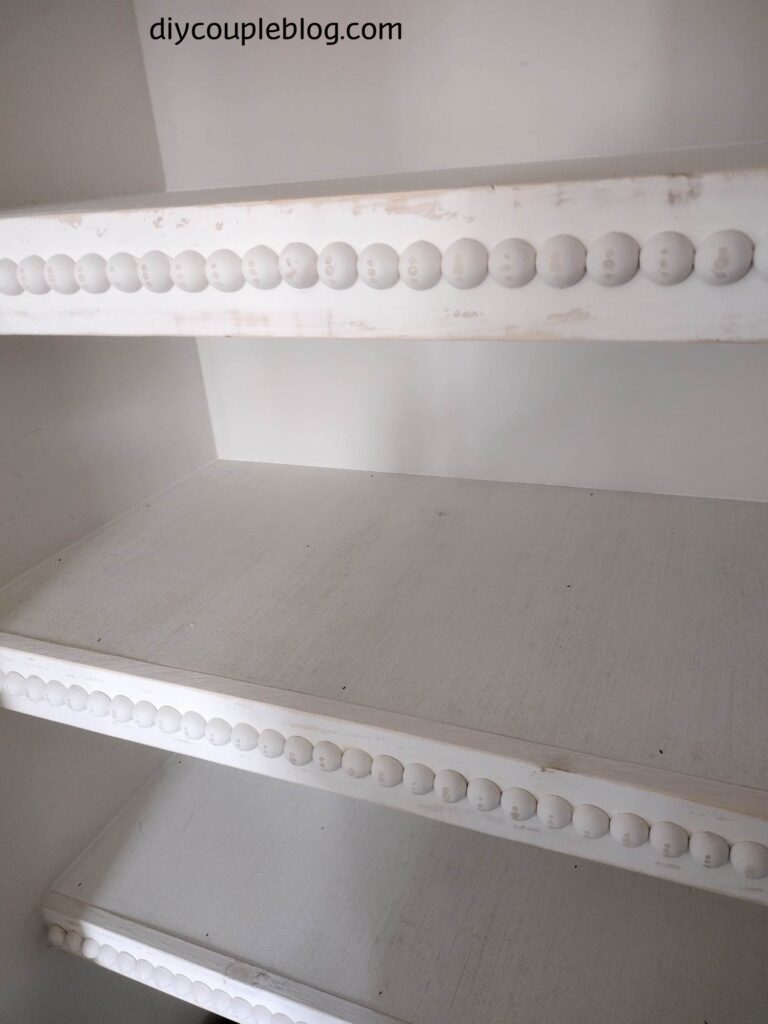
Then the fun part, using an orbital sander, distress them to desired look (don’t forget the three beads pulled aside which you’ll have to do individually).
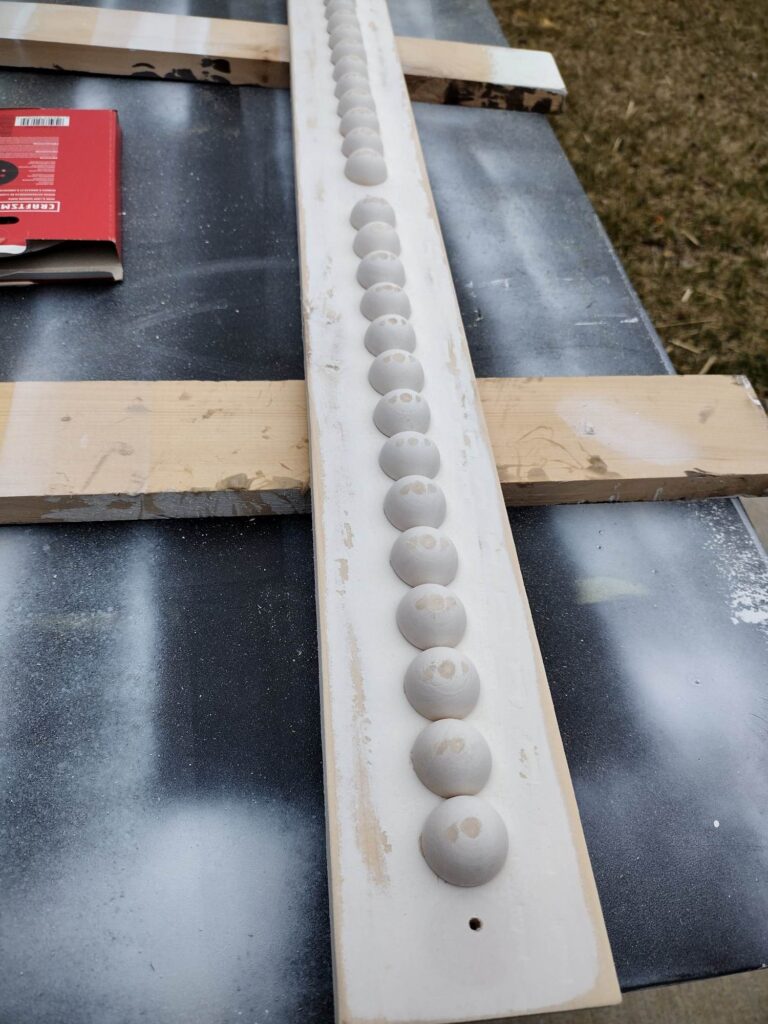
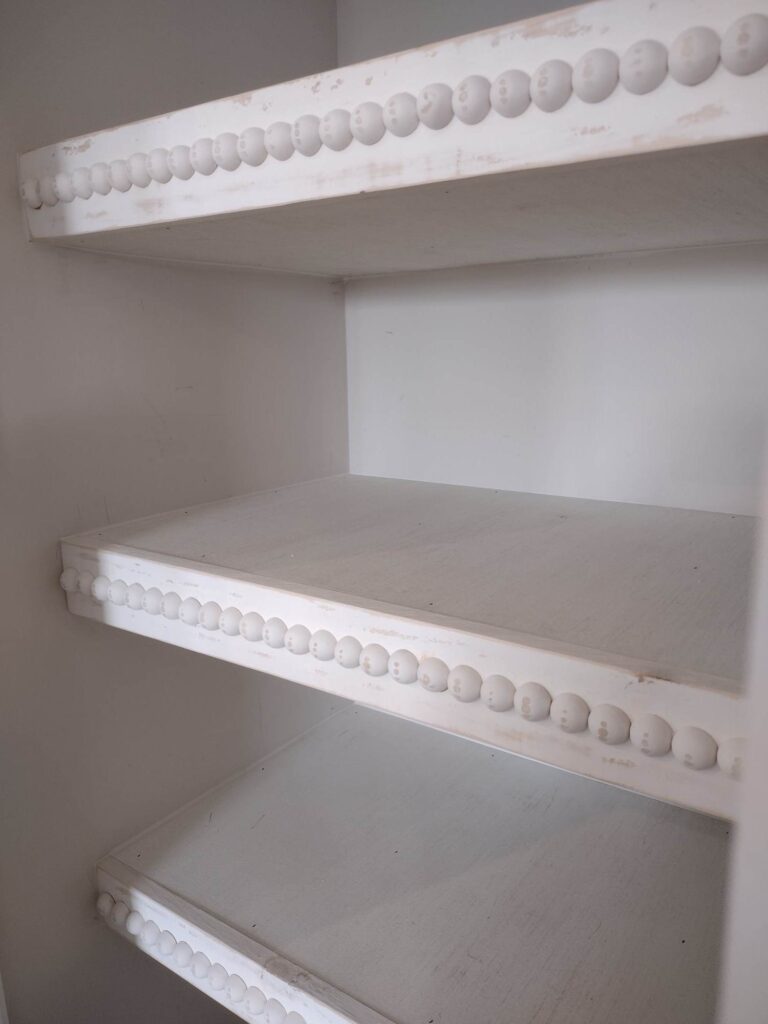
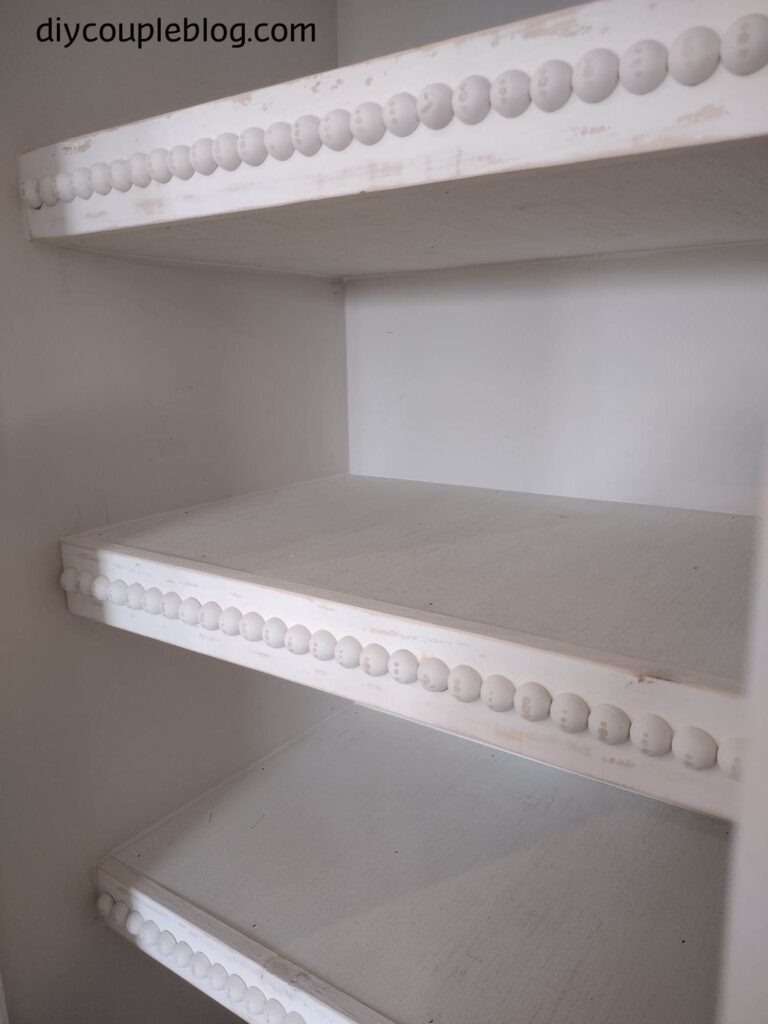
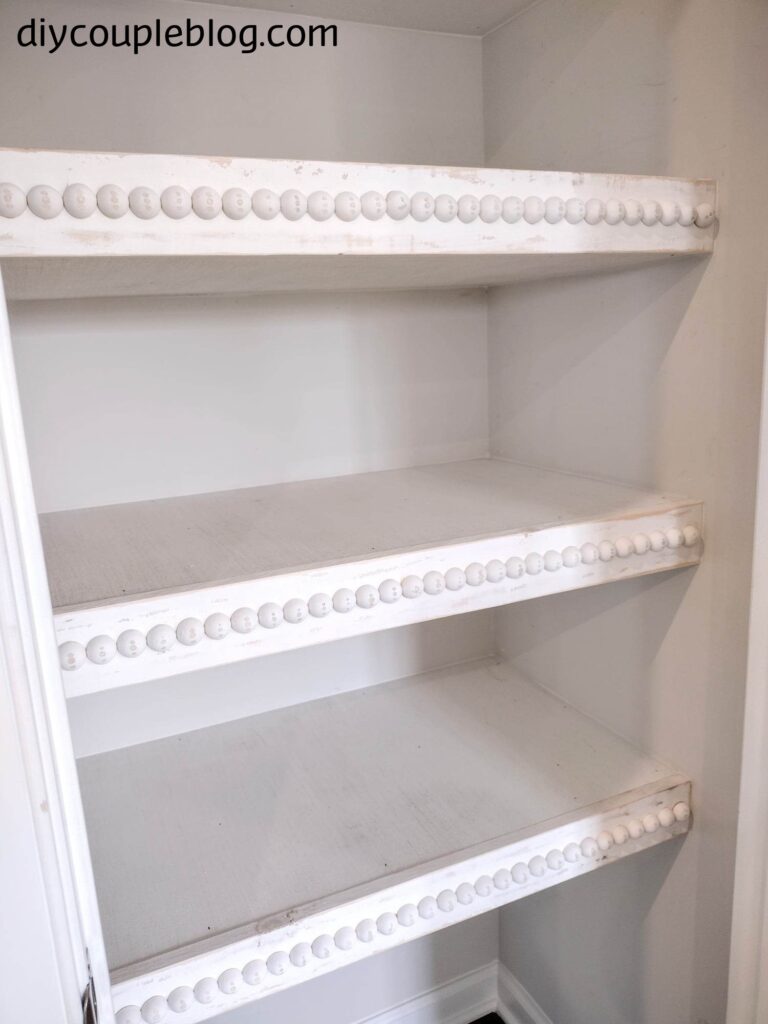
Loving how they turned out, that chippy farmhouse look I was going for. Now time to attach the fronts.
Now using the three holes you drilled, attach them to the front of the shelves with 2 inch screws.
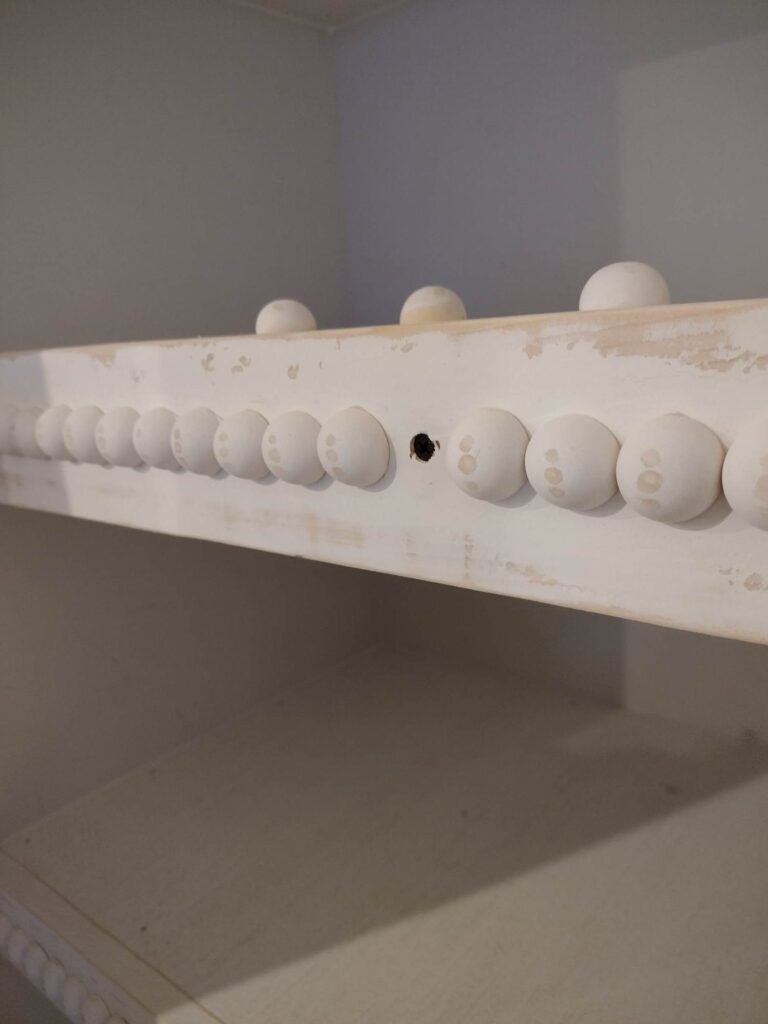
Like I mentioned earlier, if you have a narrow pantry, you’ll want to drill your hole underneath a bead that is easier to get to on the end. It’s easier to explain that from this photo below where it could make it difficult.

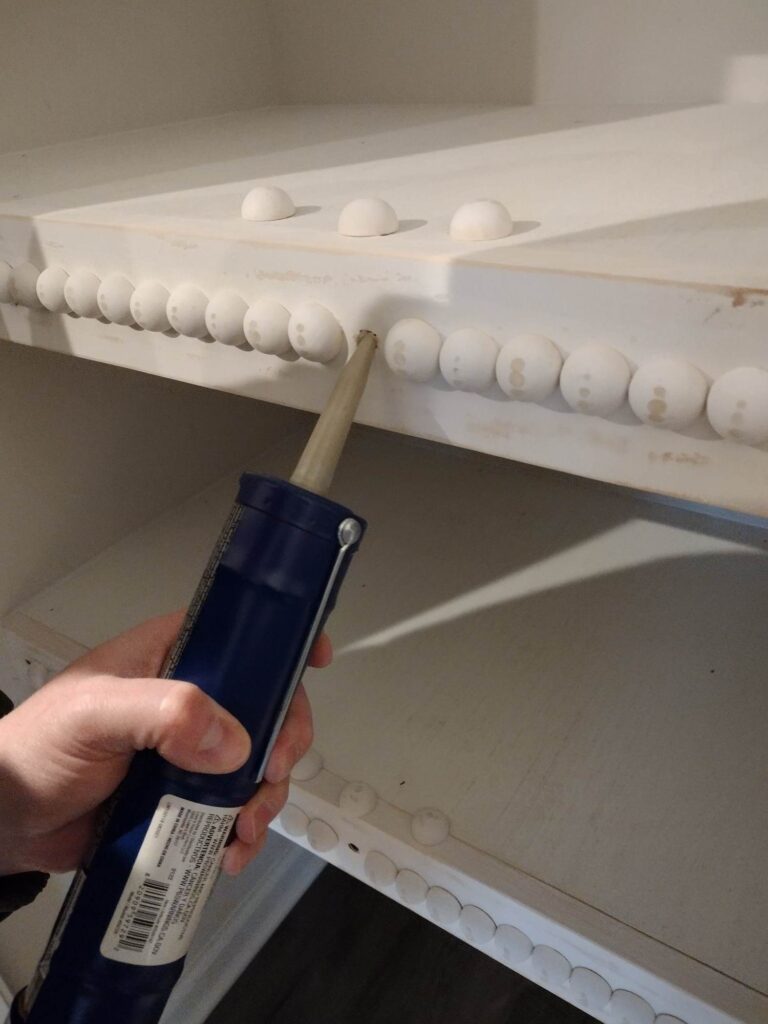
At this point you can glue on the other three beads to cover the holes. Use a piece of frog tape to hold them on until they cure. While you’re waiting you can caulk any sides of your new shelves. you can fill the nail holes if you want and touch up with your white paint but that’s completely optional, we did not choose to do that. The nail holes actually fit in with the distressed look and I figured they will pretty much be covered up with groceries anyhow.

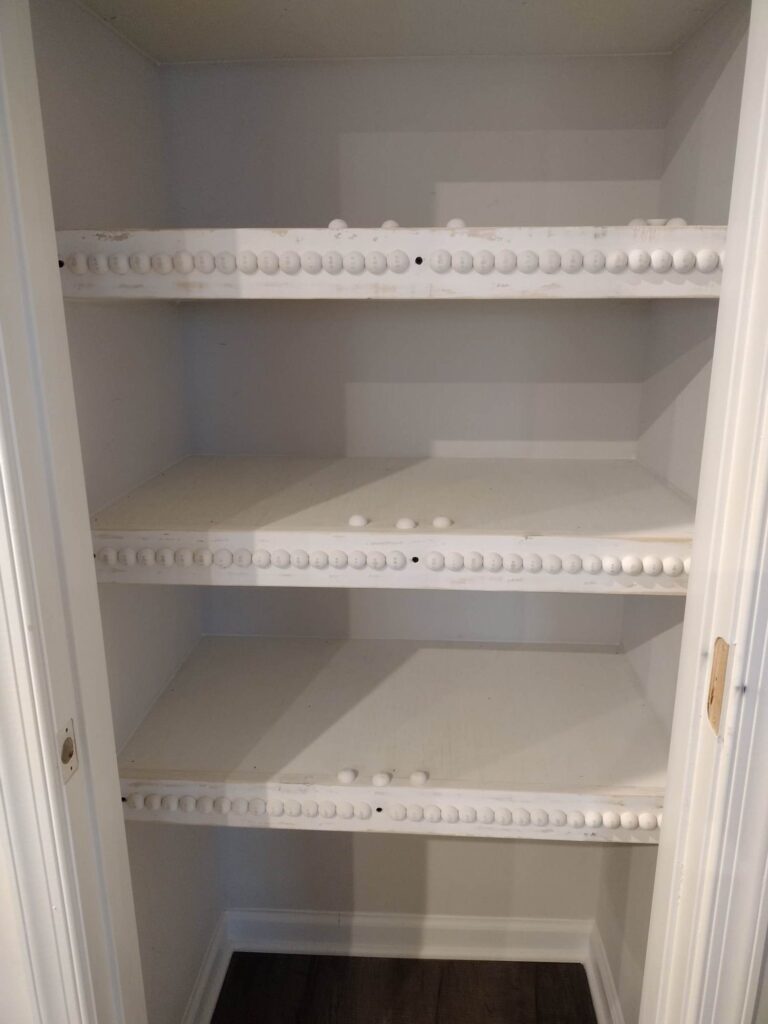
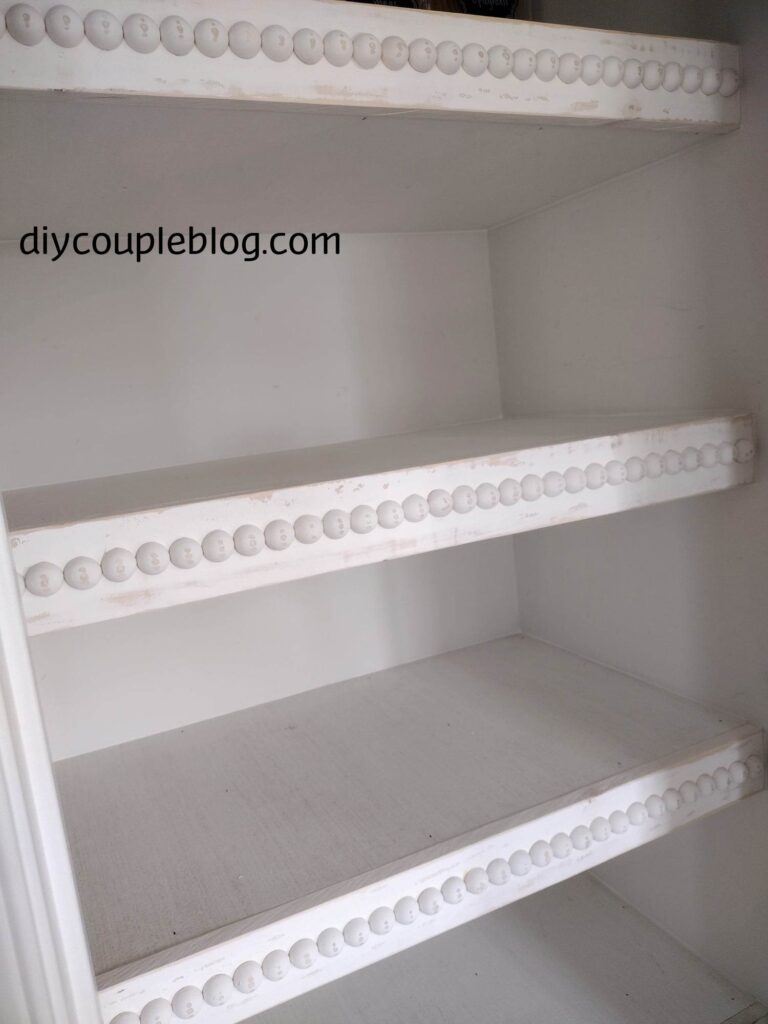
Our pantry wood shelves are finished! The tape can come off, now it’s time to organize this mess! If you would like to see it organized and gain some easy pantry solutions of your own head over here, how to organize a small pantry. Here is some more picture of how our DIY pantry shelves turned out in our kitchen. A small narrow pantry closet with terrible lighting is not easiest to get pictures of. Can I just tell you; it looks so good and so custom!

You May Also Like:
DIY Window Cornice