This post may contain affiliate links, which means we'll receive a commission if you purchase through our links, at no extra cost to you. Read the full disclaimer here: https://diycoupleblog.com/disclaimer/
Ready to upgrade your curb appeal? Here is a modern take on the classic flower bed, plus a full step-by-step tutorial to do it yourself. Recreate a flower bed design with composite decking boards and we’ll walk you through it!
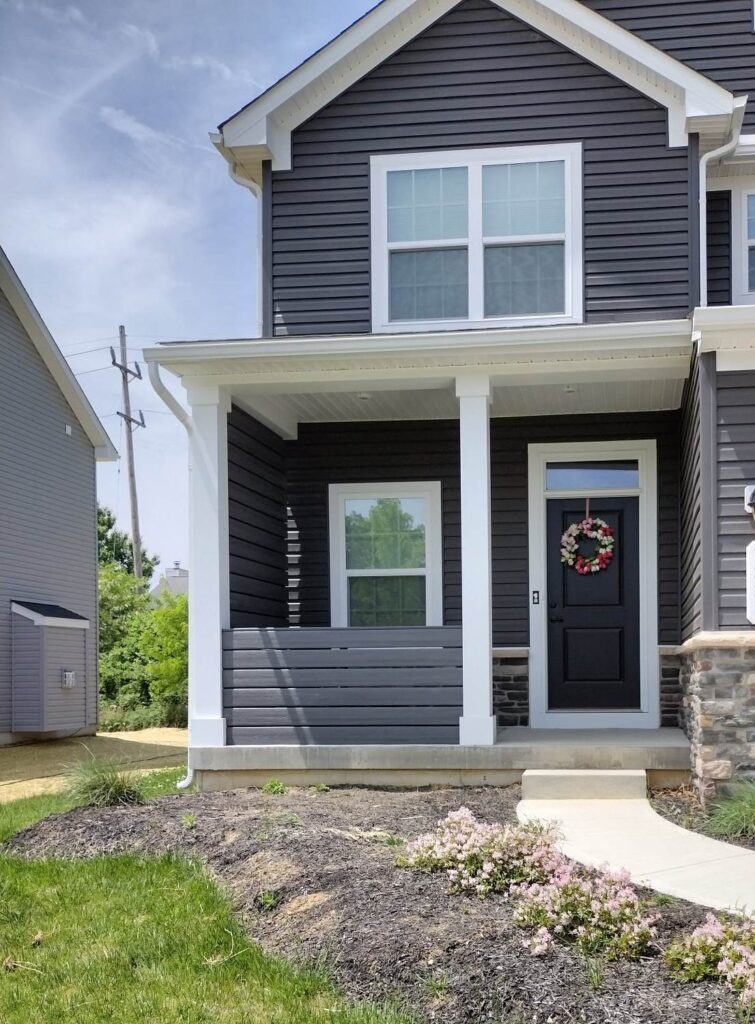
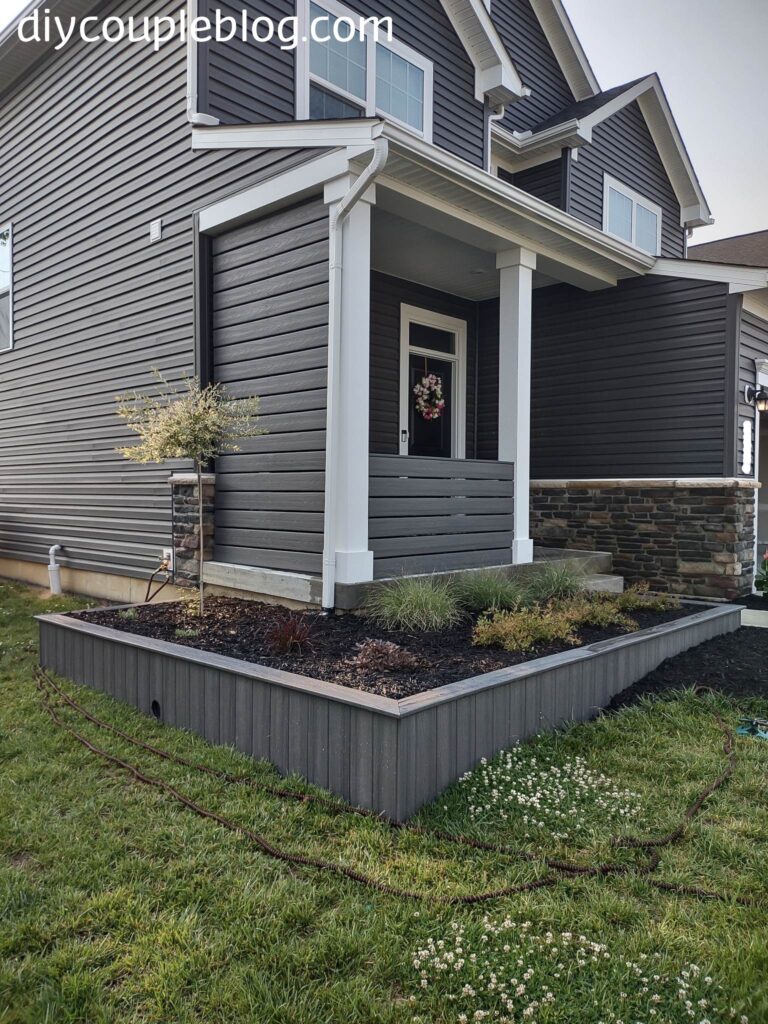
We just completed our DIY privacy wall and a matching railing on our front porch using composite decking boards. It turned out amazing and added so much character to the front of our builder grade home.
Flower Bed Design-Composite Decking Boards
Coming up with the Idea:
Now it was time to tackle the front flower bed. Before getting started we knew we needed to figure out our flower bed design.
We searched through some flower bed ideas and then it dawned on us. Since we had quite a bit of scrap composite boards from the privacy wall and railing projects, we jumped on the idea to use up the leftover materials by building a raised flower bed wrapping around our front porch.
Our raised flower bed would take on a vertical appearance with the composite board scraps so we would have plenty for making a large sized flower bed that was able to cover all the way around it.
Why It’s a Great Idea for a Flower Bed Design:
Composite decking boards are fantastic for outdoor projects although a bit more pricey (but pays off it in the long run with its durability and zero-maintenance lifespan. Composite decking boards never require sanding, staining, sealing, or painting-just an occasional wash.
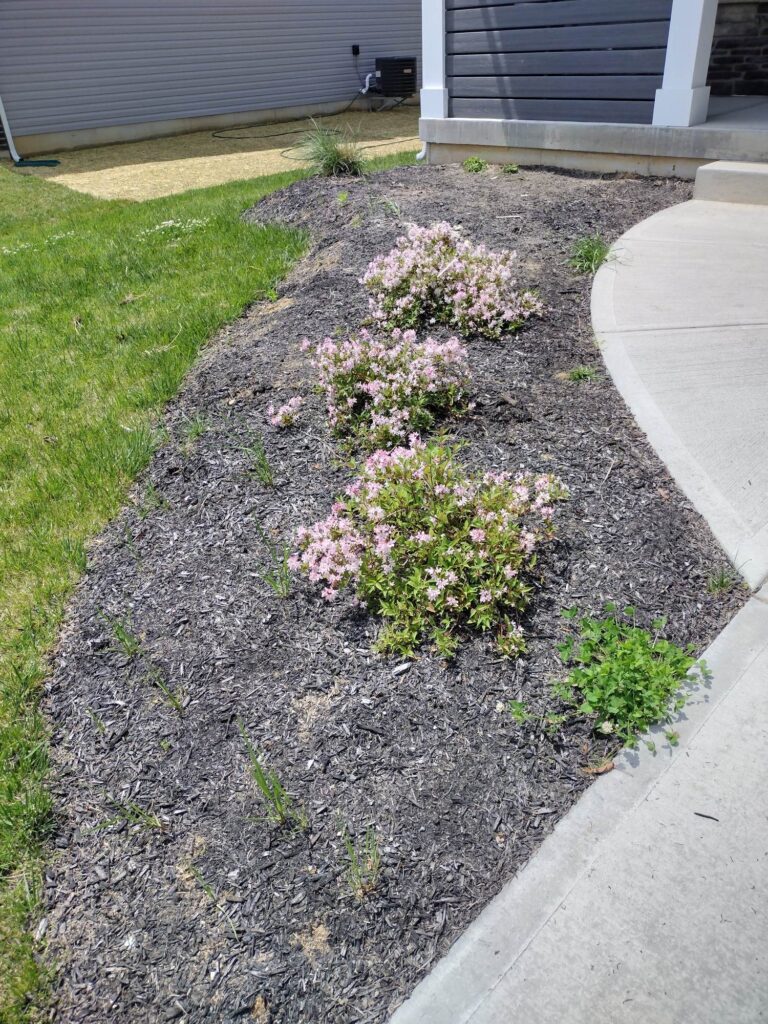
BEFORE:
Here’s a look at the flower bed before. Clearly, it needed some TLC.
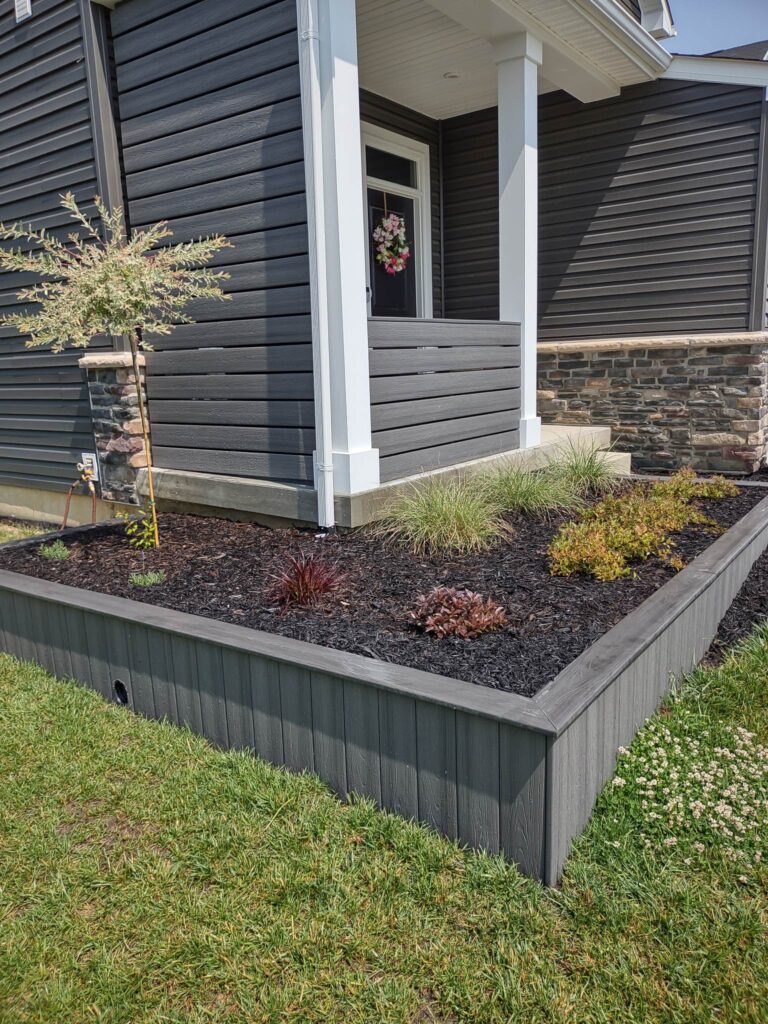
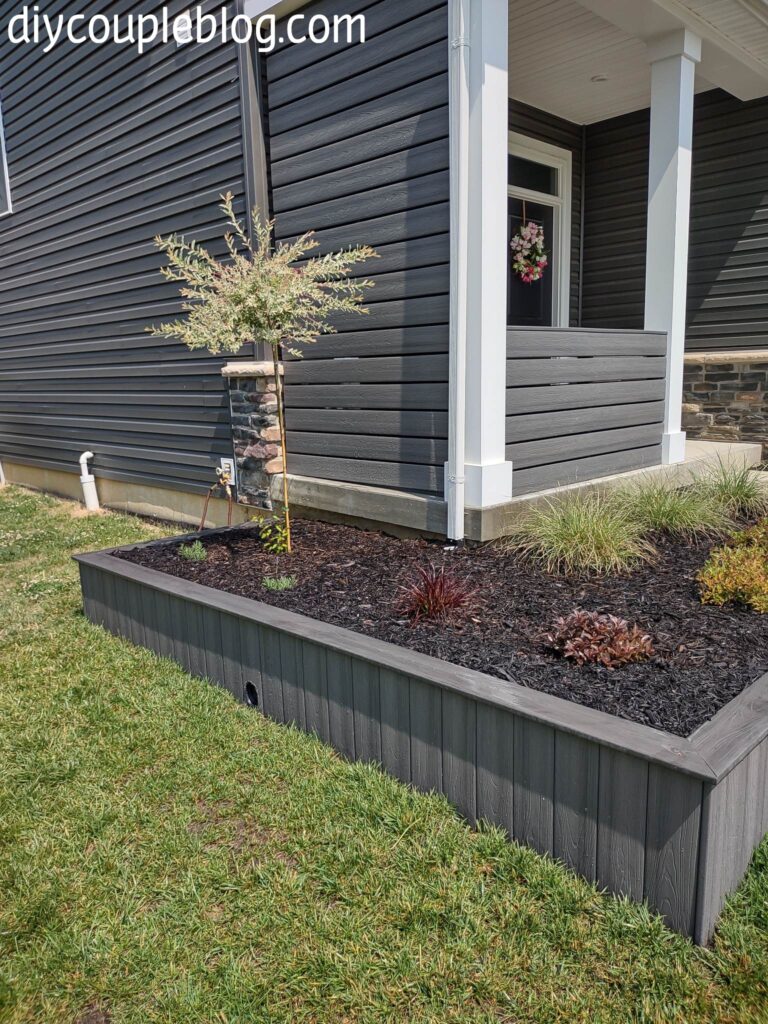
After:
Now for the after pictures. Our hard work paid off!


Tools Recommended:
Kneeling pad (highly recommended)
Drill/Driver (this combo kit we bought includes both)
Materials Needed:
Composite decking boards (we chose grey composite decking to match our home)
Gray Composite screws (choose colors that will match your boards, so they’ll be less visible)
1/4 x 2 3/4 concrete masonry screw anchors
Edging Our Raised Flower Bed Design
We got started by edging our bed and digging a trench where our flower bed box was going to be using our spade shovel, flathead shovel and our trench shovel.

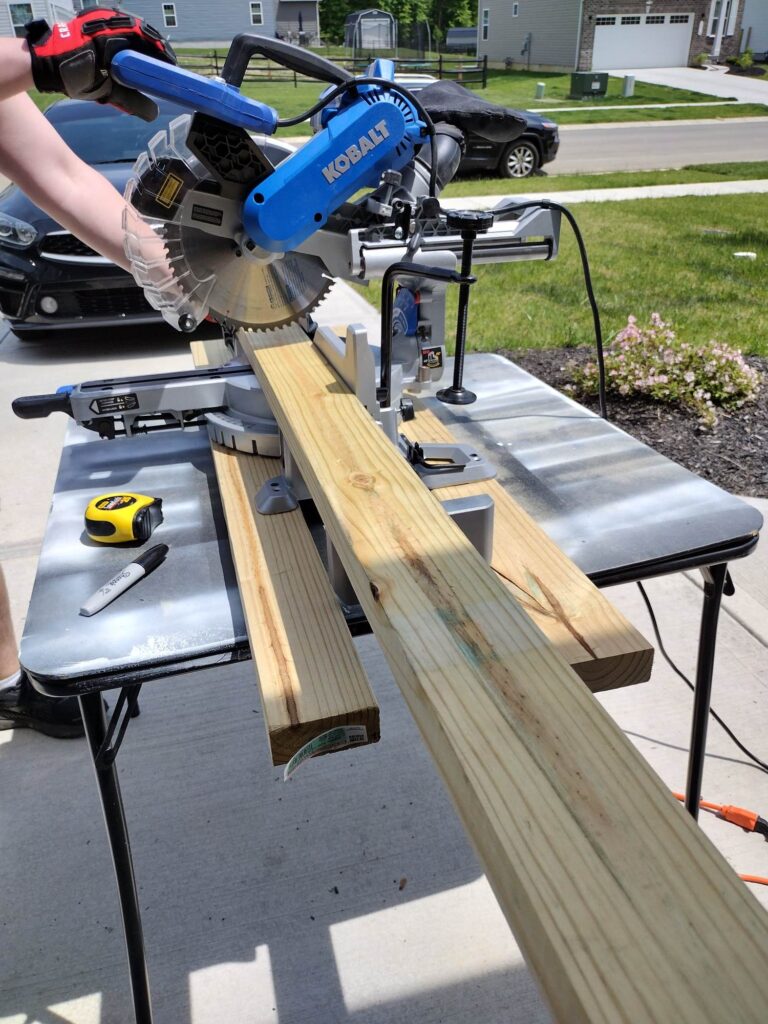
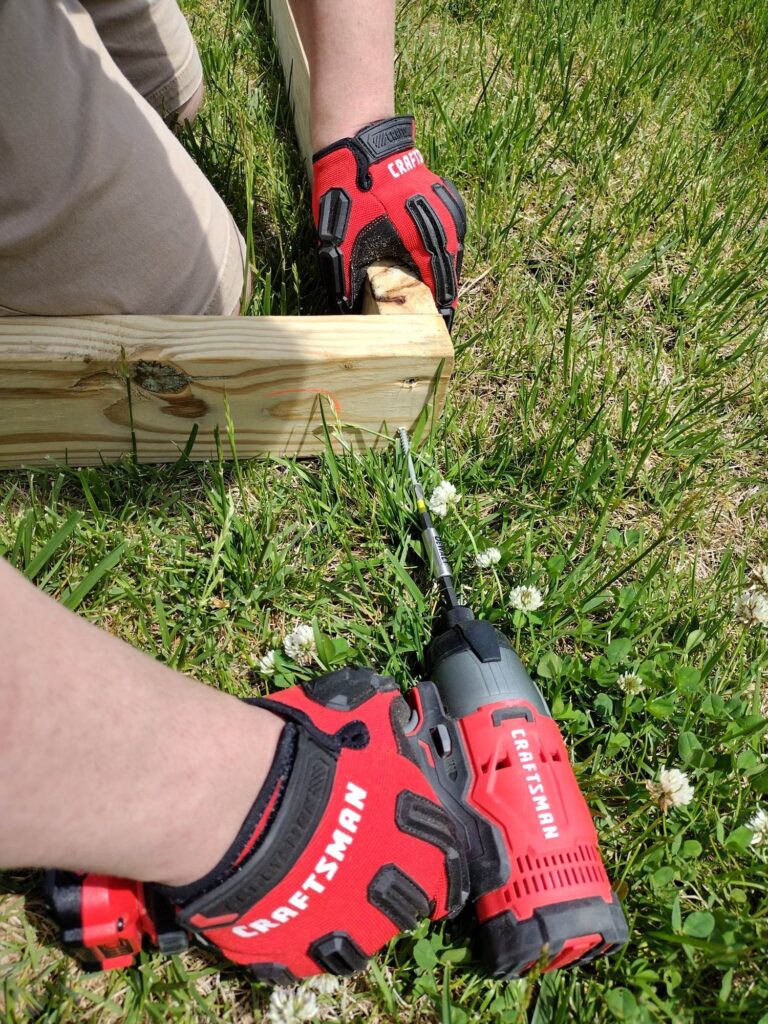
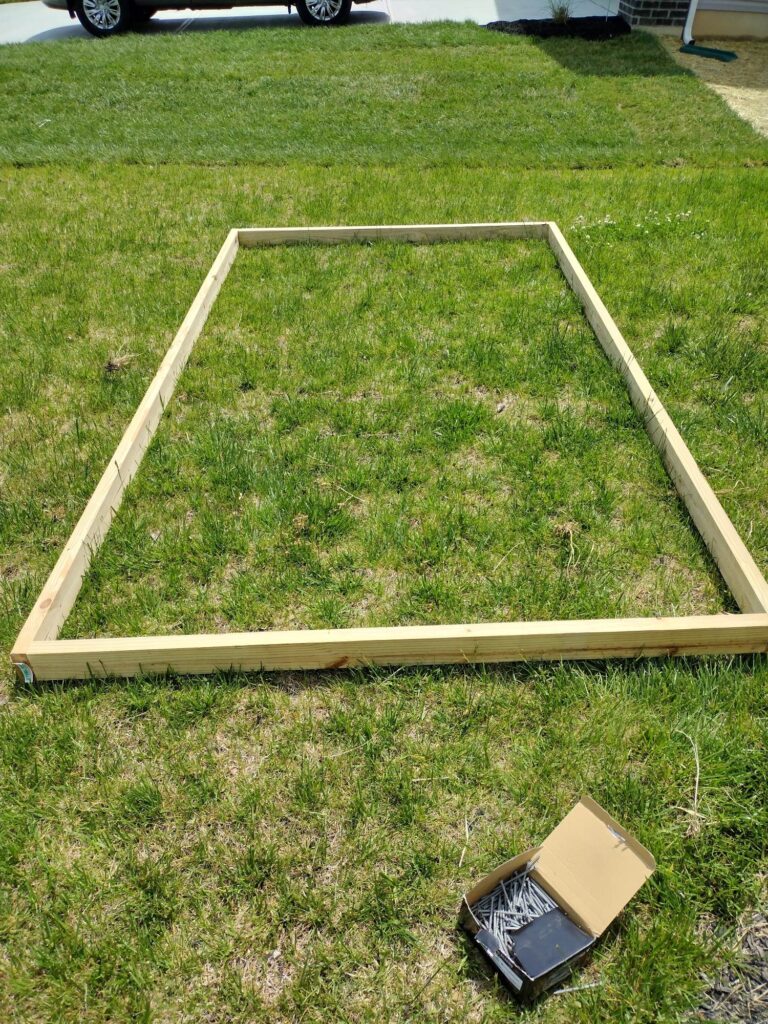
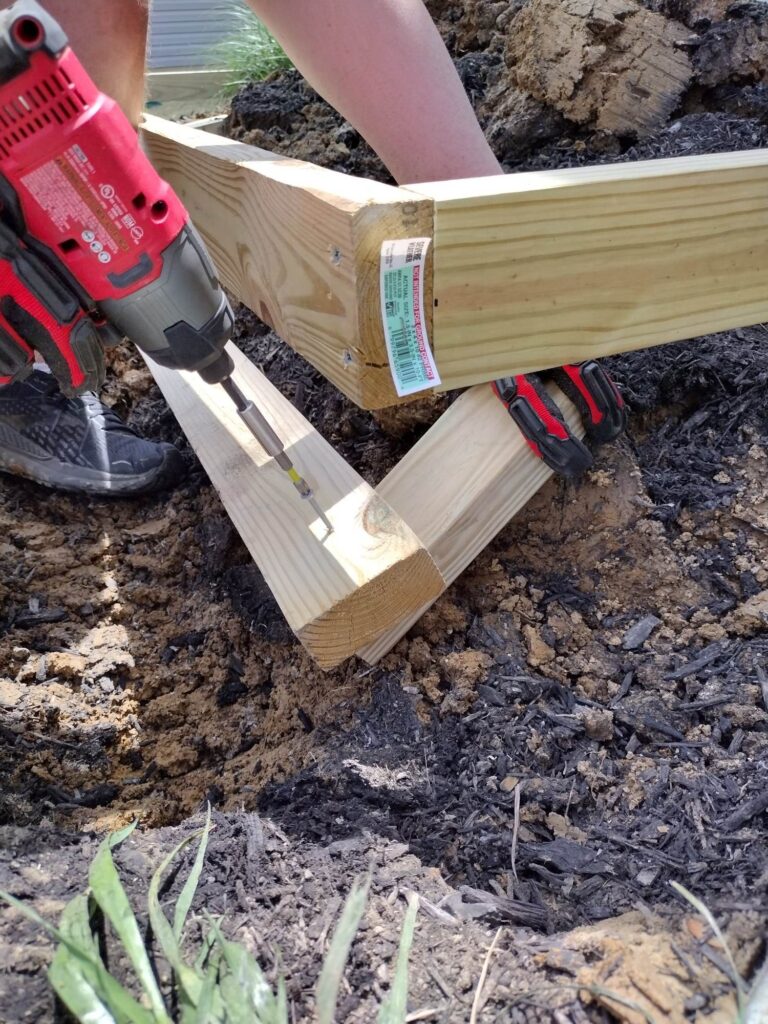
Building A Flower Bed Frame
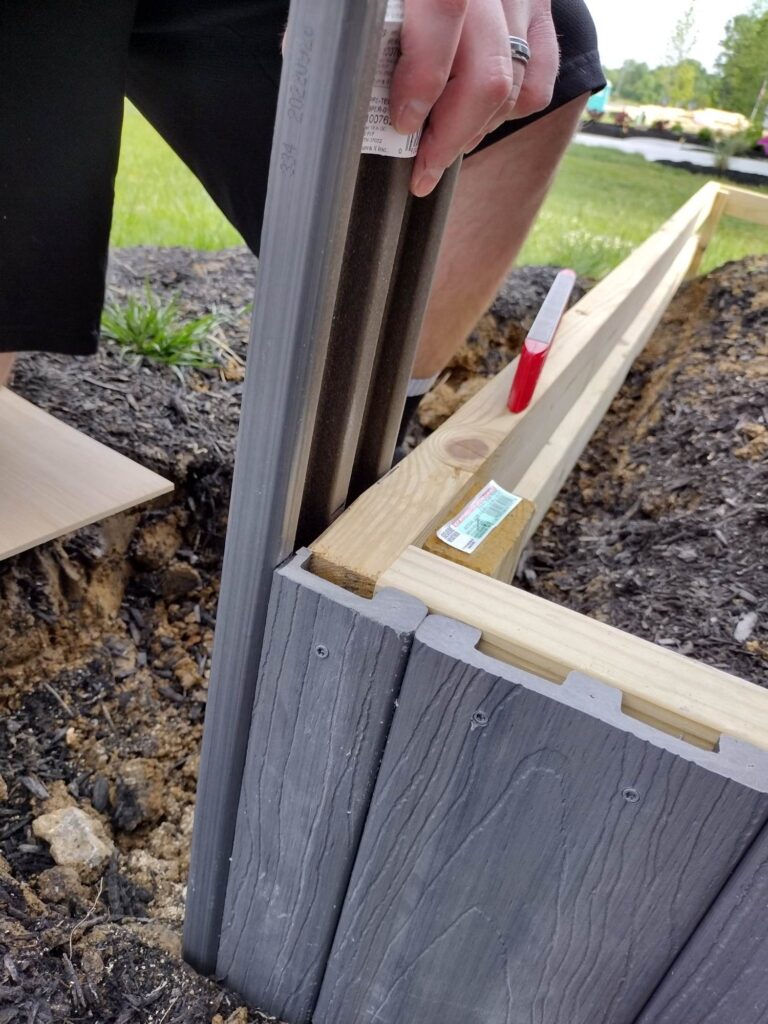
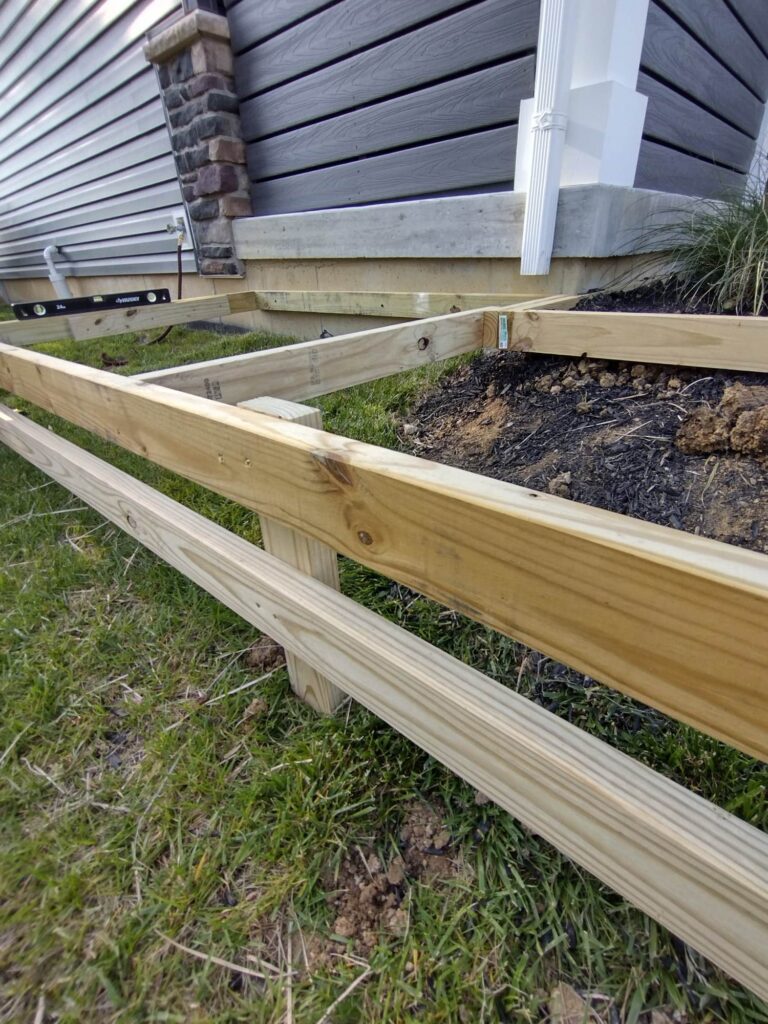
Using treated 2×4 lumber, build a frame to the preferred size of your raised flower bed. Use exterior screws to attach each corner of the frame together. This will be for the top part of your frame.
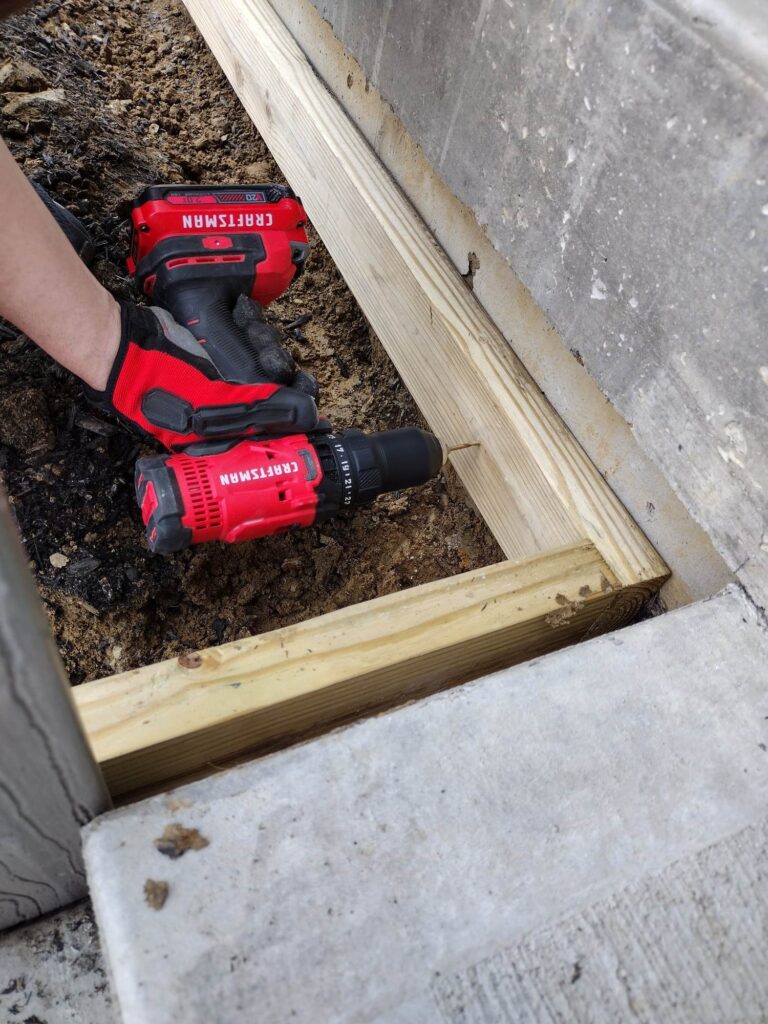
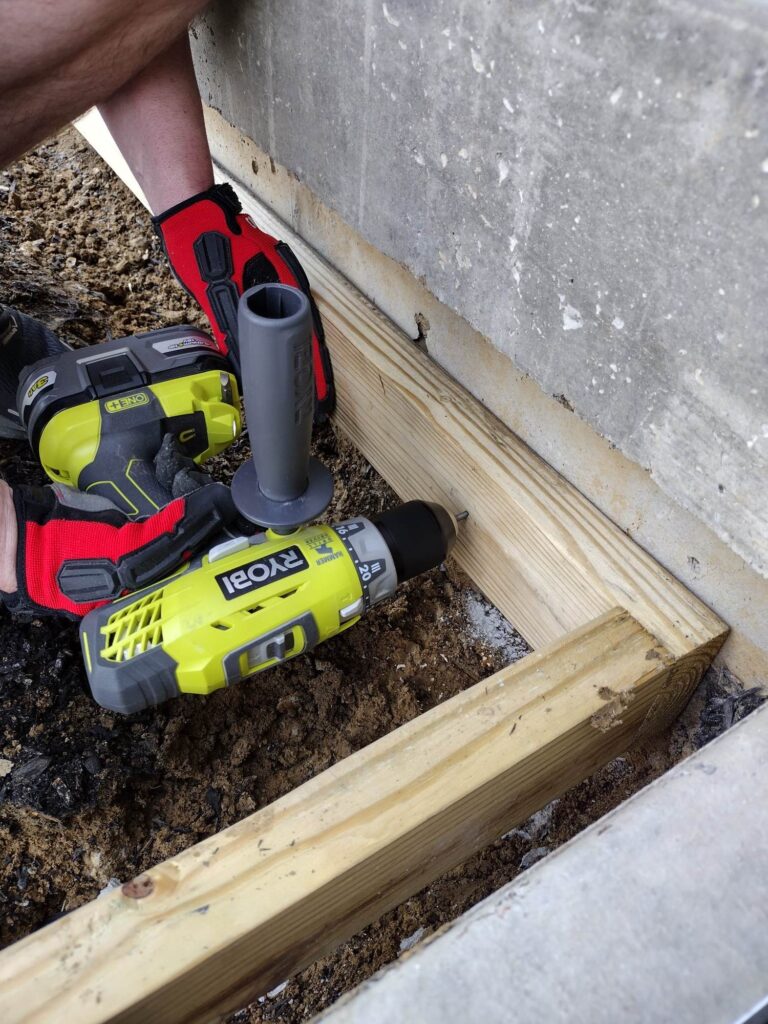
Attach The Frame To Concrete
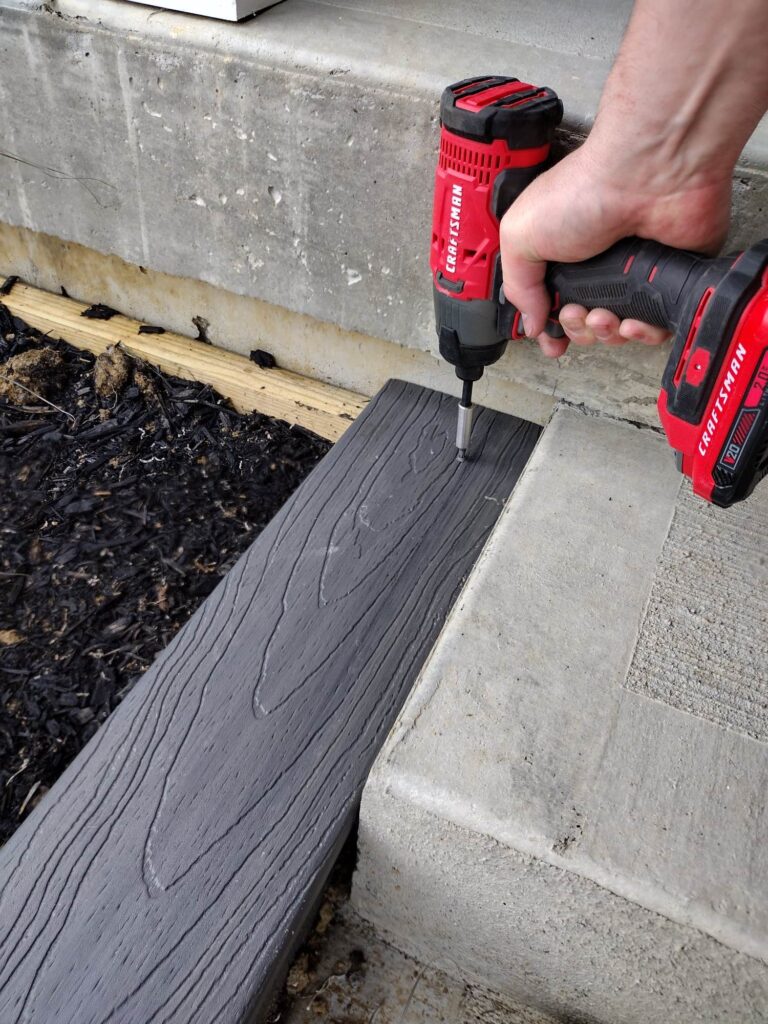
To secure our frame, at this point, we leveled and attached to our concrete at our desired height for our DIY raised garden bed (you may need something to hold the frame level until the bottom section is attached, we were able to use some excess dirt).
We drilled into the concrete using a hammer drill and attached with concrete anchor screws. Pilot holes in the wood will make it easier if you choose to do so.
As you’ll see in photos below, if you have a walkway or step like us, just remember to leave room with the frame so that you’ll have enough to fit the composite boards on the front of your frame.
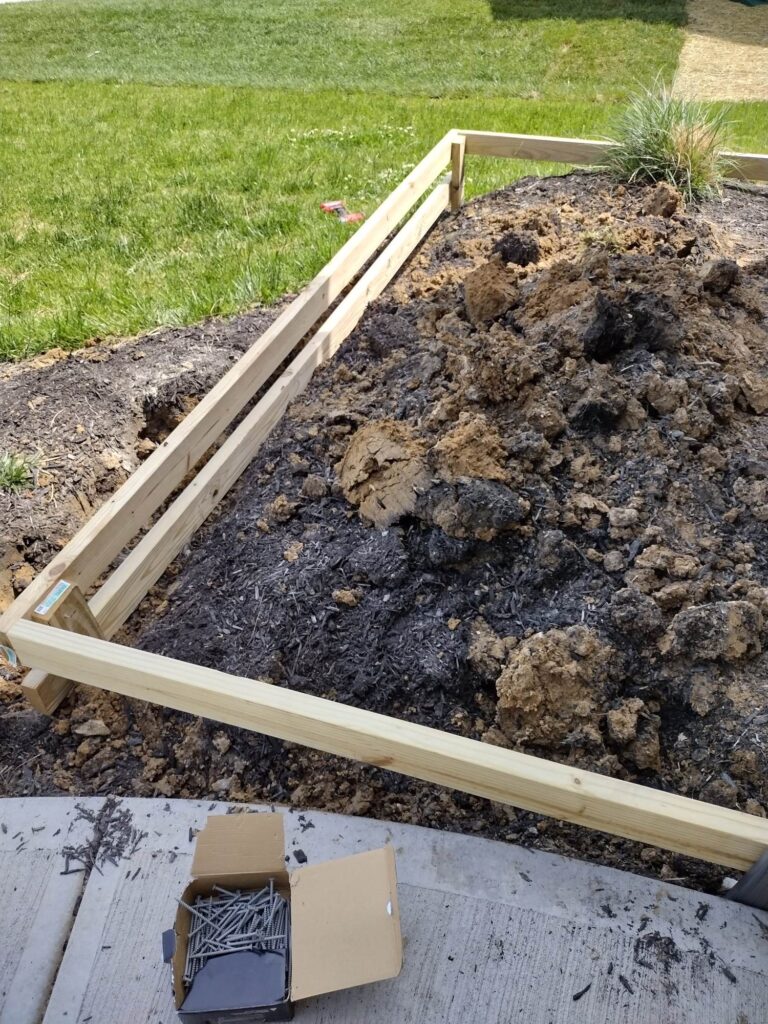
Continue Adding To Frame
Now cut another treated 2×4 (same length) and this will be your bottom piece on your frame for the front. Then cut one to the appropriate size for the side. (We held off on our side as you can see from pictures because we were choosing to do an oversized bed that wrapped around so we built two flower bed boxes that connected).
Now, measure and cut small pieces according to how tall you are wanting your flower bed to be (we used scrap pieces for this.) You will be attaching the bottom board with the top by using the scrap pieces for your height.
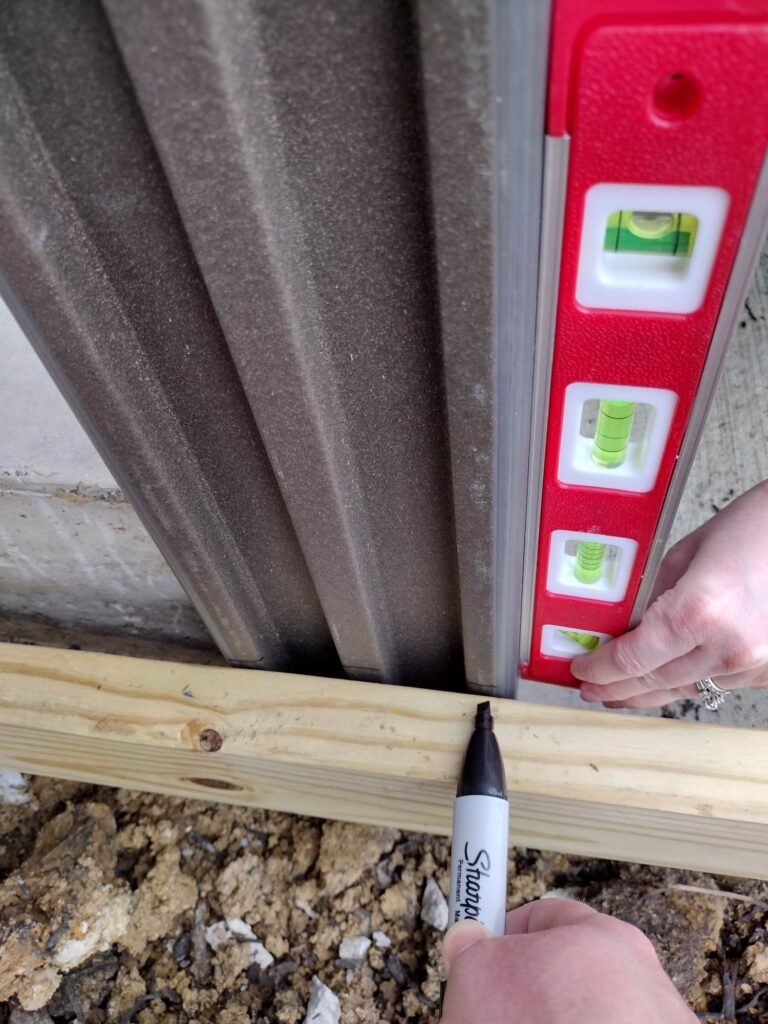
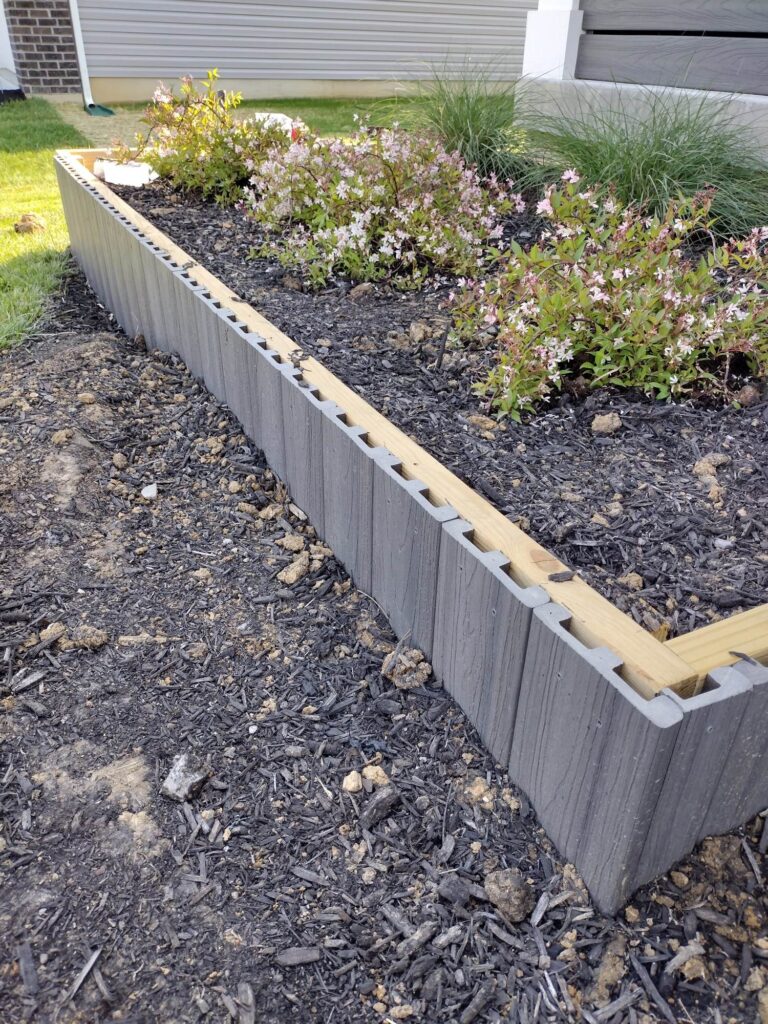
Cover The Frame with Composite Boards
Once the frame is level and in place, you’ll be attaching the composite boards around the perimeter. For each side of the flower box, you’ll level your first piece on the end and the following boards should be level as long as their flush to that board, then mark each board at the height it needs to be cut.
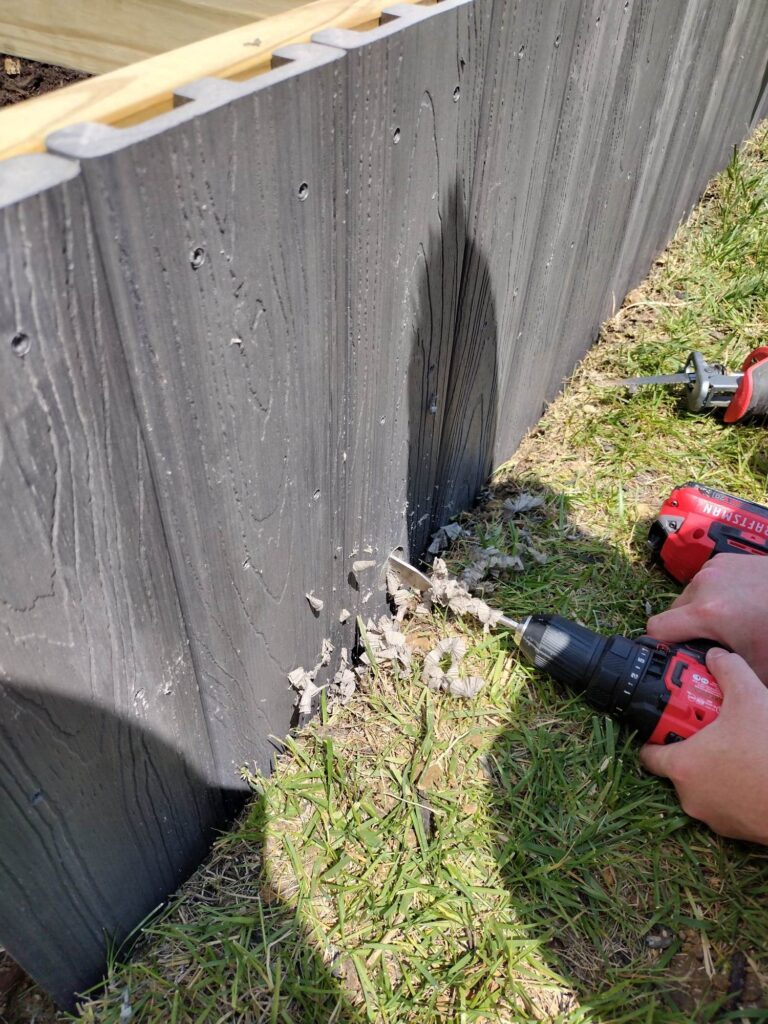
Now go ahead and cut it with your miter saw and attach to your frame using composite decking screws. You will do this all the way around repeating the process.


When you get to an end you may need to rip a composite board on the table saw to the correct width you need it.


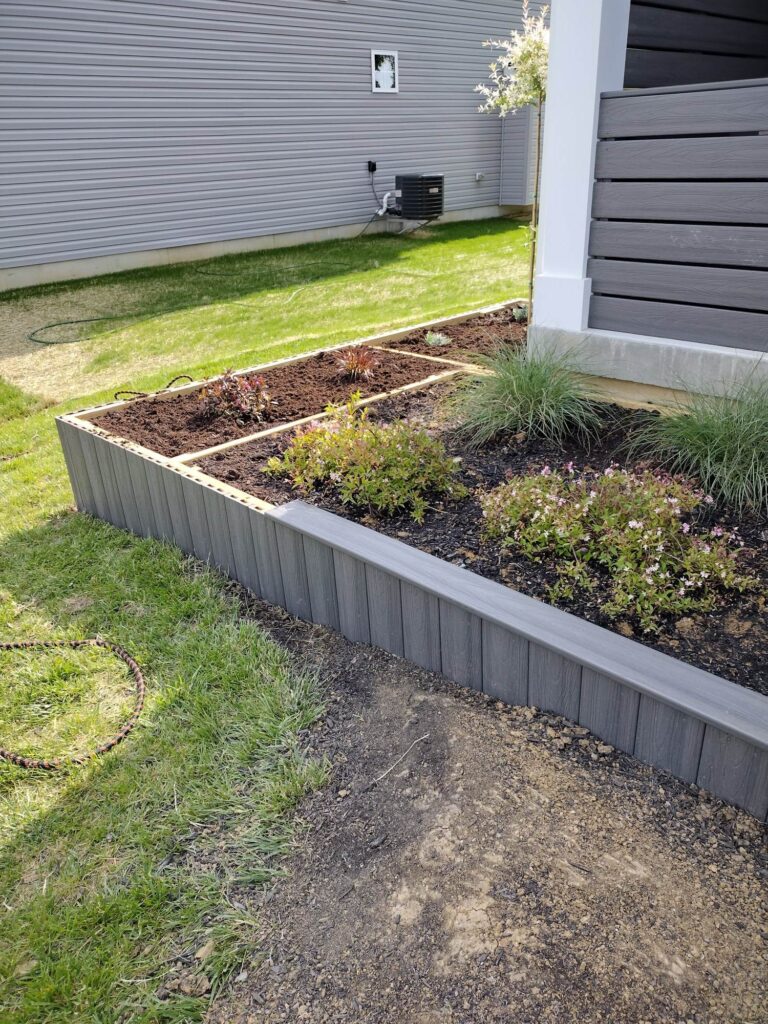
Once we brought our composite boards around our DIY flower bed, we began tilling up the dirt and pushing it to each end. Our gas cultivator made this go easier. This helped hold the frame in place as you go and get dirt out of your way as you continue to finish your boards.

We were then able to transplant our flowers back in our raised flower bed.
Extending Our DIY Raised Garden Beds
Since we did an oversized bed, we basically built two flower boxes that attached together. We secured both of them to the concrete and had to add in extra support. We put an extra board in the middle of the end where the two flower beds meet. To be cost effective we used as many scrap pieces as we could.
Also, our gutter downspout was in the way of our flower bed design, so we drilled a hole through our composite boards and had an easy drainage solution with this hose and adapter. Here is the tutorial for how we did that.

We added a ton more dirt to the raised garden boxes and picked out some perennials to plant.


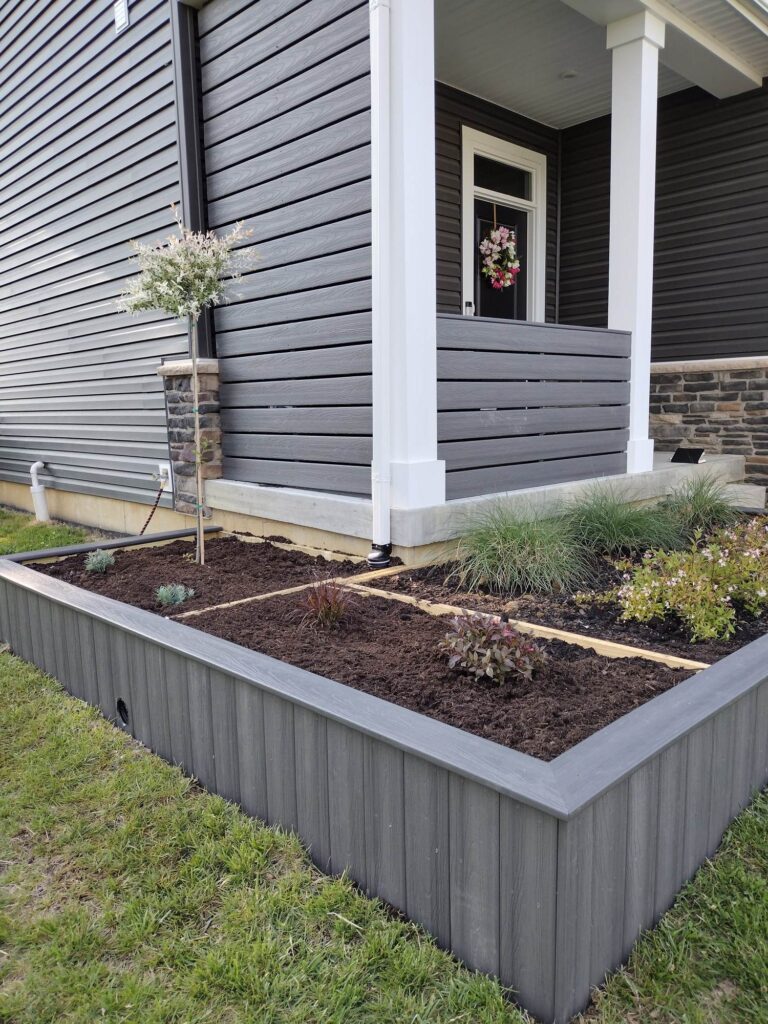
This little Dappled Willow tree is my favorite!

Some others we planted were Hidcote Lavender, Purple Fountain Grass, and a Midnight Wine Weigela. We planted the purple fountain grass and a midnight wine weigela at our last home and they got huge! We loved the way they looked in our front yard flower bed!

Attaching Decorative Topper
Time for the finishing touch. Adding a decorative top with your composite boards and screw down into the wood using the composite screws.
Flower Bed Designs
Option A. Thick trim- this is what we used for our flower bed as seen in pictures. No other cuts for thickness are necessary.
Option B. Thin trim- see our planter around tree for photos and instructions on how to rip the boards.
The Corners Where The Boards Meet
Option A. If you squared your frame up, you should be able to use 45-degree angles.
Option B. The other option (which is how we did it) is to overlap your boards on your corners and where the two boards intersect you can use a square to draw a straight line from the intersection point to the corner then cut that mark.


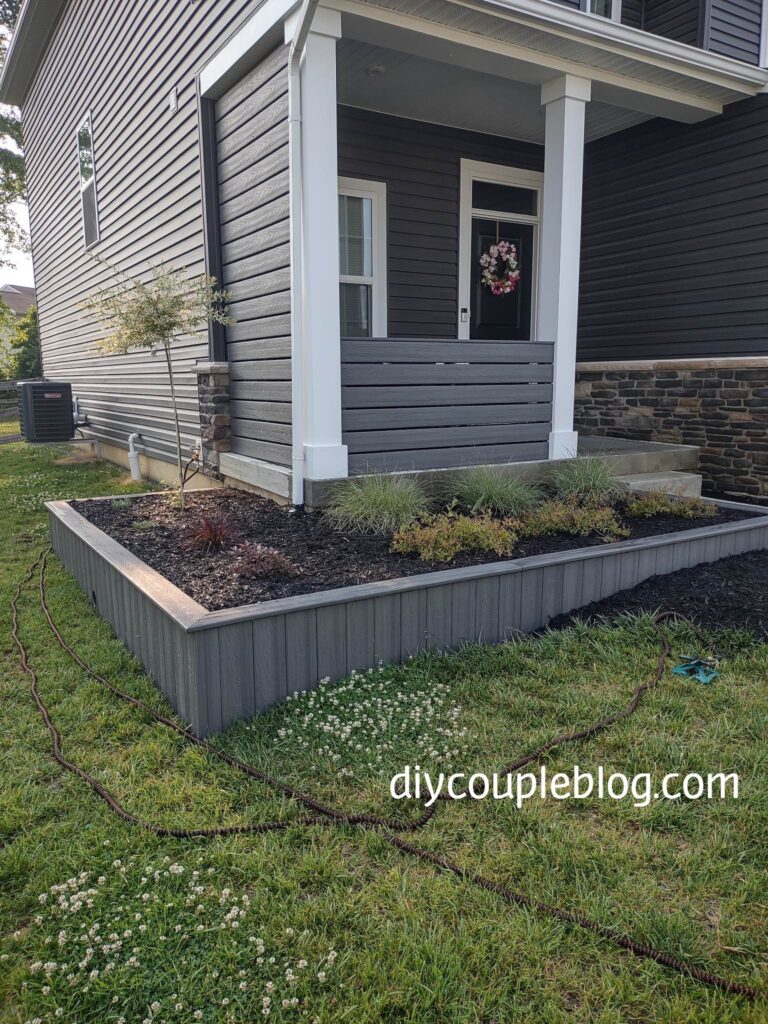
The front flower bed is ready for some fresh mulch, and we can finally call it done!

Be sure to check out our same flower bed design around our tree. We’re taking every opportunity to finally use up the rest of these composite decking boards!
There’s more to love, don’t miss our other outdoor projects linked down below or search the blog for more DIY!
Stunning Flower Bed Transformation